about having lots of bowls in progress. there’s 2 or 3 others that didn’t get in the photo.

about having lots of bowls in progress. there’s 2 or 3 others that didn’t get in the photo.
I have been working the last few days getting some oak ready for this weekend’s installment in the joined-chest-with-drawer class at Connecticut Valley School of Woodworking. But the work has been here at home, where the workspace is too tight for photos. Hence, nothing to show. I just finished the test-fit of the carcass of my chest w/drawers. When you make them w drawers, they get BIG.
 This one is related to the other 2-drawer chest I have underway. That one is nearly done. My goal is to assemble this one this weekend, so the students will see what they’re in for…so lots of drawboring to do first. One last side panel to tweak the fit, too. And the till. And the rabbets for the dust panel below the drawers. And the floor groove. Wow – lots to do still.
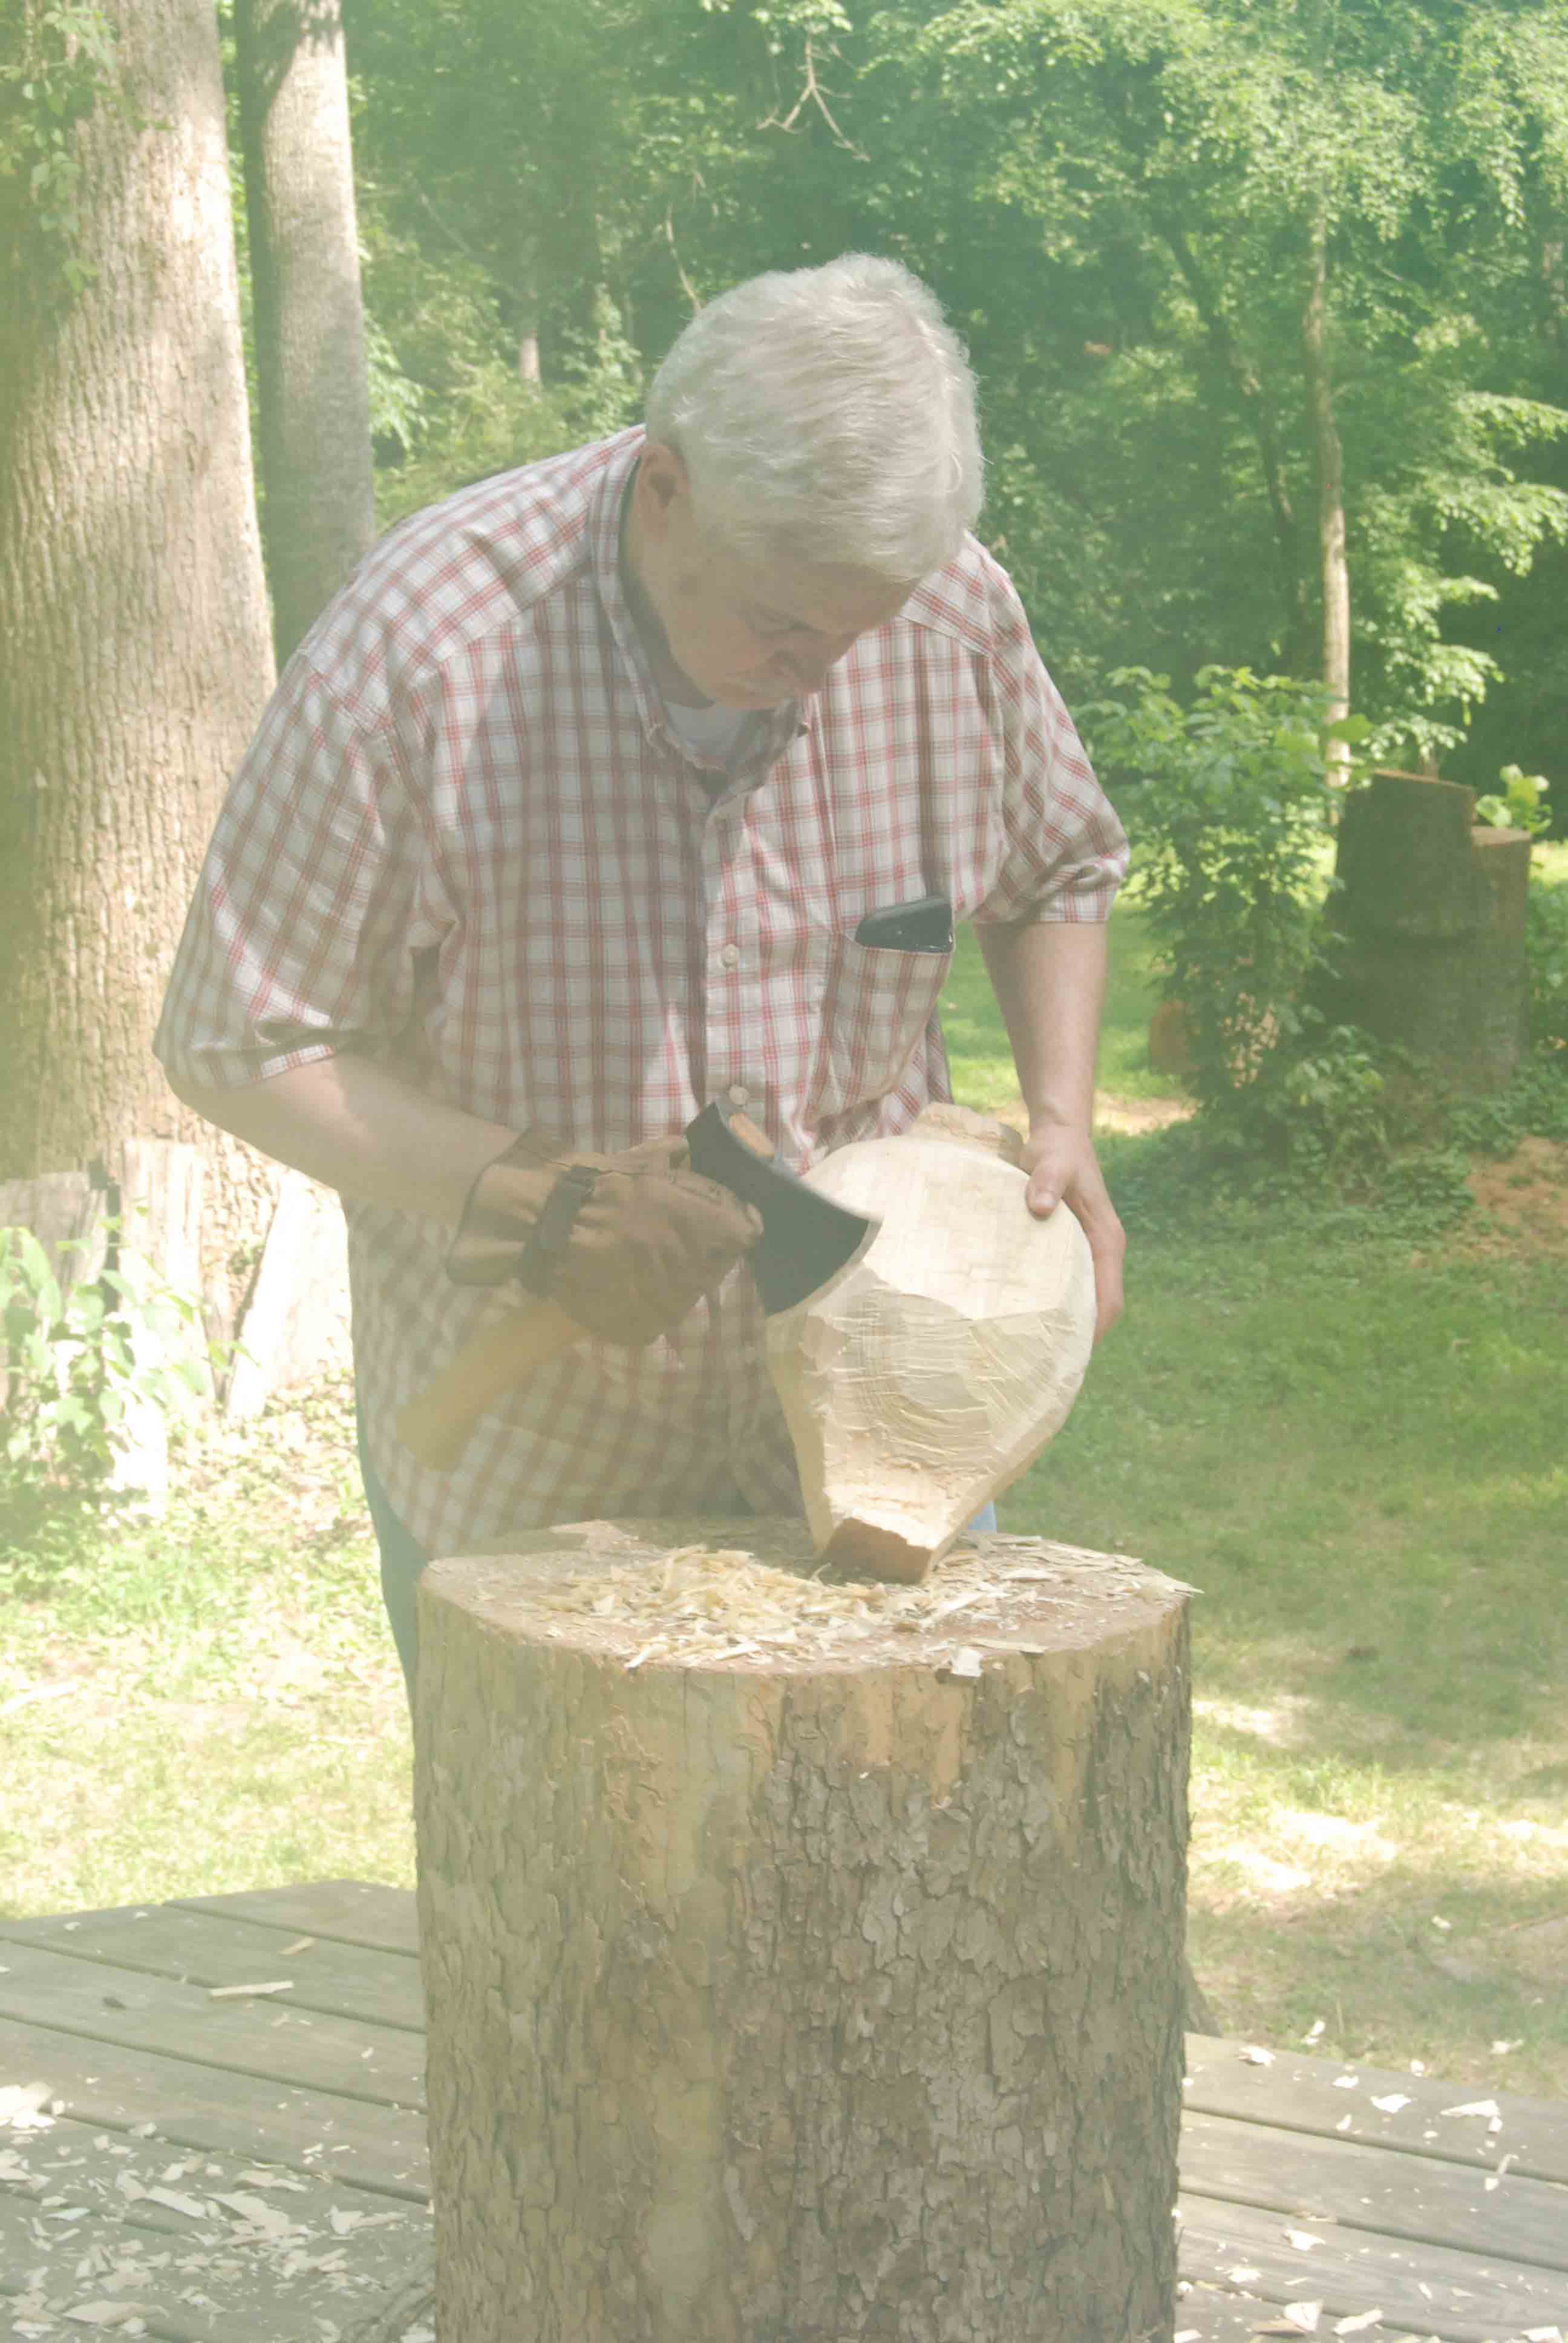
Then when I get back home Sunday night – it’s bowl-mania next. At Roy’s last week, I started 2 hewn bowls as demonstrations for the classes. Then we did an episode of the Woodwright’s Shop – so we split a tulip poplar in rehearsal, and began hewing one of those bowls. Then the next day, we did a run-through for the crew – so after that I had 4-partially hewn bowls, and 2 blanks. Then we shot the show, one more of each. I think that means I have 5 partially hewn bowls, and 3 blanks. But that doesn’t count the in-progress bowls I brought with me for show & tell…


I had never taught bowl carving before, and it was so exciting to see everyone “get it” – made me want to make some, but all I could do was start them! Next class in hewn bowls is at Lie-Nielsen in August. https://www.lie-nielsen.com/workshop/USA/71
UPDATE:
I am sold out on the DVD about carving spoons. To order that one, go to Lie-Nielsen’s site, I’ve done all my videos with them, so you can order any or all of them there. https://www.lie-nielsen.com/search?q=Peter+Follansbee
I do have maybe 10 DVDs on making a wainscot oak chair left. Same as before, when those are gone, I think I’ll leave video-selling to the professionals. https://pfollansbee.wordpress.com/book-dvds/
the week that was – two 3-day classes of spoons & hewn bowls at Roy Underhill’s Woodwright’s School. No daytime temps under 90 degrees F., mostly higher. The students hewed like demons, but were glad to stop at the end of the day… thanks to all the students & friends who came out & did such great work. Pictures with captions now:


On to the spoon-carving knives. My first knife that I remember, a Frost Mora knife. My handle. Old now, I use it with the kids. It’s an excellent knife. You could use this knife and not need to read any further.
My every-day knife, aslo a Frost blade/PF handle. A bit heavier than the first one; similar shape, with that curved end. I use it all the time, from spoon carving, opening mail, it’s my knife at lunch-time when I’m out in the shop/woodpile.


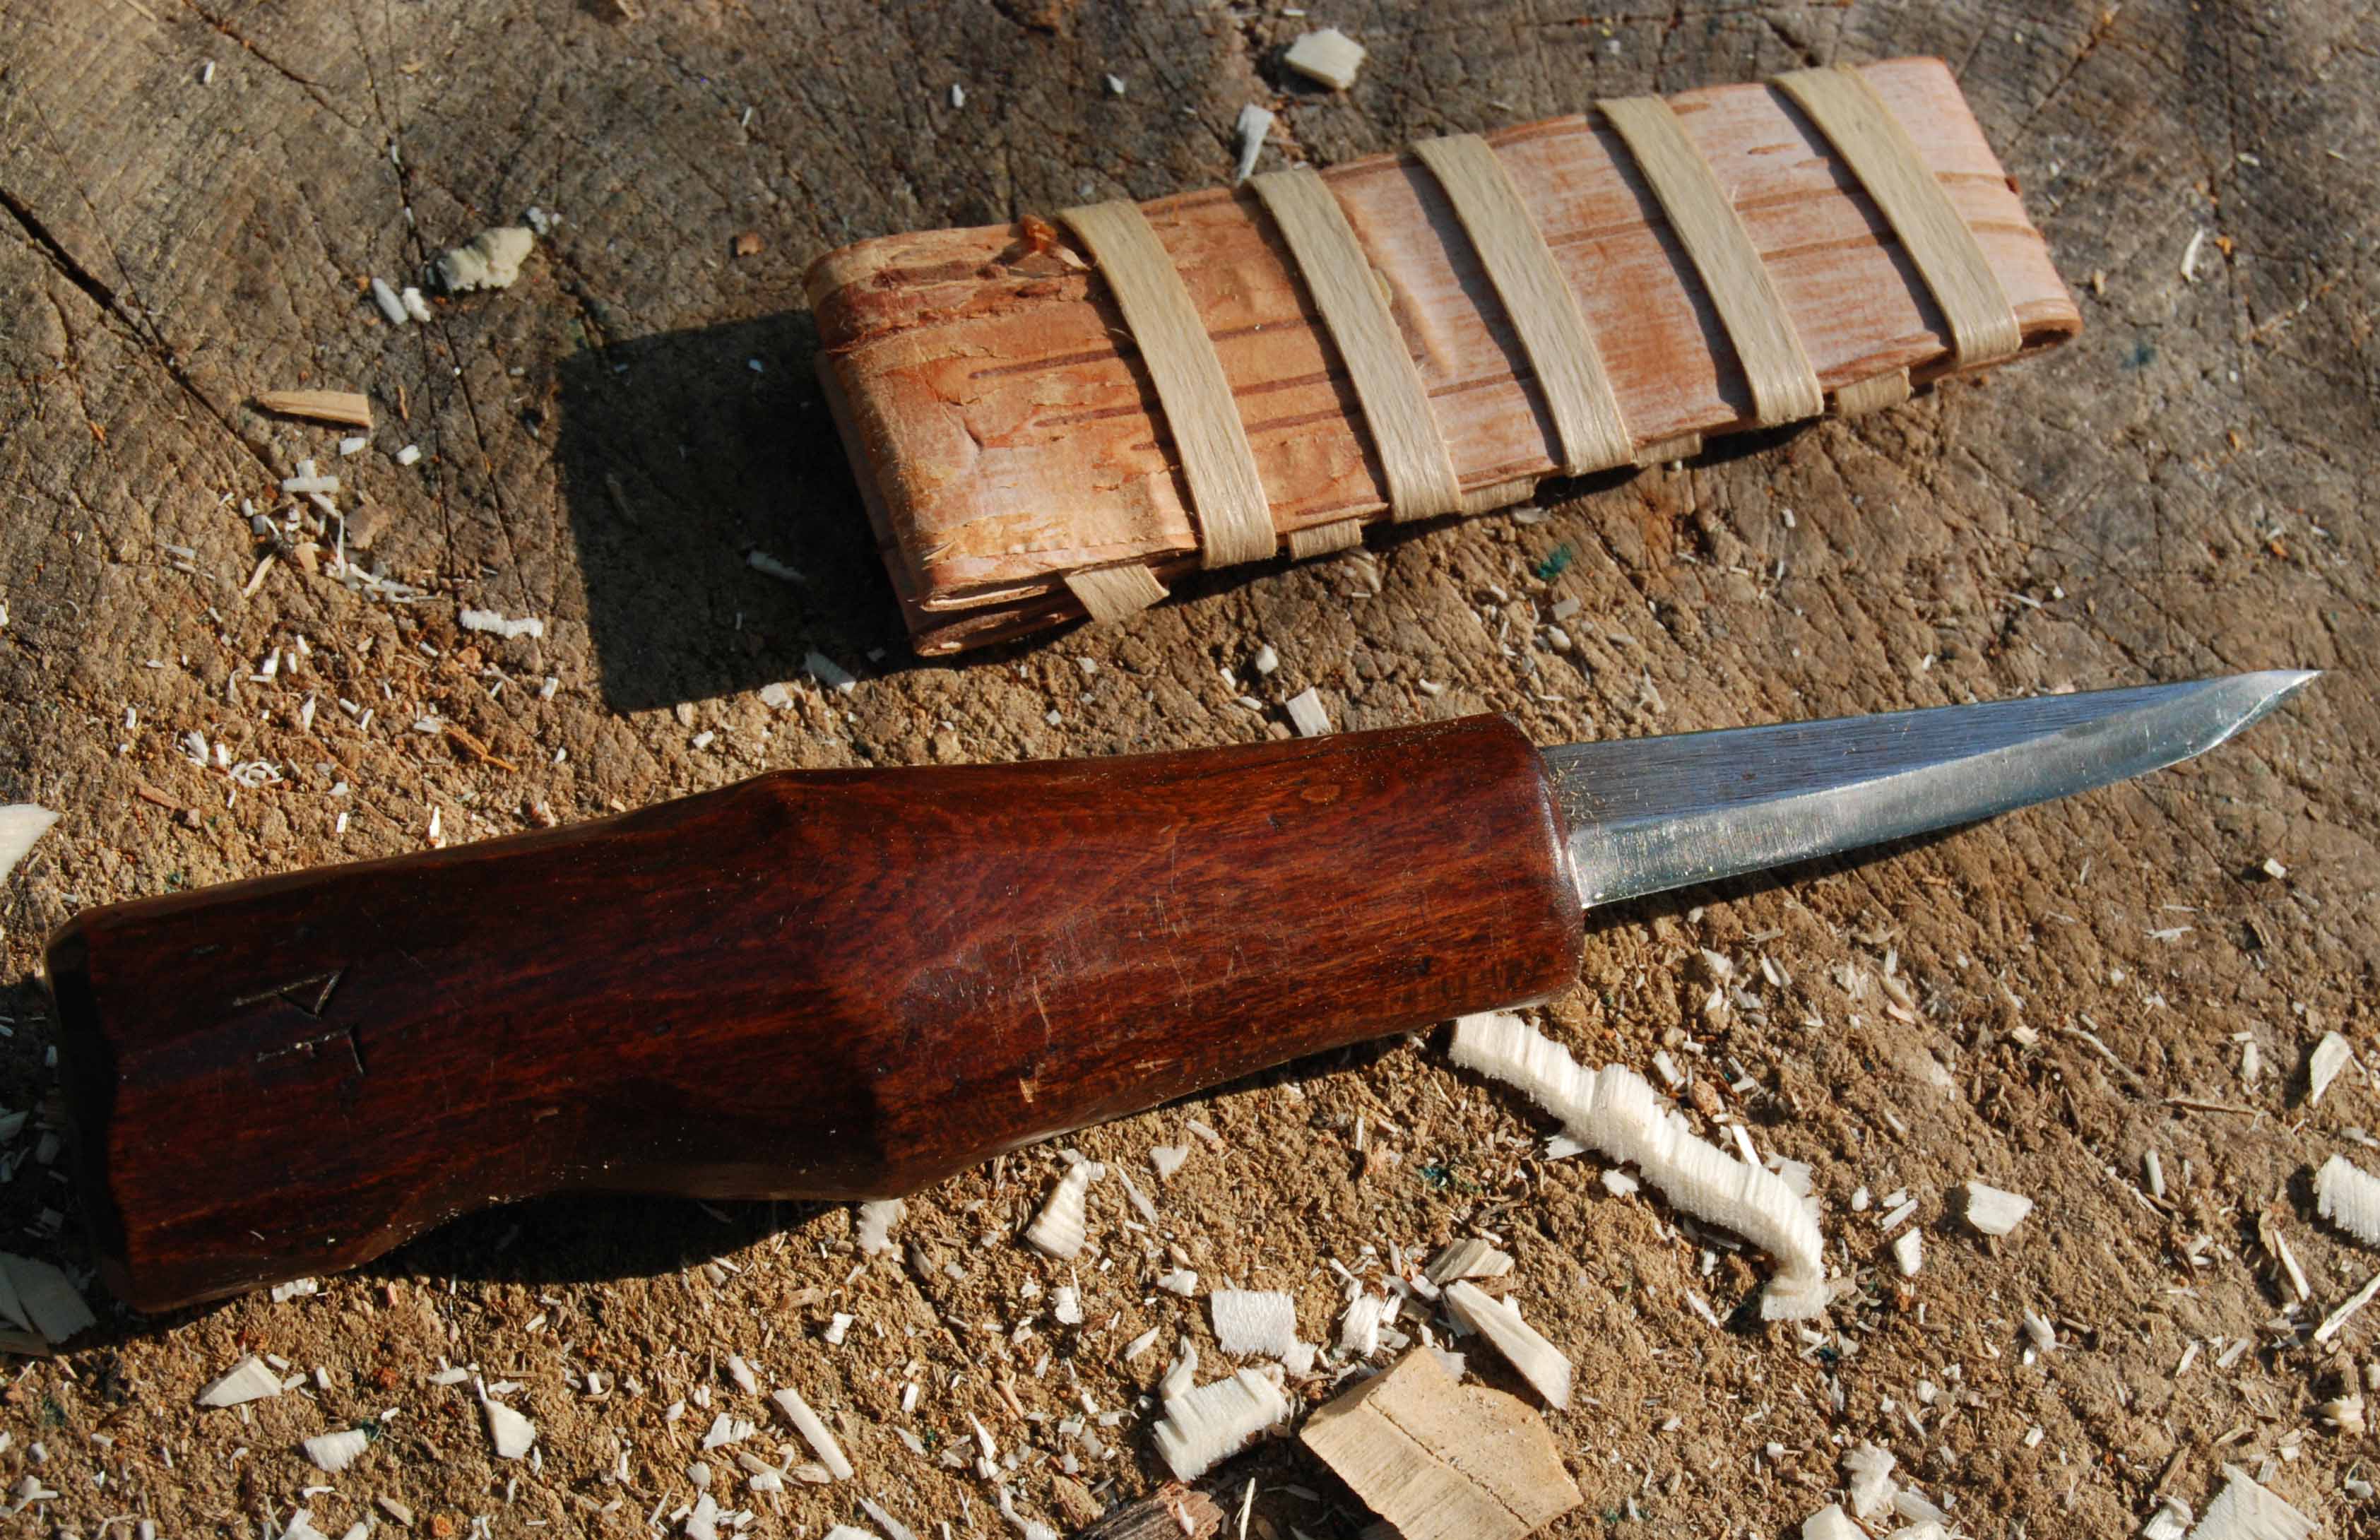
But, like the hatchets, we all tend to go further looking for the knife. Here’s one, from Del Stubbs’ Pinewood Forge. http://www.pinewoodforge.com/
an unbelievably good knife. We’ll see one of his hook knives too. I have used this for a long time as my finishing knife, for the final cuts on a spoon. That’s why I got the short blade, I’m not doing all the work with this knife. This knife showed me what “sharp” means. Still a favorite.


Came with this great birch-bark sheath. the website has instructions on making them, I have done several for my other knives.

sometimes I want a really large knife; this is the largest Svante Djarv offered from Country Workshops. Heavy, thick knife, great shape to the cutting edge. I use it for rough-shaping large spoons. http://countryworkshops.org/Store.html

But, then came the best knife. really. Nic Westermann’s sloyd knife. I got mine through Lie-Nielsen, we use them there when I teach spoon carving classes. When they have them, they offer them for sale. His hook knife too – (I’ll get to that). I can’t find them right now on the LN website – Nic is teaching there this summer, but his class is full – he will also be presenting at the Open House – https://www.lie-nielsen.com/workshop/USA/96
The knife is outlandishly good (even better than “unbelievably good”) – a very thin blade, which took me a bit to get used to. Great shape, perfect bevels, it works so well I am always happy to pick it up & carve with it. Leaves a great burnished surface.


Hook knives. Remember the hatchet story, with Robin Wood’s affordable hatchet? Here’s his solution to hook knives. My handle. Thin blade, long, sloping curve. Nice shape and excellent action when cutting with it. I use a dozen of these when I teach – they are a great introduction to spoon carving. this one he calls “open sweep” – I really like the shape. He’s posted videos of using it, and sharpening it here: http://www.robin-wood.co.uk/shop/spoon-carving-knife-blade-right-hand-open-sweep/


Hans Karlsson’s hook knife, mine from Country Workshops. I used these for years; I have them in lefty & righty. 
Here you can see the shape of this curve. 
Now, one of Del Stubbs’ hook knife. Mine’s the #1 open sweep…like the sloyd knife, sharp as all get out.


But, I am converted. Nic Westermann’s hook is the one I use the most. Hollowed on the inside, like Japanese chisels & planes…great shape, great cutting. I have carved through some spoons because I was so entranced with this hook. Write or call Lie-Nielsen in the US, Nic’s website is here: http://nicwestermann.co.uk/


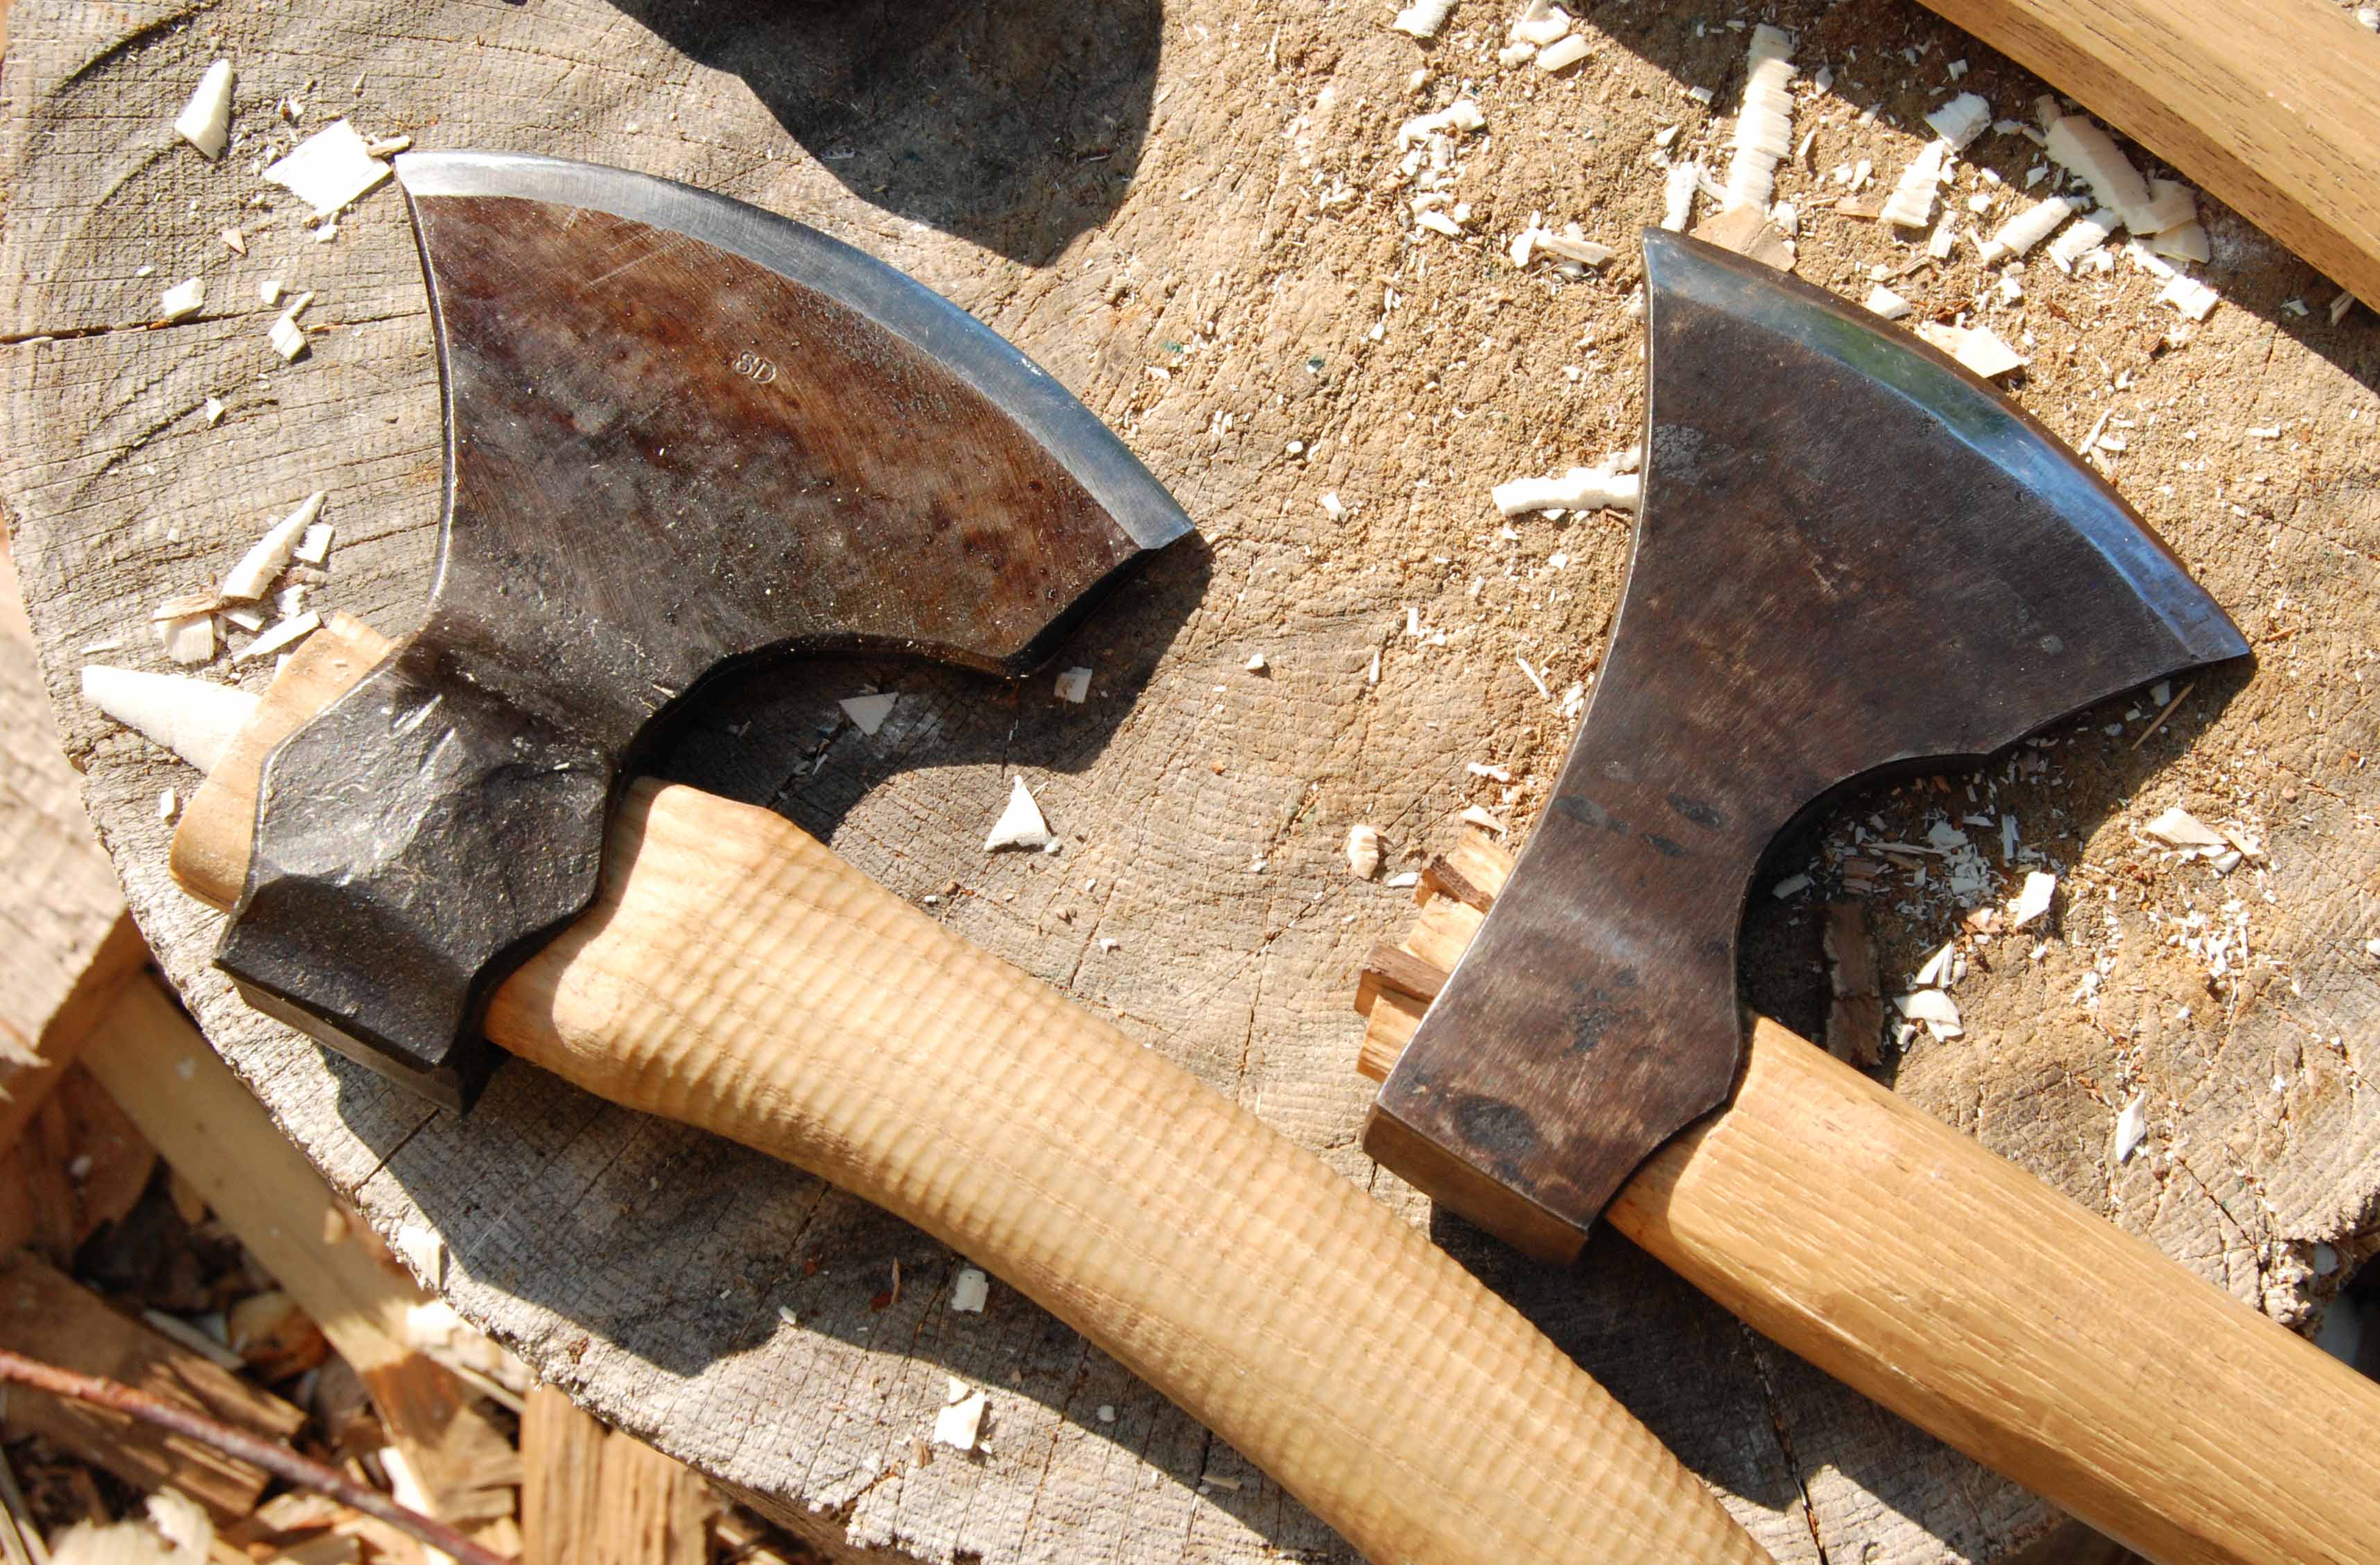
It’s been a long time since I’ve talked about which tools I use for spoon carving. I’ve received some questions lately about axes/hatchets, so I’ll start there. First off, this ain’t joinery, these are double-bevel hatchets. The single-bevel hatchets I use for making flat stuff. these can do that, but they excel at hewing shapes, which the single-bevel can’t do – in my hands anyway.
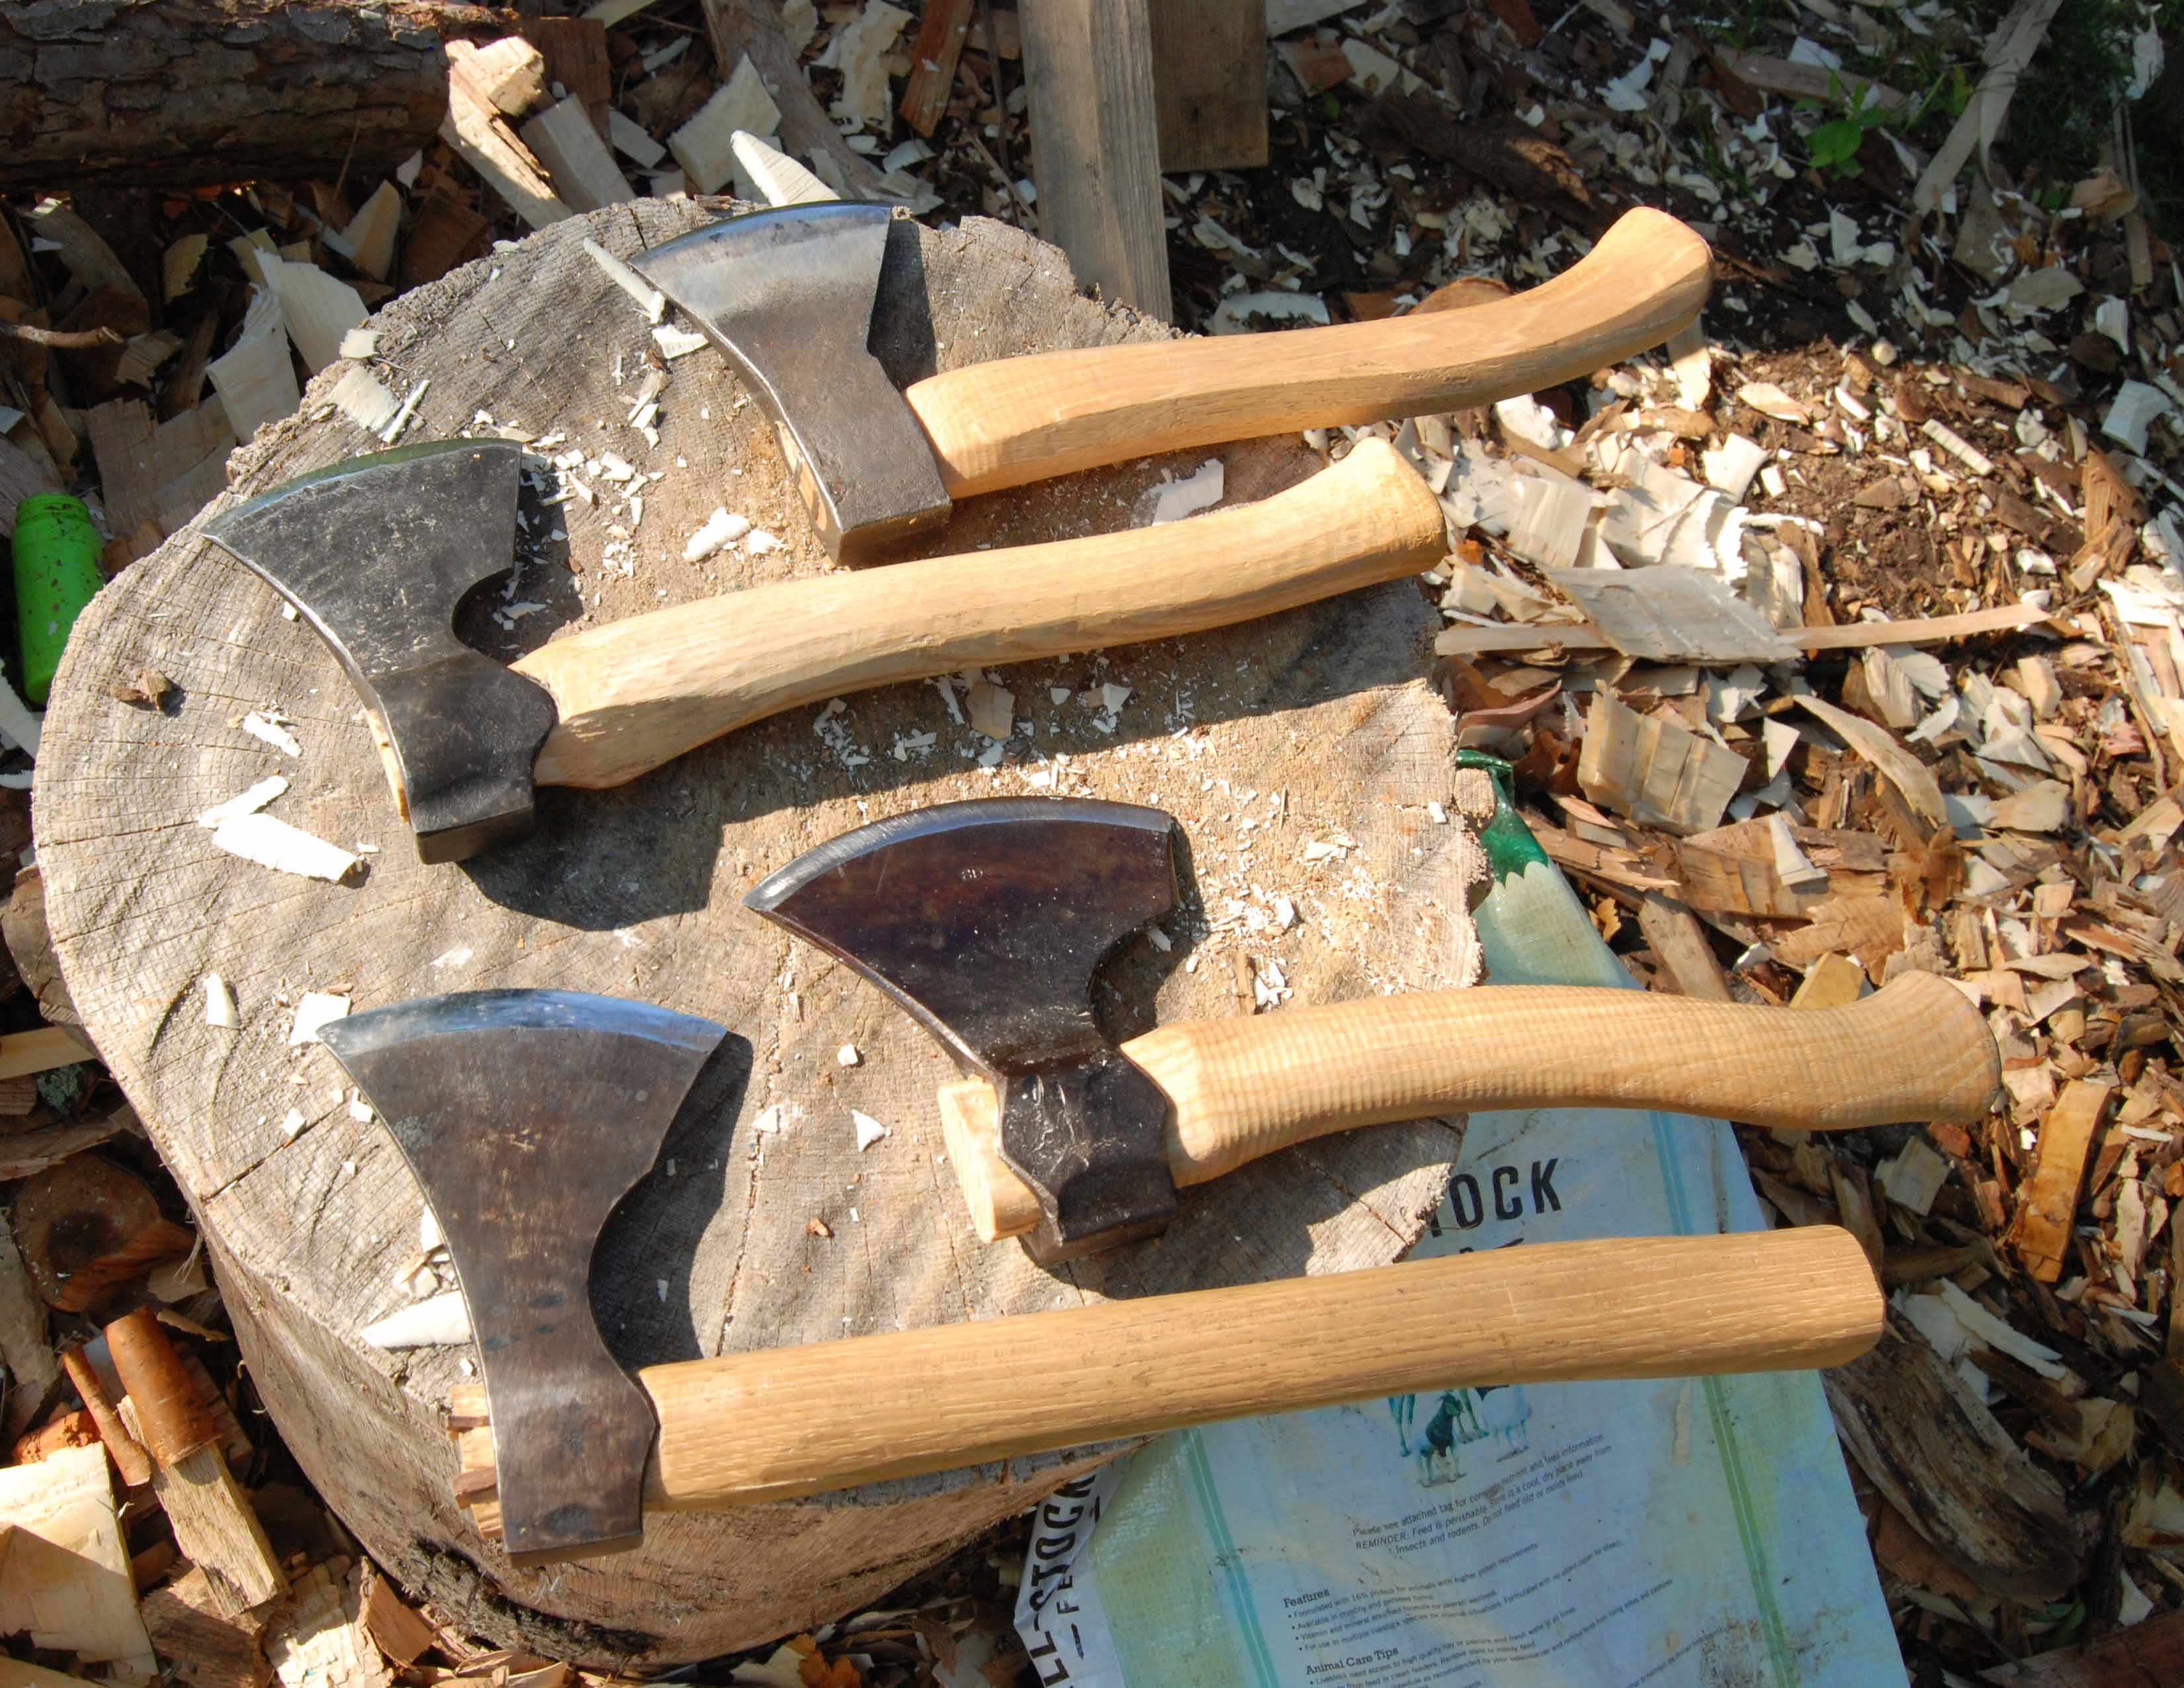
First off – new to me – a Svante Djarv “Little Viking” hatchet I got through Country Workshops – http://countryworkshops.org/Axes.html (2 of these axes are from there, so you could just go read Drew Langsner’s descriptions…)
I like this hatchet a lot, so far. I especially like using a hatchet with curved cutting edge, and this one has a nice pronounced curve. I think it helps emphasize the slicing action of hewing. Might all be in my head, but it’s what I’m used to, and therefore what I look for. Drew’s table says 28 oz., and 5 3/8″ cutting edge. I wish the handle was a little thicker at its back edge, and at some point, I plan on re-handling this and some others. But I’m getting used to the handle that comes on it –


Here’s the next one when it was new – Hans Karlsson’s Sloyd Axe. I’ve used this one a lot, and recommend it to students & others who are looking for a great all-around hewing hatchet for spoon & bowl work. I’ve had it for 2 1/2 years, and it’s held up great. Lighter than the SD hatchet above, thinner “bit” results in shorter bevels. Many are drawn to the light weight, a heavier hatchet is sometimes tiring for people not used to them…

My thoughts about the handle are the same; I tend to like to make my own. And have intended to for this one, but here I am now 2 1/2 years later, still using this one with its original handle. I think it’s too thick right below the head – I took it to Alaska & the handle shrunk with the low humidity. Now’s my chance…
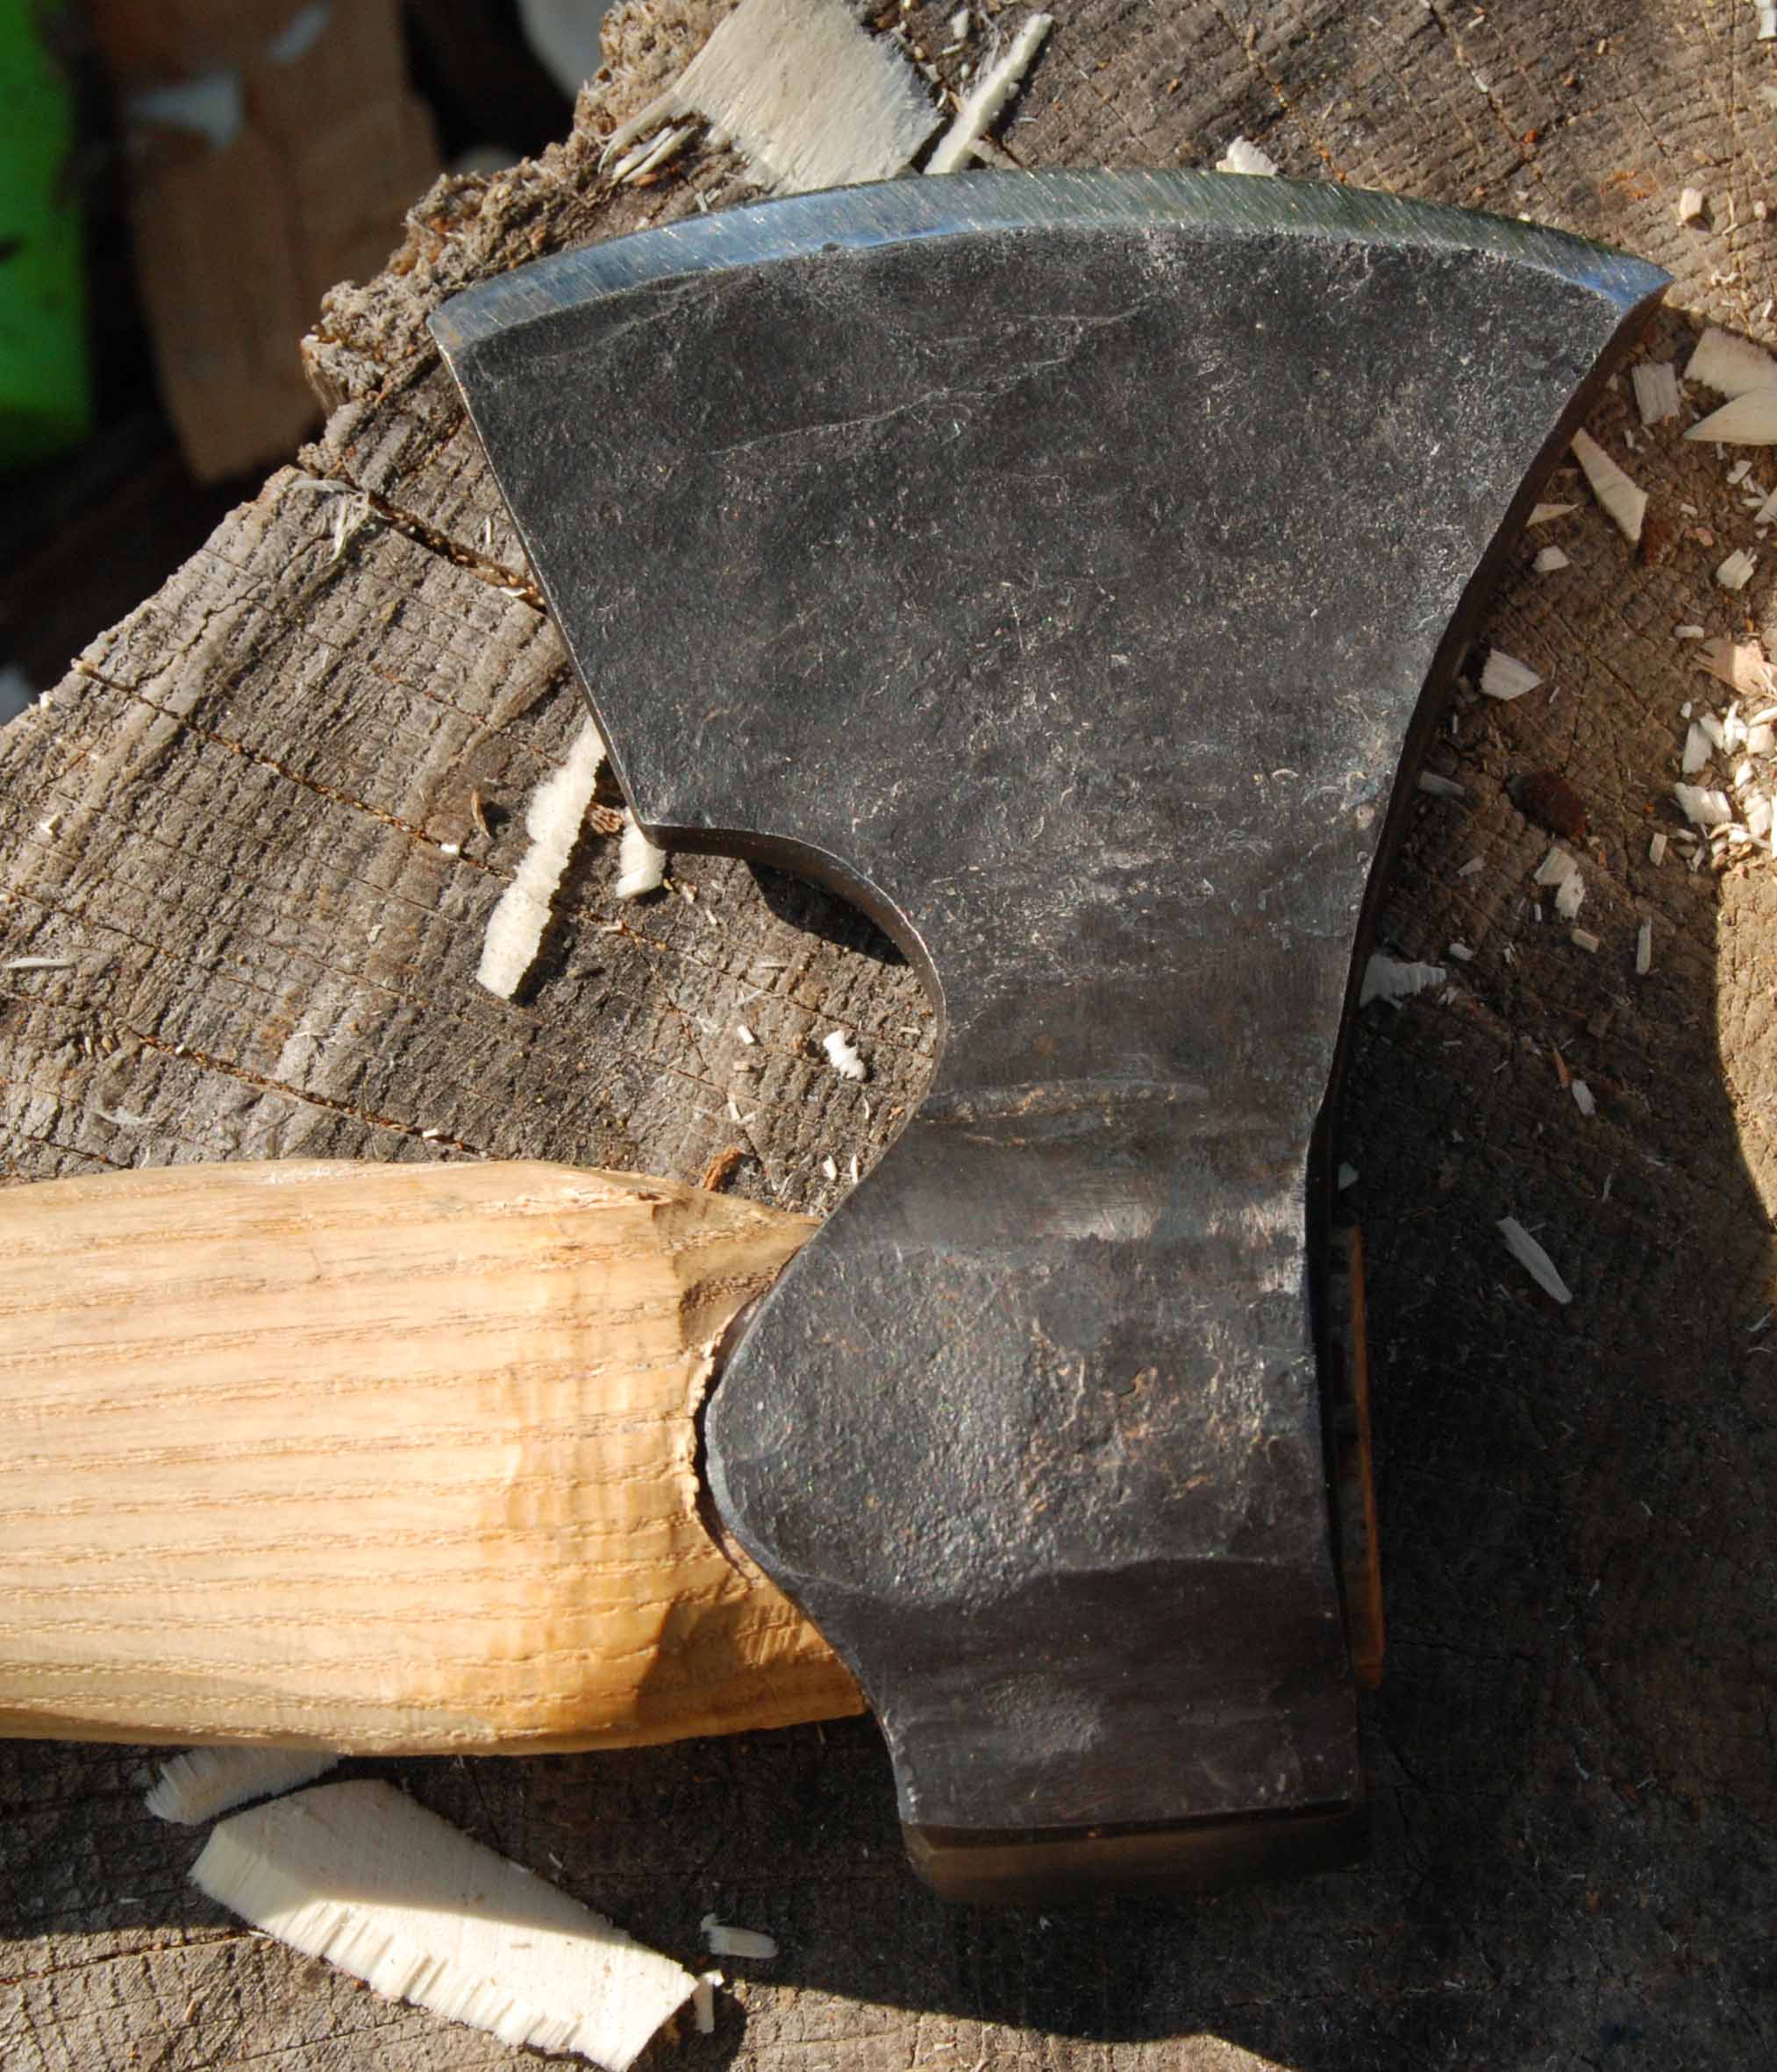
If I were on a budget (which I should be at the rate I buy hatchets) this next one is the one – made for & somewhat by – Robin Wood. Robin designed this hatchet with the idea of getting something for spoon carvers who aren’t necessarily going to spend the $200+ for a hatchet. It fills the bill nicely. Right now, it translates, with shipping, to about $80. http://www.robin-wood.co.uk/shop/the-robin-wood-axe/ (notice I didn’t talk about the prices of the other ones, but both of the above are over $200) – small, light, curved cutting edge. You could carve spoons with this hatchet all your life and never need another. But most woodworkers I know have more tools than they need…

The one I have used the most over the past many years is an old one by Hans Karlsson, no longer offered at Drew’s place…I like its long head – just a bit longer between the poll and the cutting edge than the modern HK one. But it might just be that I’m used to it, having used it so long. Right now, I am using the SD Viking one for bowl=hewing.

I don’t own a Gransfors Bruks carving hatchet. I have used them some, they’re nice. I like the weight of them. Drew’s page on hatchets has a good description (“hewing axe refinements”) of the bevel shapes and how he suggests correcting the GB hatchet. In all, I have 5 spoon hatchets right now, so am not hurting for another…but someday I’ll add a GB just for good measure.

I got a note from Curtis Buchanan the other day. Someone has hijacked some of his Windsor chair plans, and is offering them on the web. Here’s Curtis’ note:
“I have been made aware that my comb back plans are for sale on a wood working scam site.
http://chairplandiy.com/windsor-chair-plans/#
This fellow evidently just copies anything he can puts it all on a CD as “16,000” plans and sells them. Some of your stuff could be on there.
I’m not concerned that it will hurt my sales in anyway, his site is a mess. But since I think that all his material is stolen, he should be exposed for what he is. Spread the word if you feel the same way I do. I’m sure some of you already know of this fellow. There is a lot out there on him. If you want to see some of it, click on the link below.
www.woodworkweb.com/woodwork-topics/wood…scams-and-spams.html
Keep on the sunny side, Curtis”
Well, I have no plans anywhere, except on a napkin here & there. But I’m happy to post Curtis’ words and hopefully draw someone’s attention to this situation. Curtis’ plans as far as I know are only available from him, and well worth it. Here’s one post I wrote some time ago about his work. https://pfollansbee.wordpress.com/2014/03/19/go-see-curtis-stuff/
Tell your woodsie friends, so we can try to keep people from connecting with this charlatan.
 well, I was going to have some spoons for sale this week, but now I’m shuffling off to Lie-Nielsen for a box-carving class. Figuring I wouldn’t be around to pack & ship, so I’ll wait til next week. A couple of bowls too.
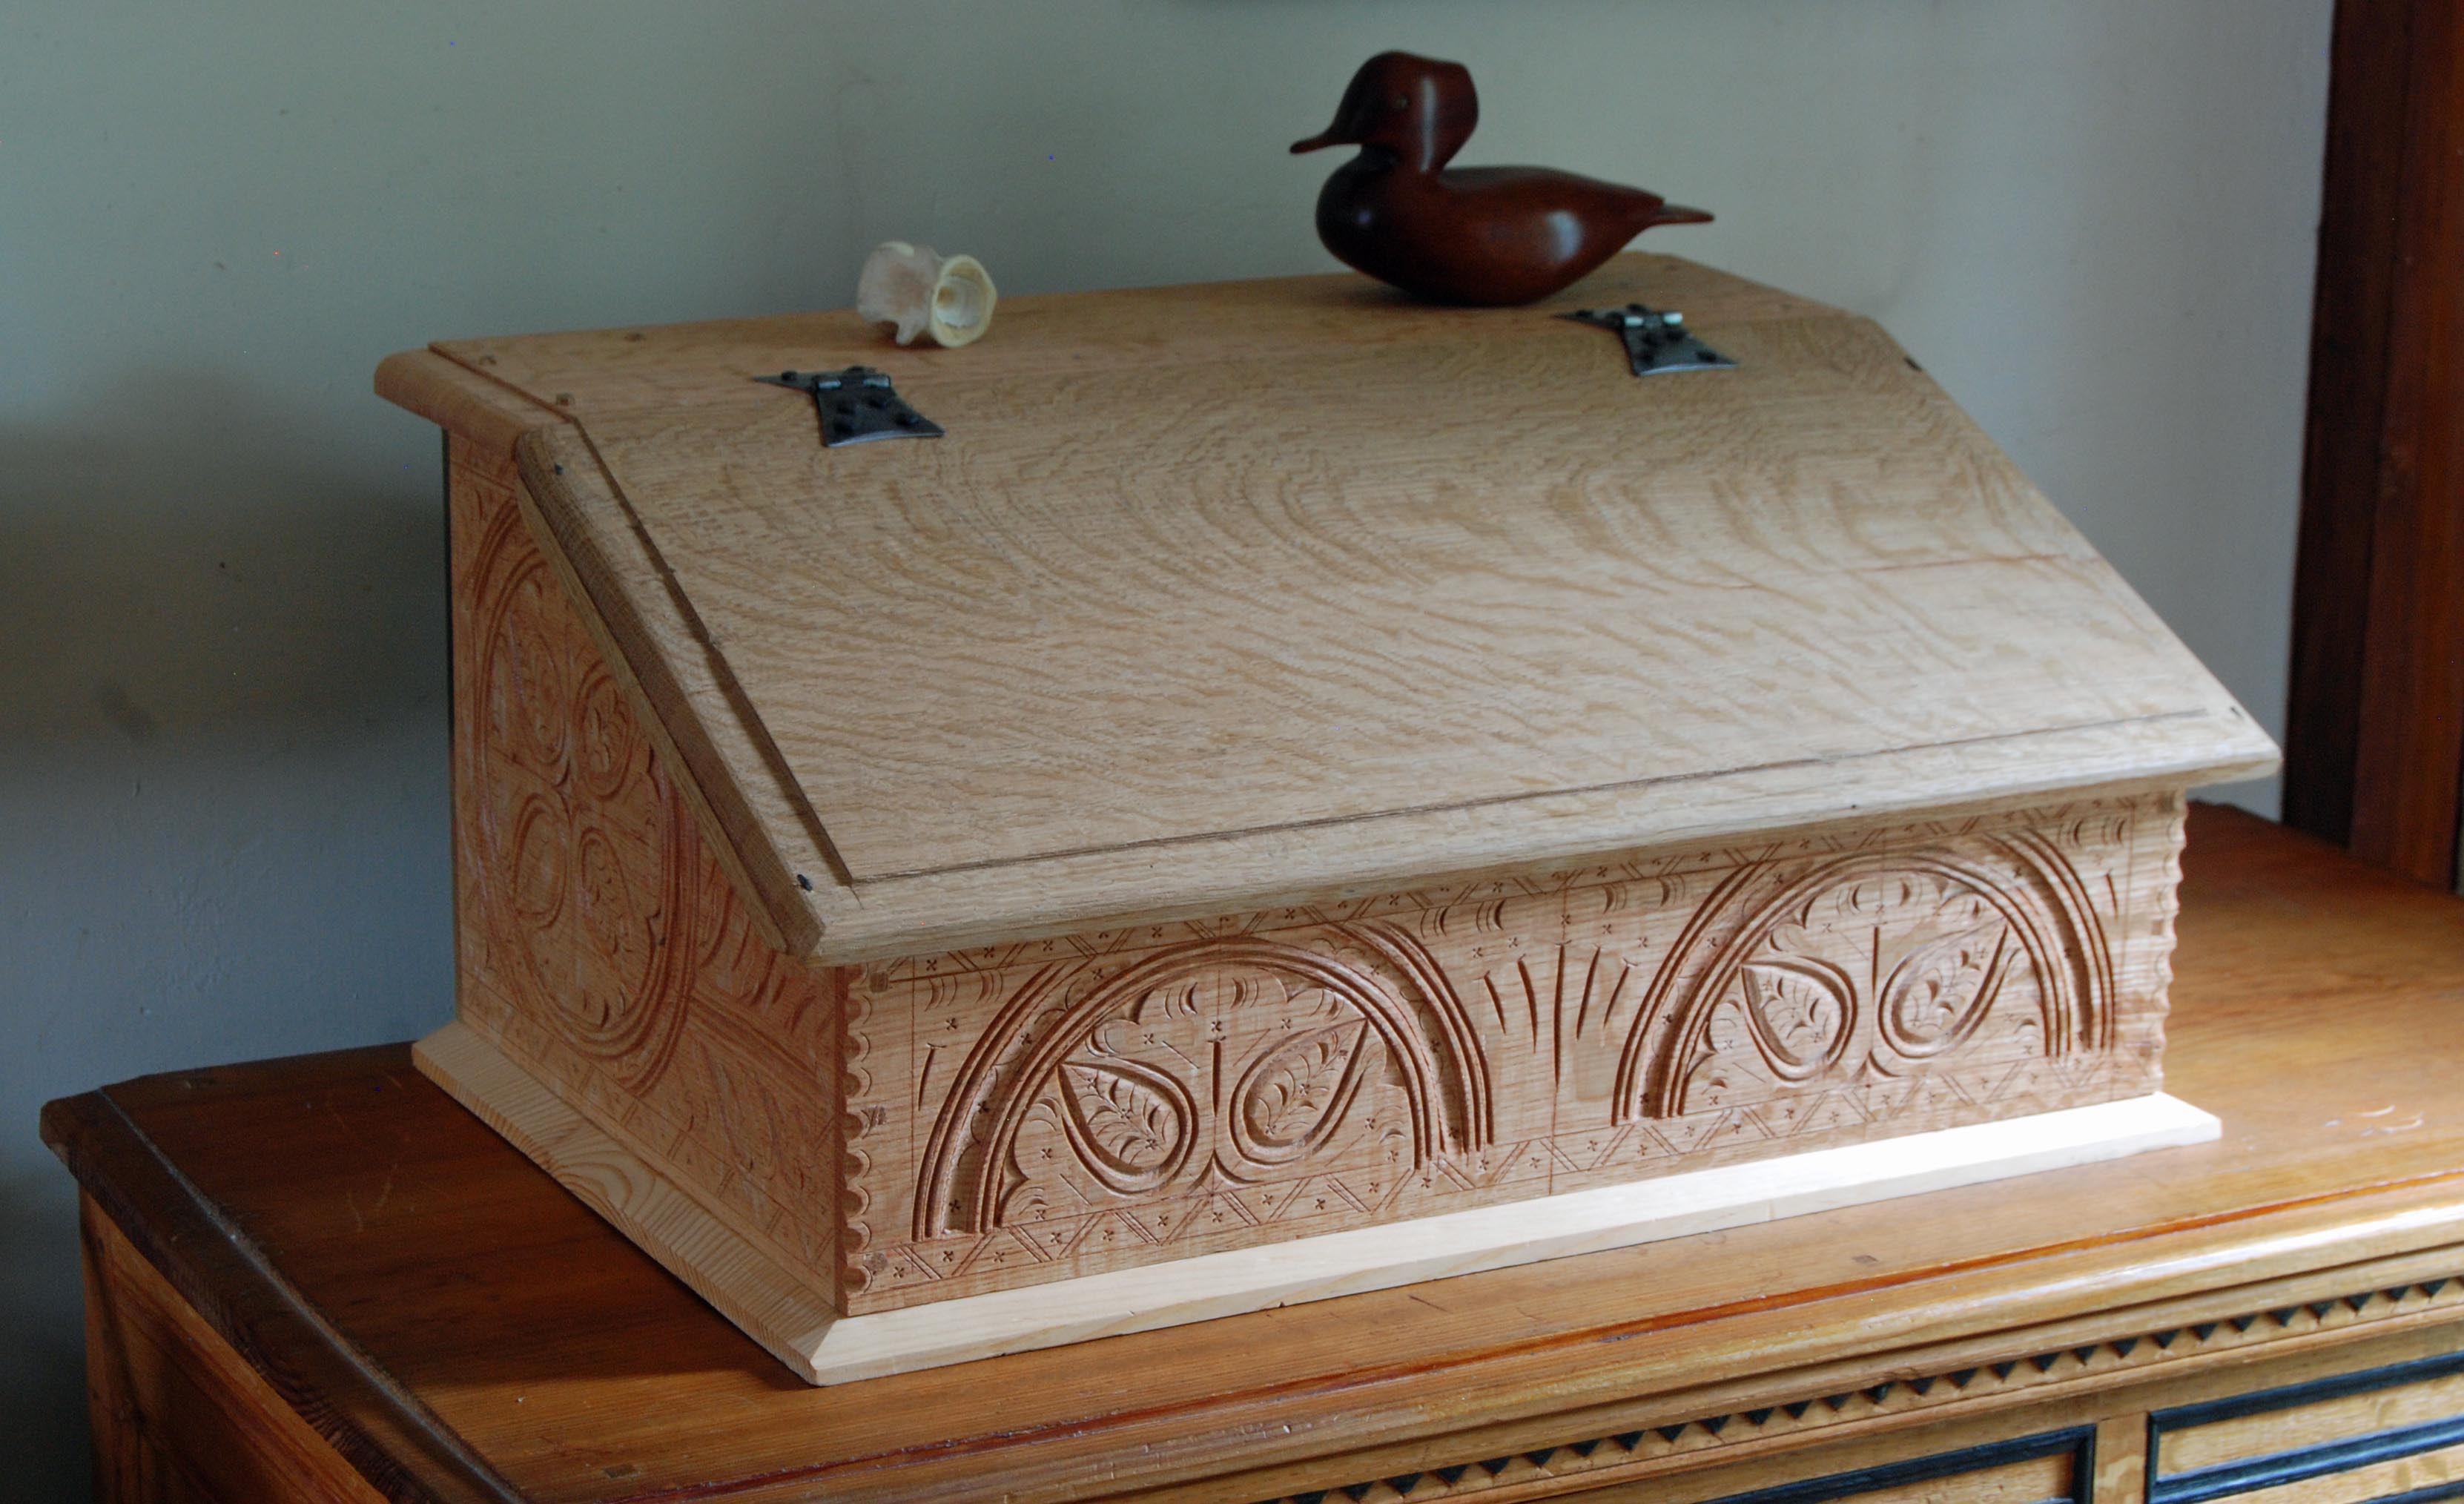
I did update the “make more room in the house” sale – https://pfollansbee.wordpress.com/furniture-sale-winter-2015/ – if anyone needs a graduation gift, a box for storing household junk, or something flat to pile things on…
chests with drawers, spoons, bowls, boxes – baskets and more – I hardly know which tools to pick up in the morning. Coming up on a year since I went out on my own, woodworking-wise. what fun…thanks to all of you out there who help me make it happen.
Oaks beware!
PF
I found the nails. they were in the chest’s till; safely stored where I forgot them. After boring pilot holes, I nailed the sides to the front. In most cases, the nails go through the drawer side, into the end grain of the front. They sometimes go through the front, then to be covered by applied moldings. I could have done that, (these drawers will have applied moldings framing them), but the original is nailed this way.

But at the back, the nails go through the back into the end grain of the sides.

Notice in this next photo, the drawer back closes the groove in the sides. So you have to open up a notch for the drawer to engage the runners.
 start with a saw, then a chisel.

This one’s ready to drive the nails down.

The bottoms run front-to-back. here’s one installed, fitting behind a rabbet in the drawer front, nailed up to the higher edges of the sides & back.

Preliminary test drive of the drawer. Then I took it back out for the rest of the bottom boards.

There’s a false muntin glued onto the drawer front, then moldings surround the “two” drawer fronts. Here, the muntin is just placed there, when I glued it on, I made sure it was straight. Enough. (turned drawer pulls will fit into holes not-yet-bored in the drawer fronts. On to the next drawer.

I hope to post some spoons & boxes for sale tomorrow. we’ll see…
