Spoons for sale, Nov 2016

I read somewhere that I haven’t been doing much woodworking lately! And I kept thinking about this all season, as I worked on building a shop by hand. Certainly, 2016 has been a slow year for me, furniture-wise and woodenware-wise. And the spoons are really something that fell by the wayside. Turns out carpentry makes me more tired than joinery. So I only have a few spoons for sale right now. I did update a page of a few furniture items I have available for sale – including 2 boxes and a stool at reduced prices. A couple of these are stuff that there’s no room for in the new workshop; two things are from around the house. https://pfollansbee.wordpress.com/furniture-for-sale-fall-2016/

I’m slowly getting back to making custom furniture, in my typical carved oak style. Feel free to contact me if you’re looking for something like that. I also hope to add one-on-one student sessions here. More on that to come.

Here’s the spoons for sale – paypal works the easiest, I can send you an invoice. Just leave a comment if there’s a spoon you want. Prices include shipping in US, outside the states, I’ll add something for shipping. If you would rather, you can send a check. Just let me know…

I forgot to mention, Maureen has some new stuff on her etsy site too – https://www.etsy.com/shop/MaureensFiberArts

thanks,
Peter Follansbee


Spoons for Sale

Spoon 01 –  SOLD

serving spoon, made from an English wood, maybe Rowan.

L: 9 1/2″

$75.

spoon-nov-01

———

Spoon 09 – apple – SOLD

another in a long series of odd-ball spoon-ish sculptures. This was made during a demonstration, and I didn’t have enough wood with me. This branch was quite weird, and I had to really work at it to get a spoon out of it!

L: 12″

$70

spoon-nov-09

THE SPOONS BELOW HERE ARE SOLD AS OF WEDNESDAY NOV 30. I HOPE TO FINISH SOME MORE IN THE NEXT WEEK AND POST THEM RIGHT AWAY. THANK YOU FOR YOUR SUPPORT. 

———————

Spoon 02 – birch serving spoon. SOLD

L: 11″

$80

spoon-nov-02

——–

Spoon 03 – SOLD

This small server might be rowan also. I started several spoons while I was in England, finished them here. Lost track of which wood was which.

L: 9 3/4″

$70

spoon-nov-03

—————–

spoon-nov-04

——————–

Spoon 05 – SOLD

this extra long cooking spoon is from an apple tree right here in my yard.

L: 15″

$90

spoon-nov-05

spoon-nov-05-detail

———

Spoon 06 – willow – SOLD

my favorite spoon of the batch. Fred Livesay split a crook of willow right when we got to Spoonfest in England, and it was too thick for what he wanted. So he split it again, and handed me this small section to carve. Thanks, Fred.

L: 8″

$75

spoon-nov-06-side

spoon-nov-06-overall

—————

Spoon 07 – SOLD

rowan or cherry

Another hard wood serving spoon.

L: 9 3/4″

$75

spoon-nov-07

—————

Spoon 08 – apple – SOLD

A nice little crook for a spoon.

L: 8″

$70

spoon-nov-08

spoon-nov-08-overall

———


inspired by students

I did some carving today, in white pine, for window trim in the workshop. The pattern I cut was inspired by the students in the joined chest class at Connecticut Valley School of Woodworking. This design has been evolving for a while now, I wrote about the basic version of this pattern five years ago  https://pfollansbee.wordpress.com/2011/07/11/patterns-patterns/  This one has the additional step of hollowing the surface, and then doubling up the design.

double-braid

We carved single rows of this in the class, then first one, then another student asked about doubling them up. So I copied them in this case…Here’s some of what I did. The outline is based on margins and horizontal centerlines. I mark off the spacing with a compass, and strike a punch to give me a starting point for the pattern. Then I strike the arcs with a large, #7 gouge. For the doubled braid, the first rows of strikes look like a stack of curved Vs or seagulls…

first-cuts

Then I turn the gouge around, and strike going the other way, toward the outer margins.

flip-gouge

After the vertical strikes, I angle the tool downwards a bit, and remove a crescent chip.
chips

After this step, it now looks like a stack of handlebar mustaches.


stack-of-mustaches

Then I go at it some more with the large #7, and begin to connect the arcs…

large-gouge

A shallow #5 gouge snips out some areas between the arcs, making space for some shadows.

5-gouge

Then I used a #8 gouge to hollow the flat parts that remain…this cut is a pivoting quarter-arc…over & over.

hollow-w-gouge

hollow-pt-1-done

some go this way, some go that way…

hollowing

I shot some short video of carving some of this pattern. No edits, some fumbling around is included.

cutting braid from Peter Follansbee on Vimeo.


hollowing braid from Peter Follansbee on Vimeo.

a few more old drawings

here’s a few more of those old drawings from the other day. There isn’t much of a story behind them, but such as it is is in this link: https://pfollansbee.wordpress.com/2016/11/16/old-drawings-i-just-found-again/

oak paneling from the Guildhall in Exeter:

exeter-guildhall-paneling

“lower part of a Spanish desk, walnut”

spanish-desk

Upholstered chair, red velvet & embroidery

upholstered-chair

two chairs from the V&A:

va-chair

old drawings I just found again

I feel like I’m moving. I guess I am…I’ve been sifting through boxes of stuff that I stashed almost 3 years ago when I moved out of my old shop. The new one is nearing completion, so I keep sorting boxes…


english-paneling

People give me stuff every now & then, and somewhere along the line I got these small drawings. I forget who gave them to me. I scanned a few of them tonight. I don’t usually work from this sort of drawing, but I appreciate the skill that it takes to make them. They’re quite nice.

this first batch are all (except the cane chair) about 5″ x 7″ – but they’re not from one notebook, so the sizes vary. one seems like it says “drawn by C. M. Bill. I scanned them & darkened them a little…some are marked either “Albert & Vic” or “Al & Victoria” – thus the V&A in london…others are unmarked as to what collection they’re drawn from…

overmantel

table-base

v-a-childs-chair

the cane chair drawing is 6 3/4″ x 10 1/4″.

cane-chair

There’s about 10 more. I’ll scan those some point soon.

Sharpening w Tim Manney at Plymouth Craft

here’s how I know Tim Manney’s sharpening class at Plymouth Craft was a success – I can’t wait to go sharpen stuff!

hollow-ground-hatchet

I wasn’t taking the class, but I got to hang around enough to get caught up in the excitement of “knowing what sharp is…” as one of the students put it. We hadn’t run this class before, so it was hard to describe. But I knew it would be a winner. And it was, in spades. Tim started them off with one of the hardest tools to sharpen – the sloyd knife. Sandpaper adhered to tiles – I’m not usually a fan of this method, but Tim sold me pretty quickly. No mess whatsoever – no water, no oil. here’s his proper posture, and he’s working the knife perpendicular to the long axis of the “stone.” Sort of jabbing it in & out.

knife-sharpening

knife-detail

a strop. 
strop

Then, cut the end grain of white pine. A non-forgiving material – but if you cut it cleanly, then you’re ready.

end-grain-ewp

His axe grinding method was great too –

axe-grinding

the students dove right in & took a wide range of tools. Axes, drawknives, knives, chisels, gouges – it was infectious.


diamond-paddle

this class will happen again, sometime in 2017. Next time, I bet the spaces will fill up, so when you hear about it -get on it. You’ll be glad you did. If you get on the newsletter, you’ll be notified of all Plymouth Craft’s offerings – http://www.plymouthcraft.org/

moving in

more pictures. the floor to the shop is more than 2/3s done, today I moved the main tool chest into place. I made this chest after Chris Schwarz’ book came out about his tool chest. There are links at the bottom of this post about building it, and painting it.

I took some photos as I put some of the tools back inside. Here is the chest in its new place, to the right of my workbench.

tool-chest

when I fitted the interior drawers, the runners I made were leftover carvings. Perfect quartered oak.

carvings

the bottom drawer is the deepest, has some backsaws & a plane on one end…

bottom-drawer

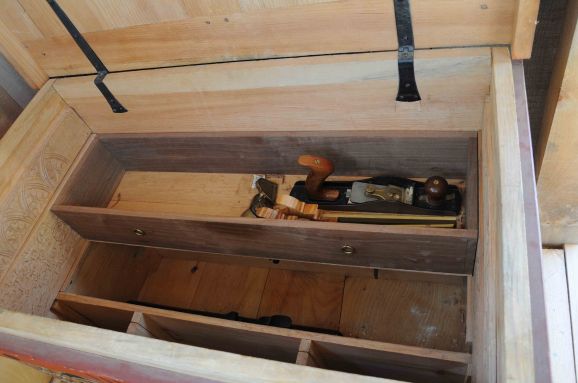
and a box-within-a-box of gouges on the other. Back in 2012 when I made this chest, I had cut some dovetails, but not enough to get efficient. This chest and its related tool trays/boxes got me plenty of practice. Here are the bowl-gouge boxes – the small one fits into the larger, deeper one:

box-in-a-box

box-in-box-carving-tools

and then the whole thing fits into the deep tray in the chest:

in-situ

shallower trays go above this one. Starting with this chisel-tray. Some spokeshaves in it are bound for new placement soon…once I finish working on the shop.

chisel-drawer

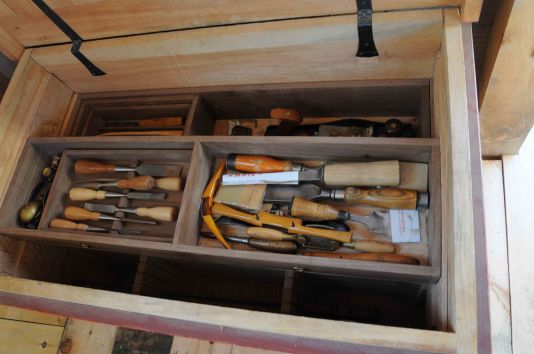
my main carving gouges go in the top tray, along with some small stuff that fits there alongside them…

carving-tools

molding planes went in before the trays – bench planes will fit in the front floor…

molding-planes

There’s a saw till in front, this Disston saw, made for A.J. Wilkinson Co, sits in there, with others…

wilkinson-saw

wilkinson-saw-handle

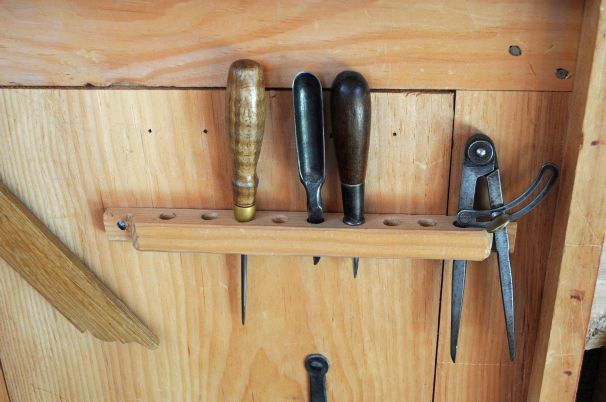
Later, I added some junk to the underside of the lid – marking tools, squares, some bits:
open

Like this:


bits-awl-etc

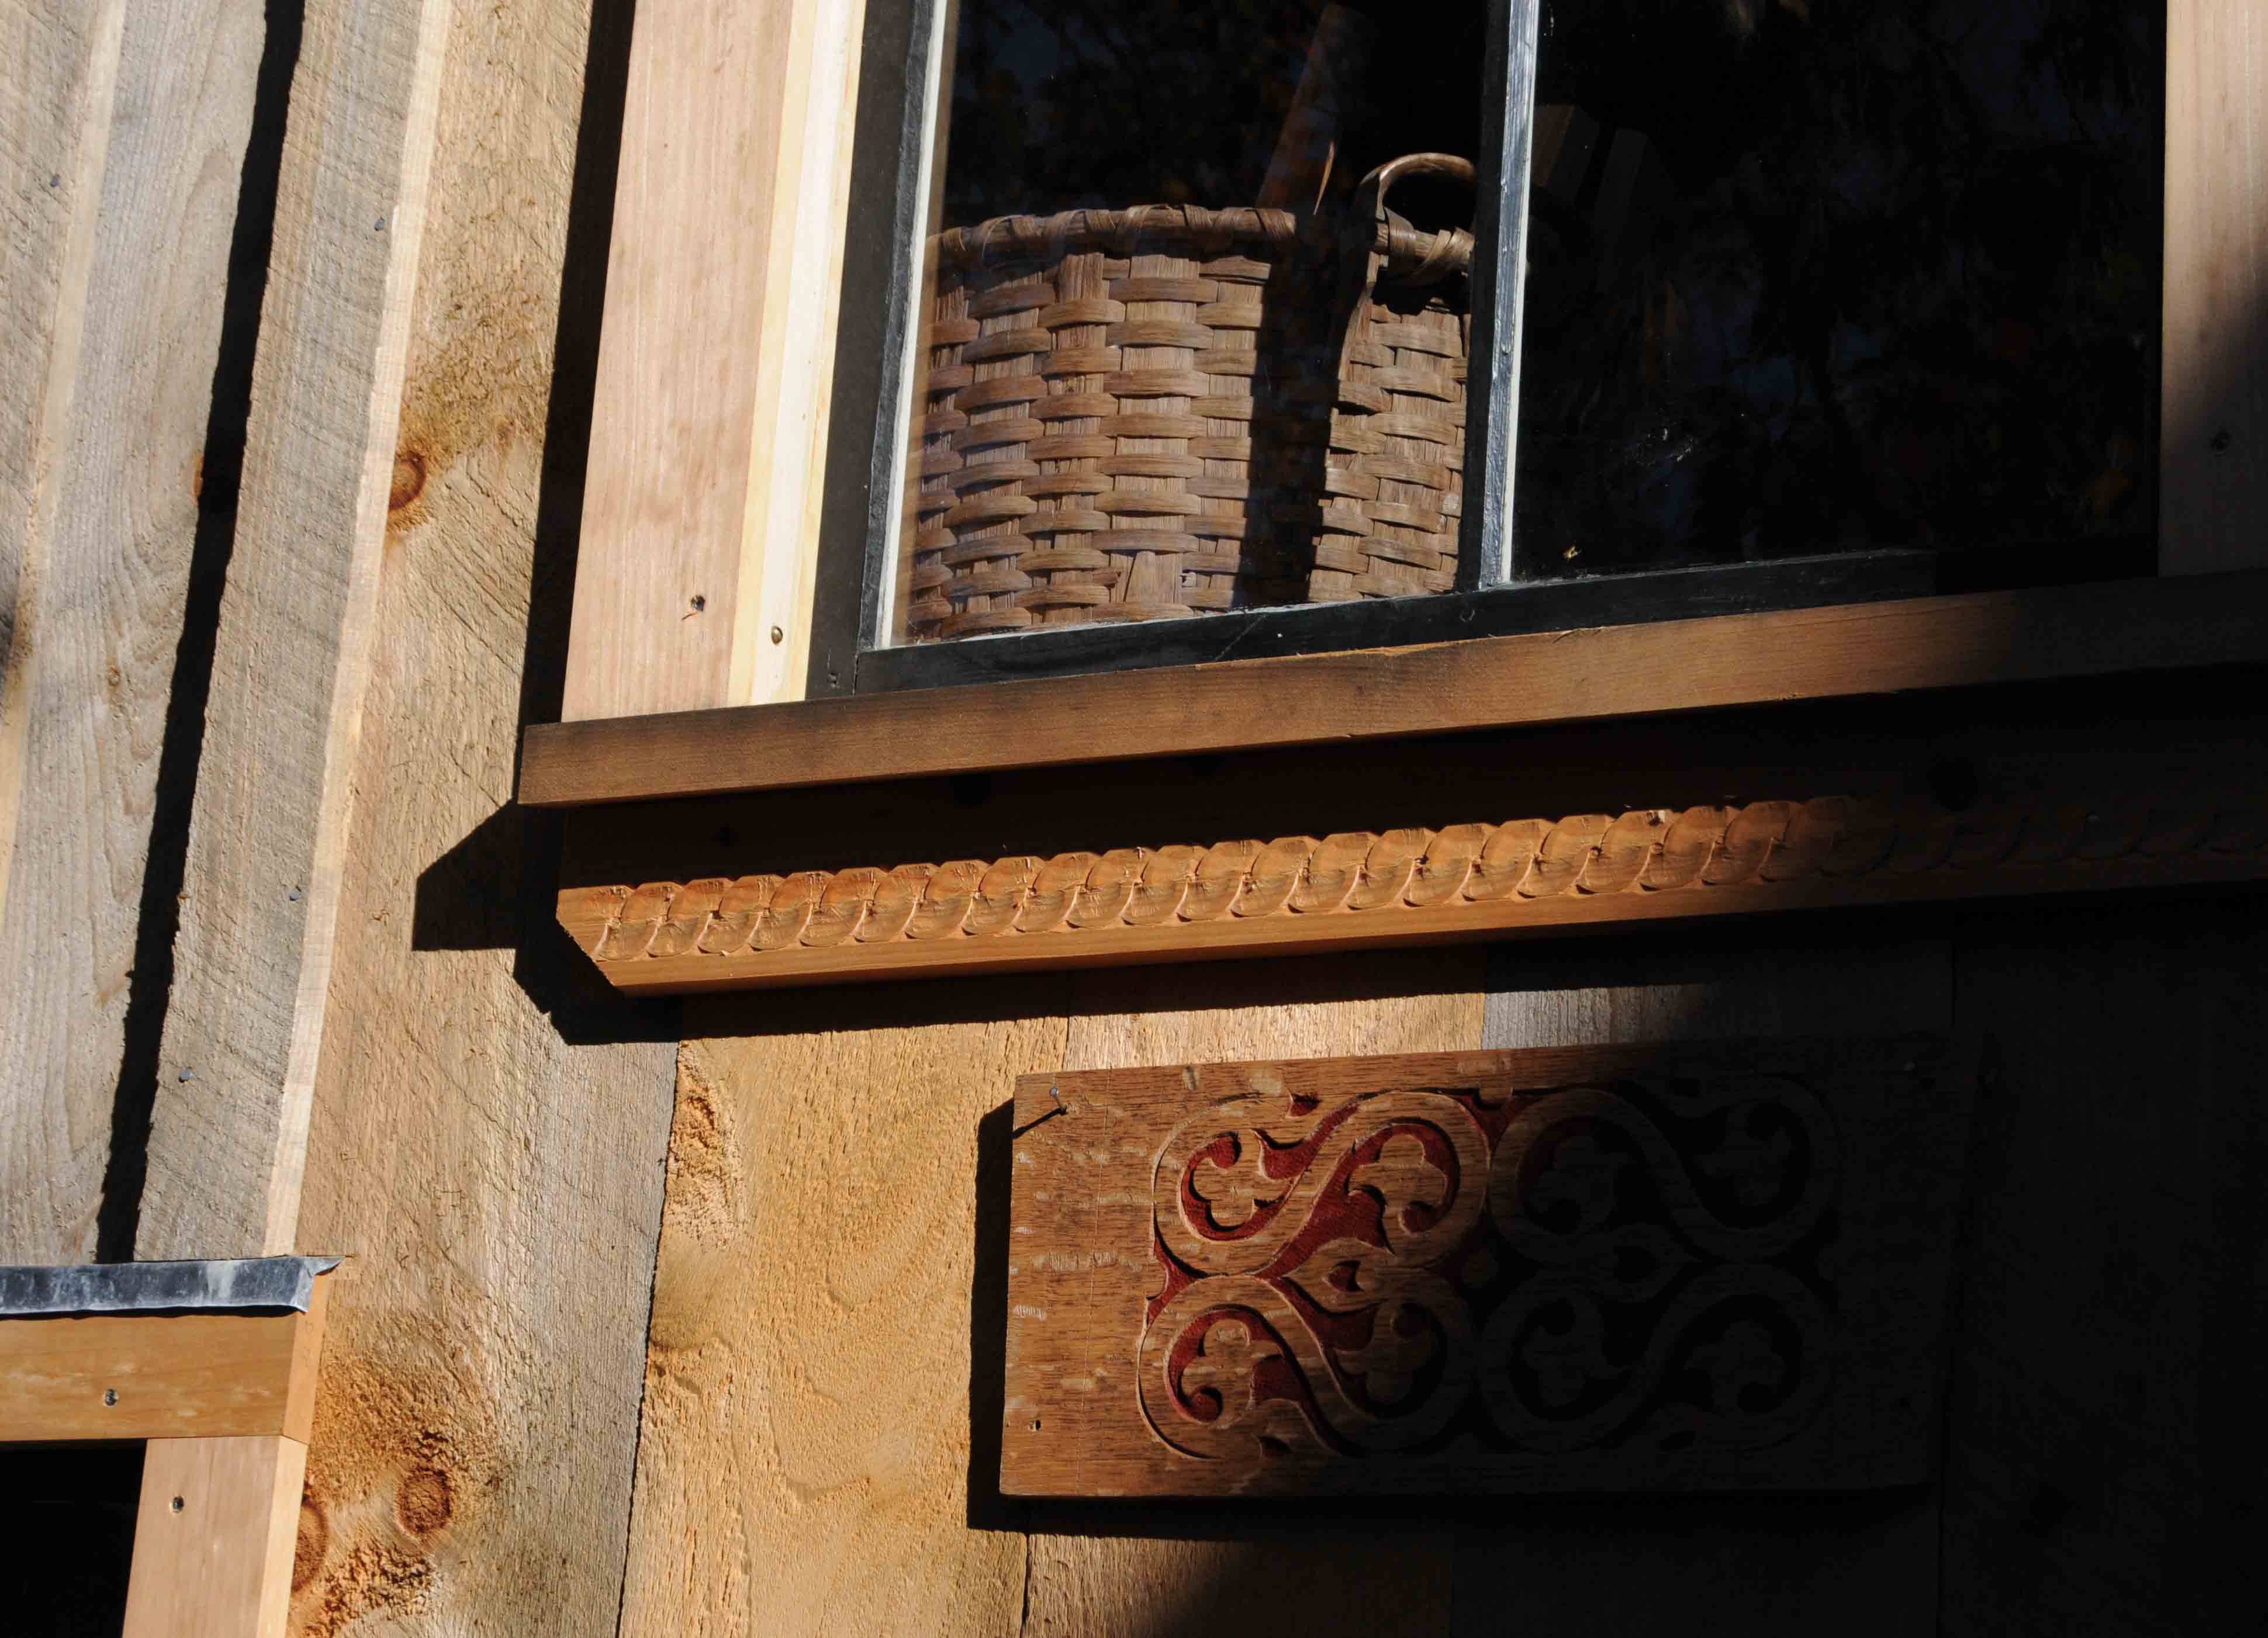
Then, the door-hanger came, so I switched gears. More later. Tomorrow, threshold and spandrels.

door-hanger

I mostly watched, as Pret hung the door. so I got out the camera & shot some raking light…

raking-light

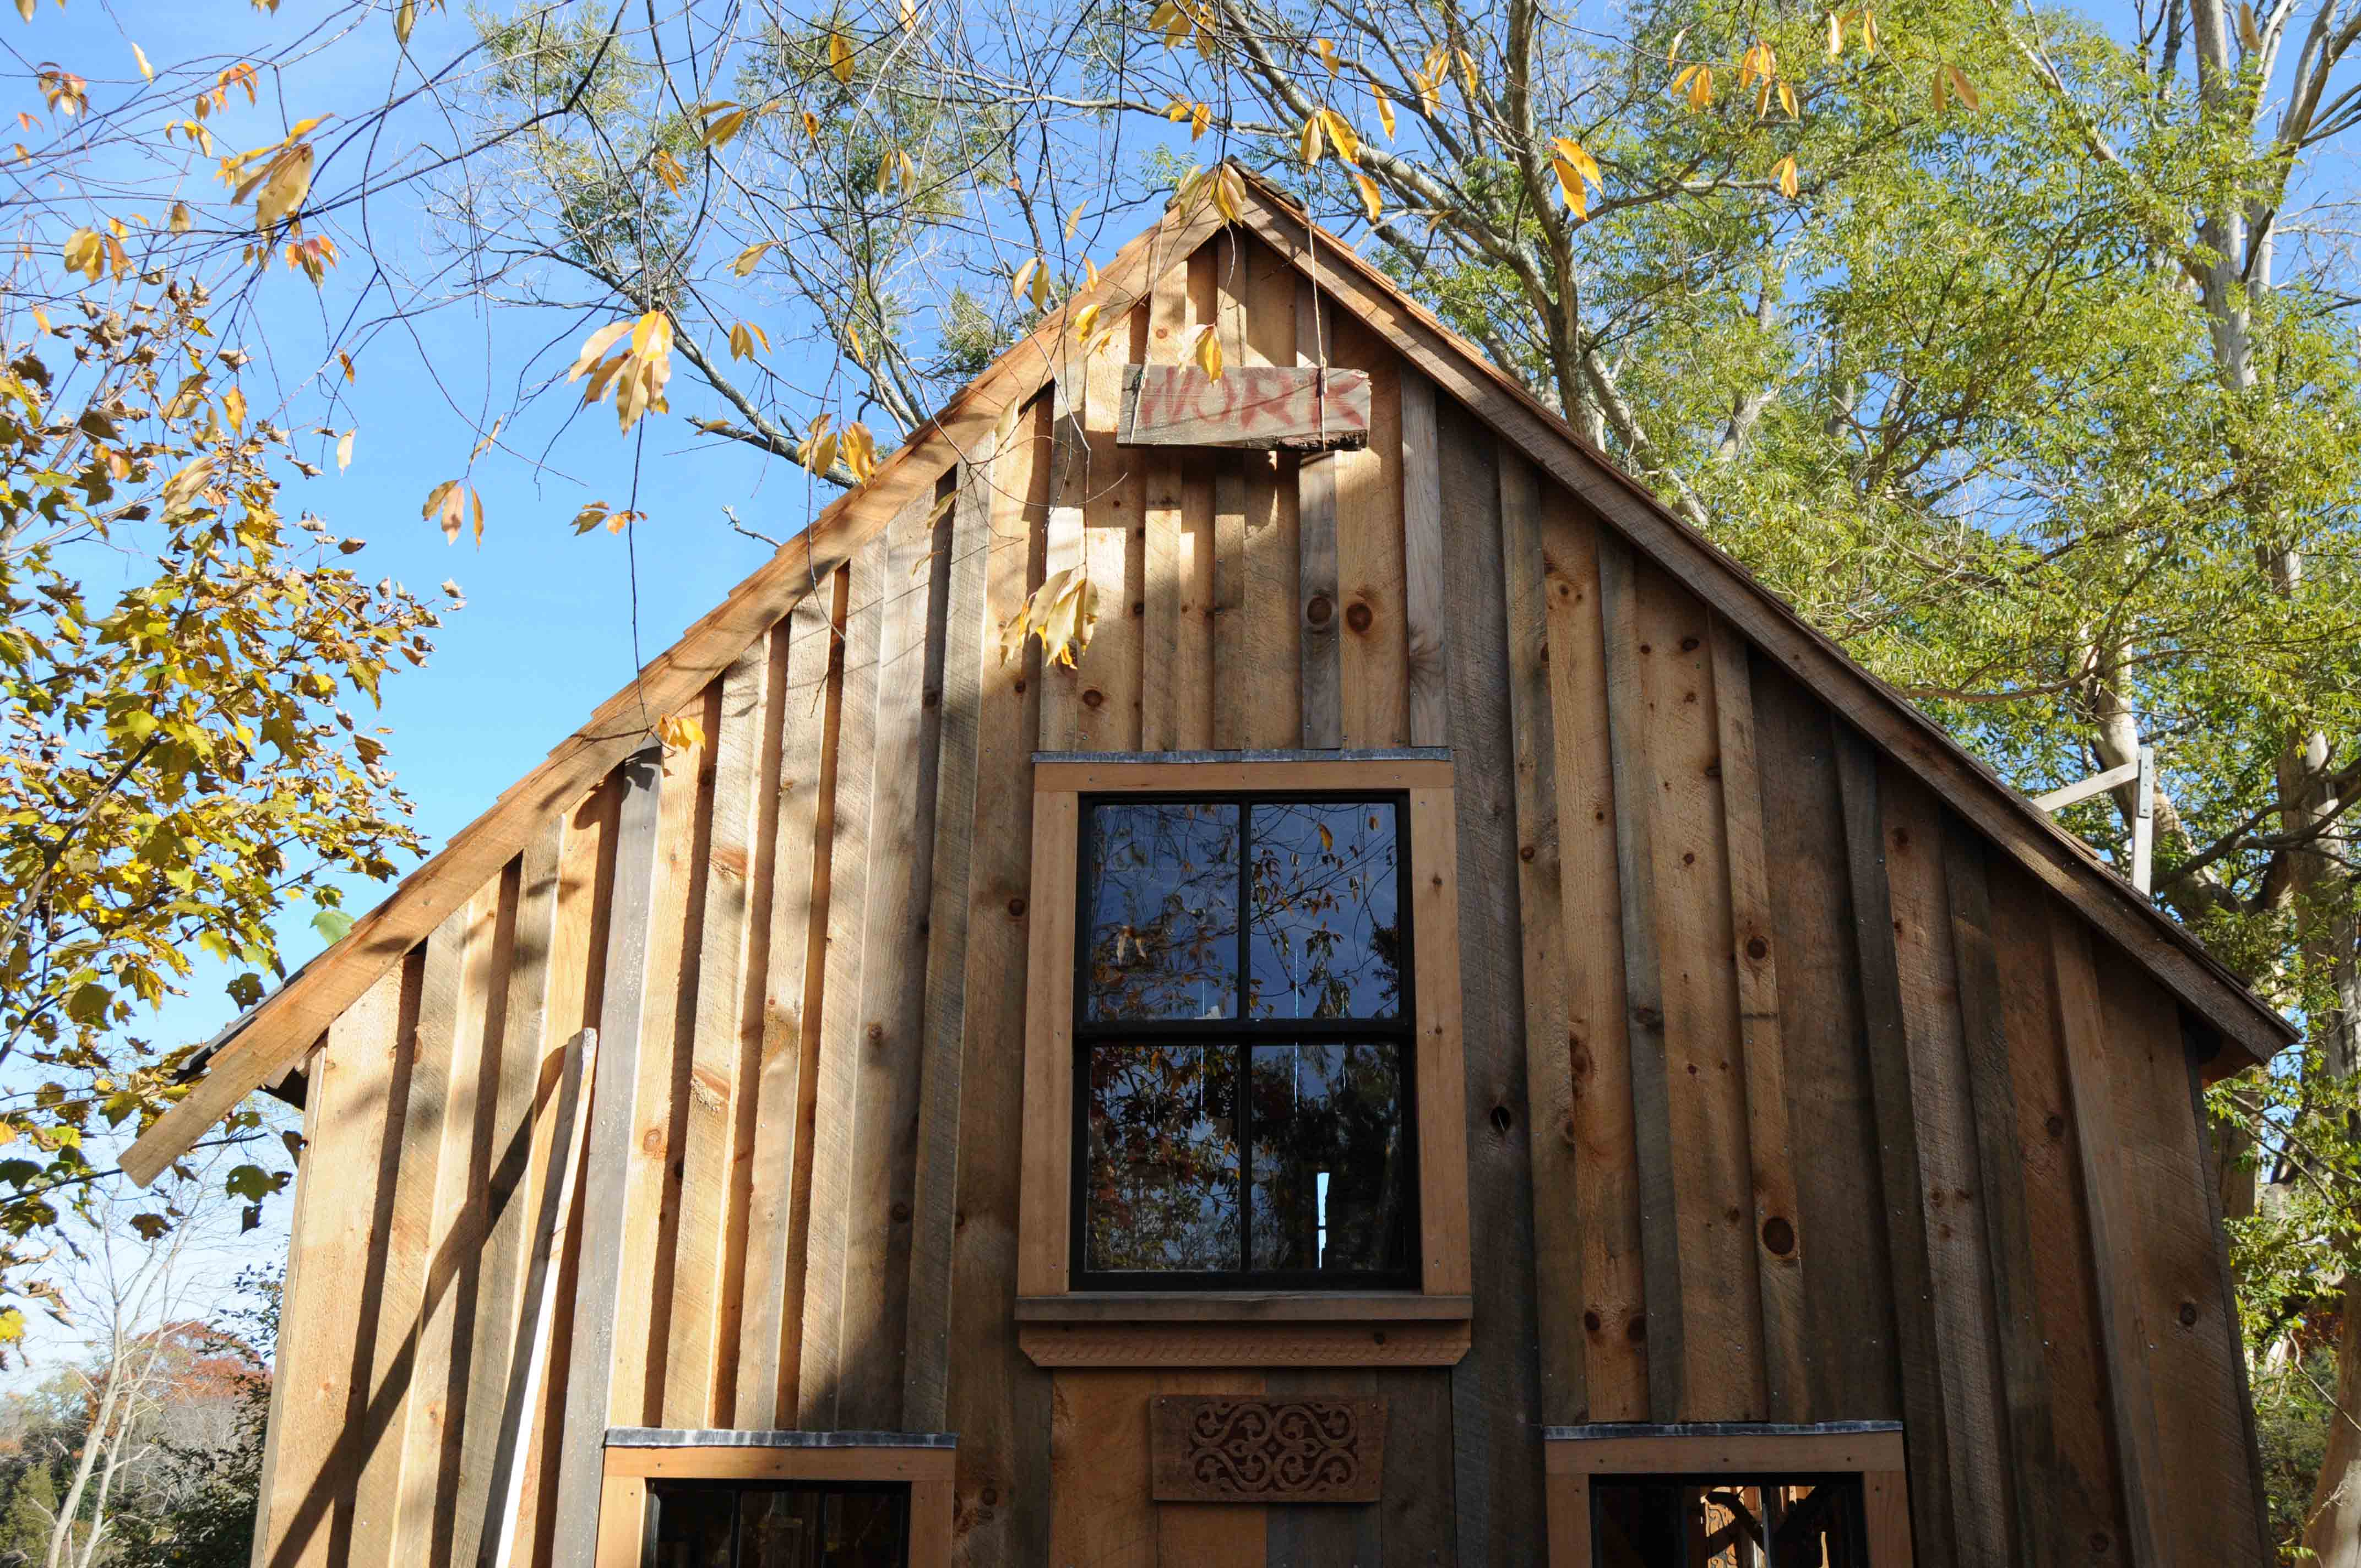
and Daniel’s sign he put on the shop’s peak:

work

It was going to say “Workshop” but he ran out of room…

work-detail

Here’s more about the chest, back when I was making it.

https://pfollansbee.wordpress.com/2012/02/01/slow-going-on-the-paint-work/

https://pfollansbee.wordpress.com/2012/01/18/a-solution-to-too-much-blank-space/

https://pfollansbee.wordpress.com/2012/01/19/another-day-of-painting/

https://pfollansbee.wordpress.com/2012/01/12/it-was-the-rust-that-got-me/


Upcoming sharpening class w Tim Manney

chisel-edge

I am often telling readers of the blog to remember there’s a search button on the sidebar of the blog, to help you find stuff buried in the mists of time. But don’t search for “sharpening” because I almost never write about it. Today I was sharpening some chisels for this weekend’s session in joinery at the Connecticut Valley School of Woodworking. Lately, I’ve been using a honing guide from Lie-Nielsen and experimenting again (after 20+ years) with water stones.

chisel-sharpening
honing a chisel
ln-honing-guide
lie-nielsen honing guide
chisels-plural
ready to use

I use a broad range of sharpening stuff – still use natural oilstones for many things (drawknives, hatchets, turning gouges). I never teach sharpening as a stand-alone course for several reasons. Principally, I feel like I’m a student of it, not an instructor. And there’s people better qualified than me to teach sharpening.

One of whom is Tim Manney, and he’s coming down to Plymouth Craft to teach a 2-day class in grinding, sharpening, honing –  the works.

Tim Manney sharpening an adze

I remember seeing Tim at Woodworking in America one time, and he was cutting end grain pine with a drawknife – it was as smooth a surface as I had ever seen. Tim isn’t magical, just methodical. And good. Good teacher, good craftsman. Come join us November 12 & 13 – bring your derelict and dull tools. You’ll be amazed at what can be done with them. I’ll be peeking over some shoulders to see what I can learn…

http://www.plymouthcraft.org/an-axe-to-grind