some tool marks from 17th-century pieces

I’ve been slightly under the proverbial weather lately, so not in the shop much, and not organized enough to shoot anything when I am there.  I went last week to the Lie Nielsen event in Manchester, CT at the Connecticut Valley School of Woodworking. While I was there, I spent some time showing visitors some photos of tool marks on seventeenth-century furniture. I dug up a few of the photos here. Maybe we’ve seen some of these before, but often these things bear reviewing.

scribed mortise position

Scribing the location for mortises across the face of your stock? Why would a joiner mark his mortise here? I think it’s to lay out the two matching rails together. Mark one, then butt them edge-to-edge, and scribe the marks across the faces of both to ensure that the mortises in both rails agree.

scribed mortise for upper rail to stile joint

These two examples are from joined chests from Dedham, Massachusetts, circa 1635-1680. In some cases, this shop marked them across the outside face, sometimes even marked them on both outside and inside faces, i.e. scribed them all around the stock. Note that the one showing the upper rail-to-stile joint marks the upper end of the mortise below the end of the stile. The corresponding tenon will be stepped as well. This way the joint is not exposed at the upper end of the stile/upper edge of the rail.

carving layout w compass & awl

Same shop – the scribed layout for two half-circles that define the S-scrolls. Also we can see a line struck with a square and awl across the panel to get both centerpoints at the same height. Often you can also see a scribed line along the panel’s edge, to align the bottom set of half-circles with those at the top. (or vice versa)

numbering system on muntin

Here’s a favorite, a “carpenters” joint ID mark, on the inside face of a muntin on a joined chest front, Braintree, Massachusetts, c. 1640-1670. I’ll see if I have the other two muntins from this chest – they help show the scheme of this numbering system. It amounts to a sort of Roman numeral identification.

inside chest of drawers rear stile & lower rails

The inside of a chest of drawers from Boston, c. 1635-1680s showing the awl layout for the edges of the mortises; also here some riving marks, hewing marks from the joiner’s hatchet. Most notable is the timber – not oak, but Spanish cedar, or cedrela. About as light as oak is heavy. Some Spanish cedar is ring porous, so rives well like oak. Some is diffuous  porous, with interlocked grain, like its cousin, mahogany.

inside surface on table apron

Here’s the inside face of the apron of a joined square table, late 17th-c; NewburyMassachusetts. Riving marks, foreplane shaping, hatchet work. No smooth plane work at all.

pitsawn board


Pitsaw marks on the underside of the wainscot chair thought to have belonged to Edward Winslow of Plymouth. If it’s really Winslow’s, it’s quite early. I think he booked back to England by the mid-1640s. Pitsawn evidence on furniture from New England is quite rare. Even without the saw marks; the grain orientation and the knot indicate “not riven” stock. but in this case, not mill-sawn either.

that’s enough for now. hope you like them.

Lie-Nielsen hand tool event this weekend


a quick note to remind any locals, (or semi-locals – I’ve found people travel quite a ways for these things) that I’ll be at the Lie-Nielsen Hand Tool Event in Manchester, CT this Friday. http://www.lie-nielsen.com//?pg=1 No doubt I’ll be doing some carving, and I’ll have some boxes around… (I’ll only be there Friday this time, but the other stuff is both days, I imagine.)

the host is the Connecticut Valley School of Woodworking, run by Bob Van Dyke – here’s their website: http://www.schoolofwoodworking.com/

I haven’t been to Bob’s place before, but from the looks of it, there’s lots of great classes that happen there. Should be fun.

this is only a test

Not about woodworking – the last post I did generated over 1,000 spam comments for me to deal with…I went in & shut off comments for that post, so now I wanted to see if the problem persists. I wasn’t ready for another woodworking post – so you get to see some birds I caught last week. It was my mother who got me interested in birds; and cedar waxwings were the first birds we ever identified with a field guide, probably 45 years ago…I still have my mother’s copy of Peterson’s guide that we used to find these guys. and waxwings have been a favorite of mine for many years for that reason. PLUS this small flock showed up here on Mother’s Day.

if the spam goes away, it’s back to woodworking after the weekend. fingers crossed.

cedar waxwing


Link to CloseGrain re SAPFM demo

shaving a pin
 
If you are inclined, Steve Branam has written up a lengthy post about the demo I did for SAPFM last weekend at Phil Lowe’s Furniture Institute of Massachusetts. Many photos, a couple of videos. Thanks to Steve, Phil, Freddy Roman and all who showed up for the day. I appreciate the chance to shed light on the 17th-century work.  


I just copped the above photo from Steve’s site. While you are there, if you haven’t seen his stuff, look it over. He did a similar report from SAPFM last month, visiting Paul Lelito’s bandsaw mill. http://www.closegrain.com/2011/04/sapfm-new-england-chapter-april-meeting.html

 
Further links, if you missed them before:
 
Society of American Period Furniture Makers  http://www.sapfm.org/
Furniture Institute of Massachusetts  http://www.furnituremakingclasses.com/


workbench height

I know that I am a creature of habit, maybe most woodworkers are. Working alone in the shop, we develop patterns, methods and habits that through repetition become second nature. Then, off to a traveling demonstration and that’s when things become, well, different.

 What I noticed when I got back to my shop from the most recent foray is bench height. Mine’s mighty low, and I like it that way. We have sometimes read that older benches were low to account for the amount of planing that pre-industrial woodworkers did in such quantity.

planing at the bench


Looking at the Dominy workbenches at WinterthurMuseum, they are really low – the longest bench is 29” high, the others a fraction higher. Forget the notion that “they” were smaller back then, any difference in average height across the years is pretty negligible. Especially considering my height at about 5’9” which is as average as you can get. (here’s the main workbench from the Dominy shop – I copied this from Charles F. Hummel, With Hammer in Hand: The Dominy Craftsmen of East Hampton, New York (University Press of Virginia for the Henry Francis duPont Winterthur Museum, 1968)

Dominy bench

So for planing a low bench allows you to lean into the work and use your lower body in addition to your arms. Fine & dandy, but what about carving? Many carvers prefer a higher bench, feeling that they are not hunched over as much.

 As I have said before, I learned 17th-century carving from the objects, not from any craftsman. So it might be that my methods are bunk, but they get the work done, and I think the results bear a close resemblance to the originals. My recent “discovery” is that with such a low bench, I can lean all the way over the carving, and really get right on top of it. Working last week at a higher bench, I was sort of lost at sea; and couldn’t figure out what was happening until I got back to my bench.

carving at the workbench

My joiner’s workbench is 32” high, comes to about my knuckles when I stand at it with my arms dropped down at my side. My store-bought German workbench is just over 34” high.  I checked the specs on some modern woodworking benches offered these days, and 35″ seems to be almost a standard height now.

leaning over the carving

Another task that a the low height is helpful with is mortising, both with a mallet:

mortising
 

And with hand pressure. Well, it’s more than just hand pressure. I use my lower body to help drive the tool here, and that’s where the low bench height is a benefit. I rise up on the ball of my foot, and shift my weight to bring the tool downwards…

mortising w hand pressure

Anyway, low  bench height can be a good thing. For some people with weird habits. So if you want to experiment with a lower bench height, before you go cutting your bench’s feet off, you can try to lay a board to stand on, even prop it up on timbers if you need to come up more. It might be worth a shot.

Back when I first made this bench a friend of mine tried it & said it was the worst bench he’d ever used! But his legs are too long.

video of splitting a large oak

Not me tonight, it’s a link that was sent to me by SAPFM member Joe Barry. I did my demo for the Society of American Period Furniture Makers at Phil Lowe’s shop last weekend, and while I was splitting a section of white oak, someone mentioned this Danish project. It’s a very nice short film, most of the sounds are a giant oak busting open, and lots of birds making a ruckus. How can you beat that?


Note that they use a technique taught to me by Jennie Alexander and Drew Langsner; to split the log, first score it along its diameter – in this case they use a wooden beetle driving their axe; Alexander used a large, dull hatchet. I use my wedges, and just tap them along to score the end grain. Really helps get the split started.

http://vikingeskibsmuseet.dk/index.php?id=1364&L=1&no_cache=1&sword_list[0]=oak

spoon work


rhododendron spoons


One thing I have been picking away at recently is another bunch of spoons. I cut a rhododendron tree that uprooted in early March… I made a few spoons from it, and really liked working it.  Sometimes the challenge is “seeing” the spoon in the crook. This one in particular is perplexing; I have had it around for over a month & a half. Every so often I would look it over, and try to plan my cuts into the stock.

how many spoons

Another view;

sometimes come at it from another angle


Finally took the plunge the other day.

first one from that section

At the same time I got a bunch of cherry limbs, so I have lots of spoon stock for the warmer days coming. I hew them either at home in the back yard, or in the shop. then the carving is portable, and I do that while watching the kids; in the yard, at the playground, etc.

cherry limb

 Then I cross-cut it, before splitting.

spoon blank in cherry

Splitting the cherry is sometimes tricky. Once I cross-cut the section I want, I usually hew away the bark along the edges where I want it to split. This photo came out like X-ray vision, but it’s a benefit here, because you can see where the hatchet is going, and the crook-ed shape of the spoon blank.

X-ray hewing

I think this is the spoon that came from that blank

small cherry spoon

Here’s the other view

showing the crook shape

Here’s an earlier cherry blank, and the spoon-in-progress that I have worked from it..

cherry ladle blank


Now the spoon laid back where it came from

 
the spoon in the shape
But today, it’s time to chase birds.
 
yellow warbler
 one last one, an early morning –
 
wood duck flight
 

carving bits & pieces

still here

I haven’t forgotten the blog – just been very busy, and had little time for photographs. That’s usually how I work a blog post – I shoot something, then write around it. Sometimes it’s the other way around but still I need the pictures for it to make sense.

 I have two wainscot chairs to make this spring – I seem to specialize in them in recent years, which suits me fine. These are reproductions to take the place of “whereabouts unknown” originals – so many details are from whole cloth; these chairs are becoming a medley of 17th-century ideas.  

one carving begun

At this point, I have little to show other than some carvings underway, and some rails with scratched moldings. Here’s a couple of shots of one carving in particular.

guillochge defined

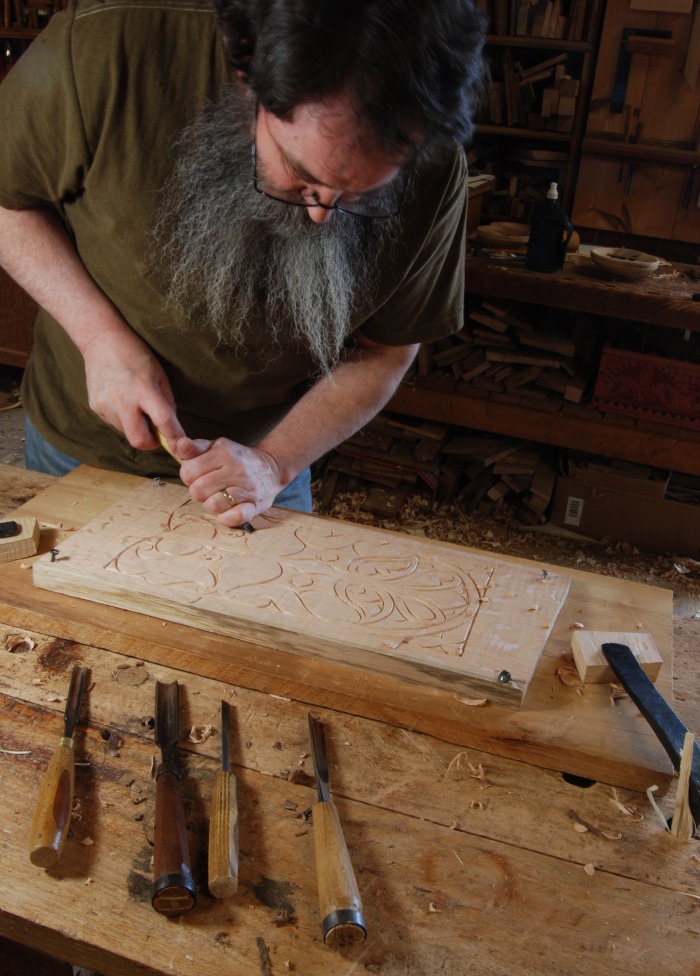
 This is a pattern now termed a “guilloche” – a run of overlapping circles. This time it’s done without a V-tool, just outlined with a compass, then cut with three gouges, plus a very shallow one for shaping. So 4 carving tools & a compass and marking gauge. This section is just a muntin in the chair back, so quite short  – maybe 12″ of pattern.

finished carving
 
Here’s a section where I tested which tools to use for this scale, the whole piece is 3 1/2″ wide, so the circles are less than 2″ in diameter. on a small scale like this, the V-tool often can’t turn tight enough, so cutting it with the gouges works well for this small pattern.
 
test section