My timing almost couldn’t be worse, but I have some items finished for sale. They can’t come in the house, in fact two were bumped out. In between driving places and eating voraciously, have a look. If you’d like to purchase any of it, just leave a comment here & then I will either send a Paypal invoice or you can send a check. But leave the comment so I can mark the items as sold.
The main problem with my timing is that I’ll be away from December 4-15 or so. That means the larger items; the joined chest, carved box, joined stool, won’t ship until December 17th. Should be fine for those who are holiday shopping. But just so you know…
There’s a lot of stuff – the furniture first, then 5 spoons down below, and after them, something new for me – birch bark containers. The smaller stuff I can mostly likely ship before I leave on Wednesday next week.
to order something, leave a comment, if you have questions, email me peterfollansbee7@gmail.com
Thanks everyone. I appreciate all the support I get here for my craftwork.
PF
—————–
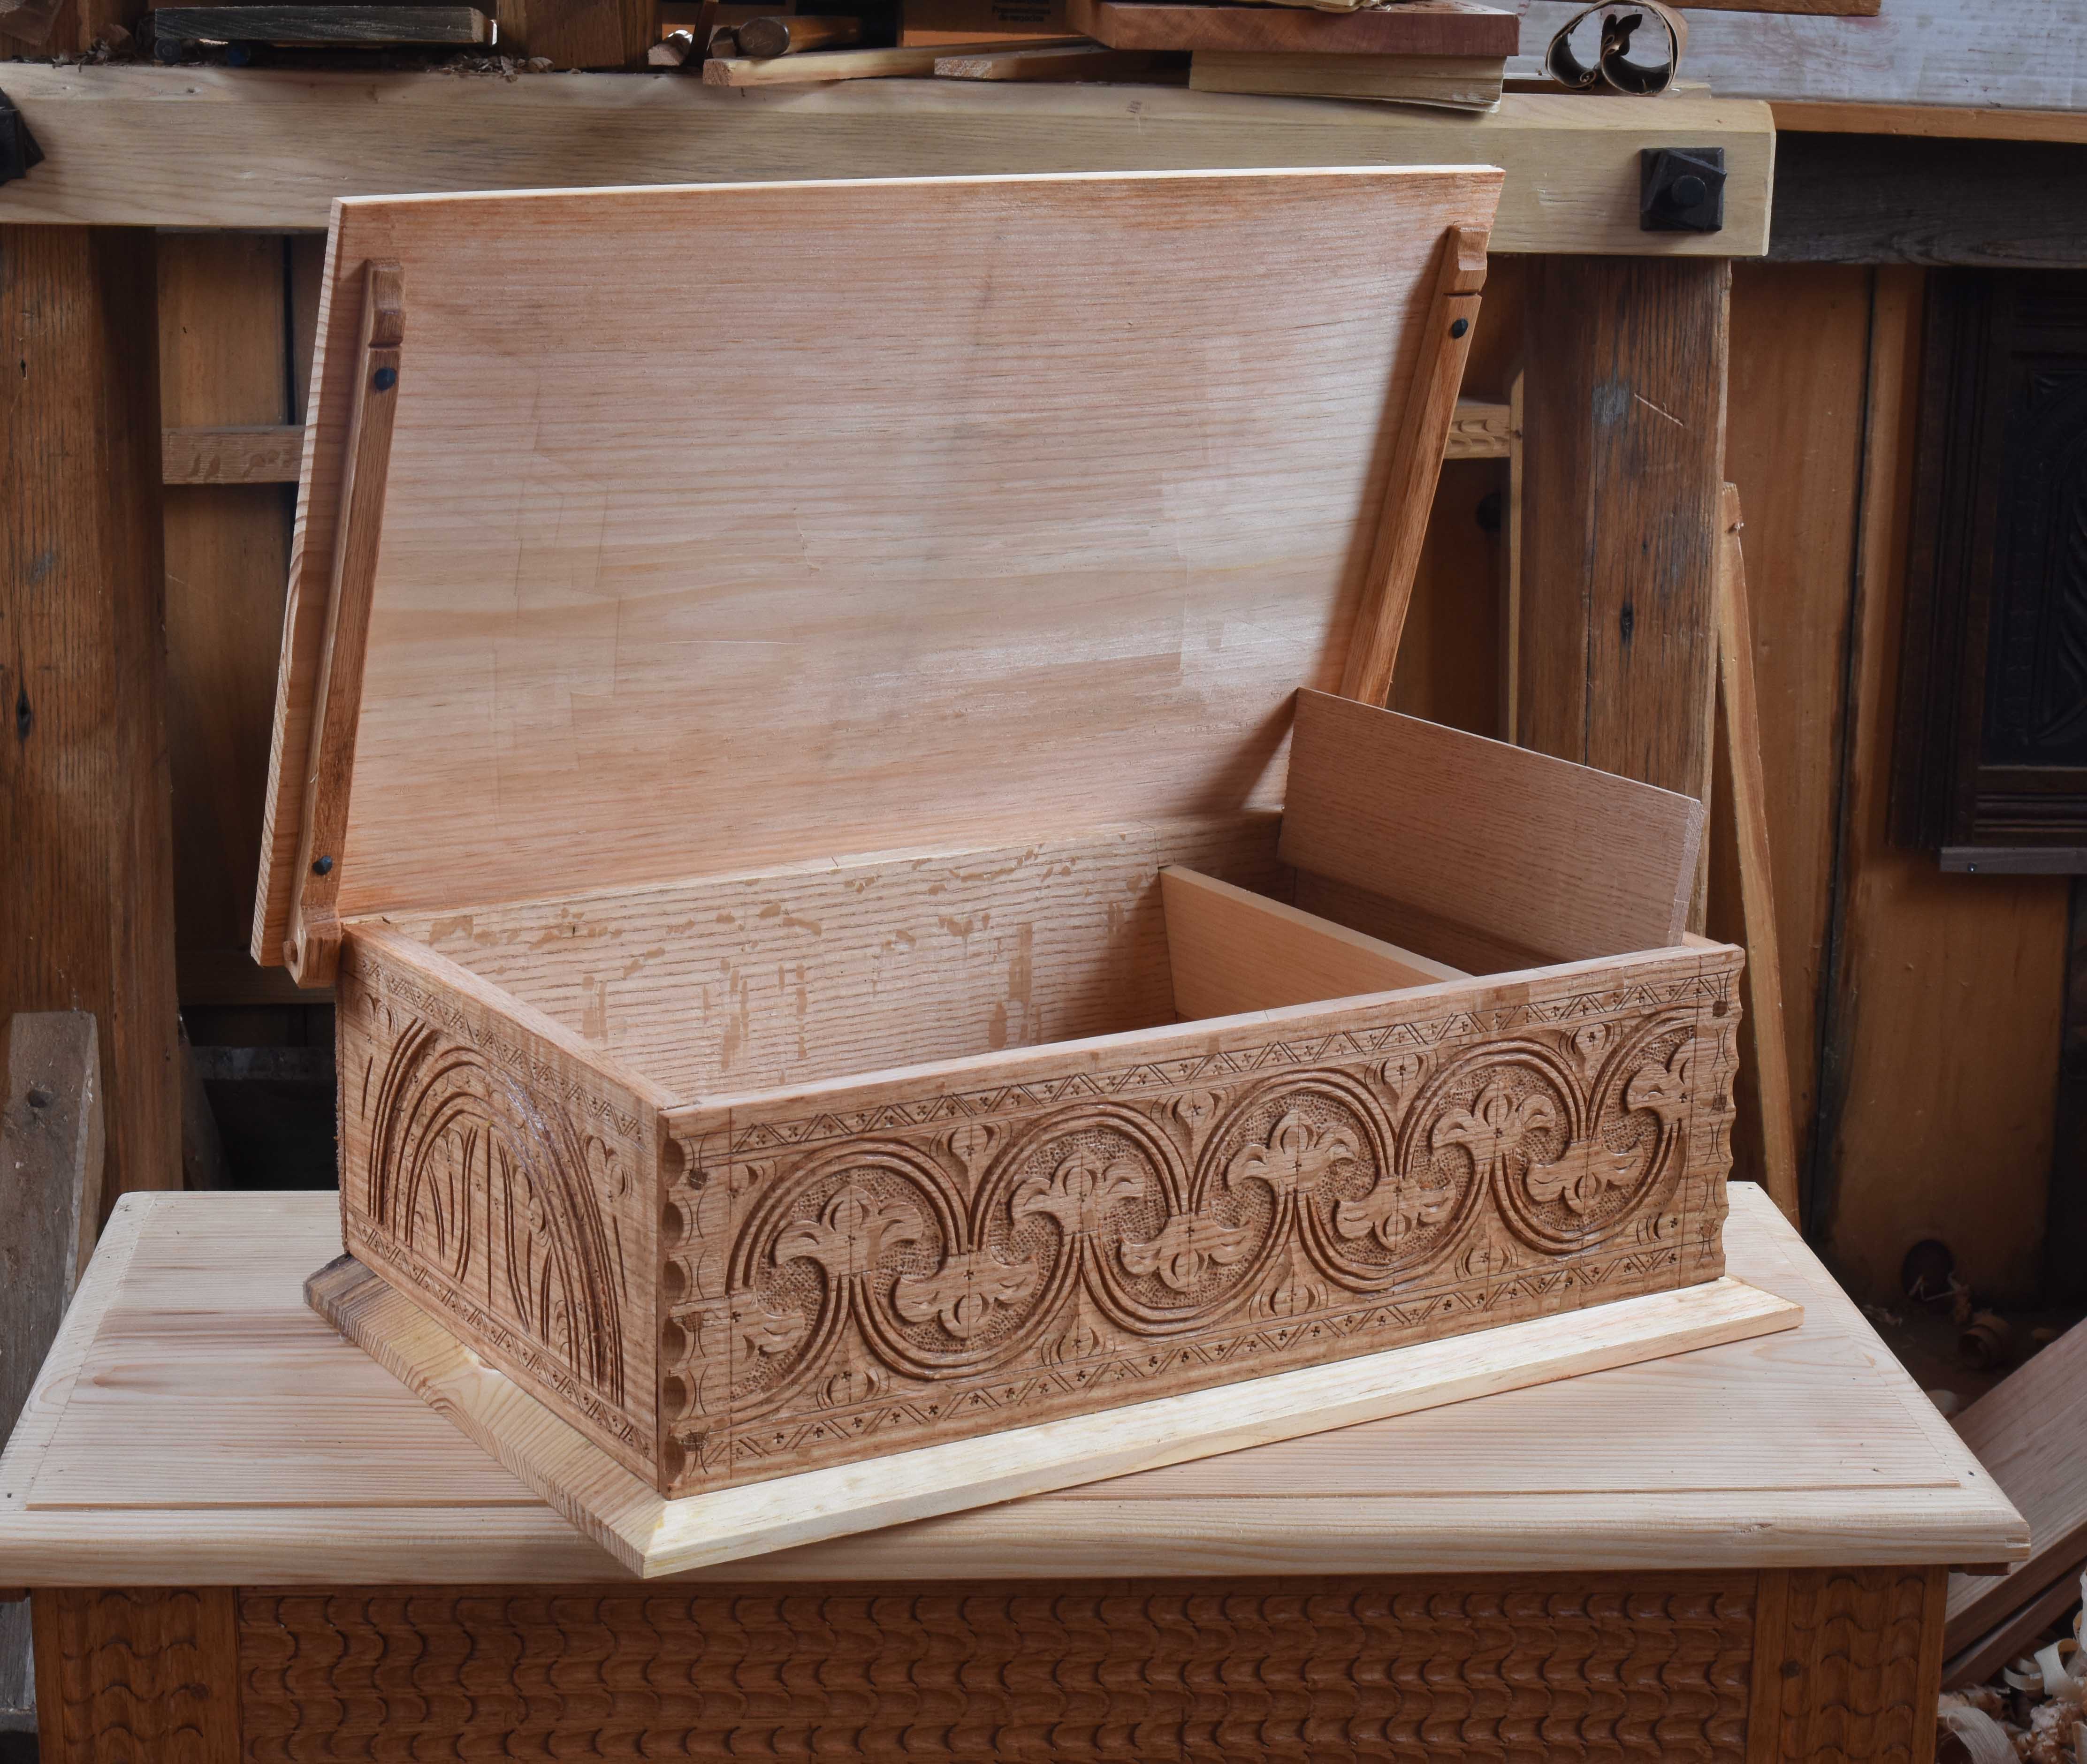
CARVED OAK BOX; SOLD
red oak, with white pine lid & bottom. Till inside. I just made this box recently as a model for the class I’m teaching at Lost Art Press in December.
H: 7 1/2″ W: 22″ D: 13 1/2″
$900 plus shipping


———————
CHIP CARVED BOX W SLIDING LID; SOLD
Spanish cedar and white pine.
H: 4 1/2″ W: 16 3/4″ D: 7 1/4″
This box was made from leftover Spanish cedar from the chest of drawers I built this summer and fall. Dovetailed & chipcarved. The lid slides in grooves in the sides and end.
$600 plus shipping


————————-
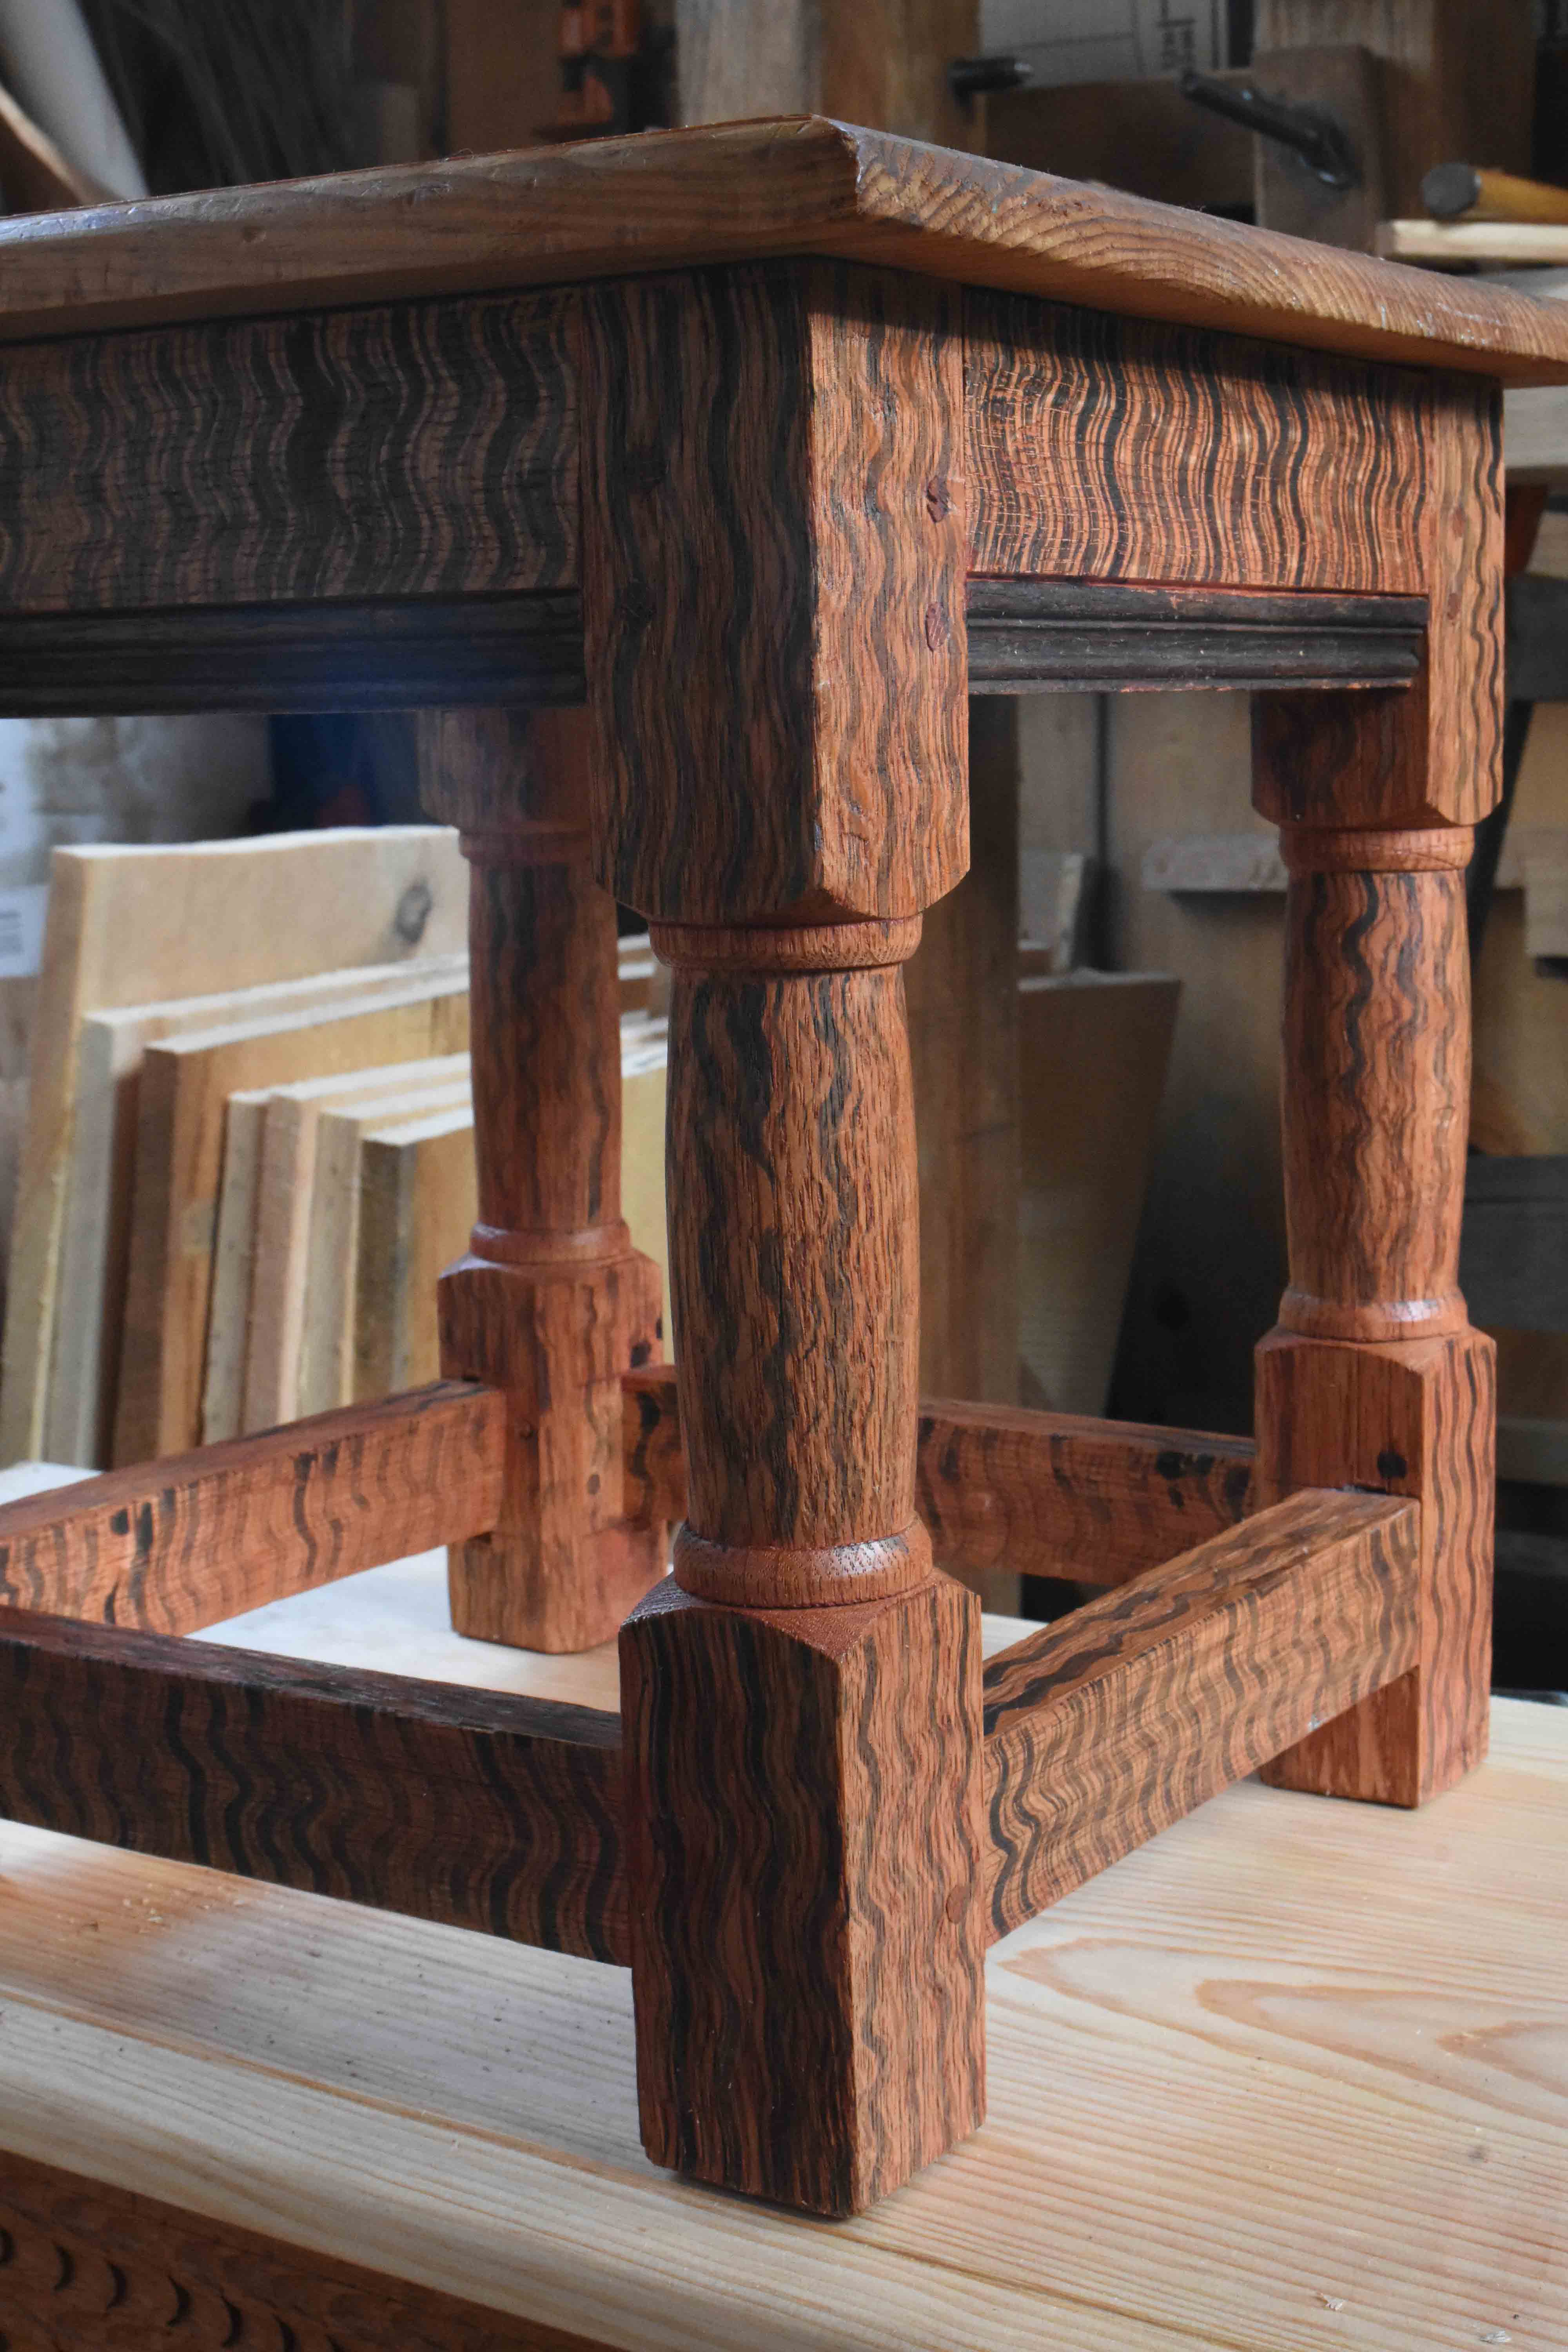
JOINED STOOL; red oak and white pine SOLD
H: 15 1/4″ W: 14 3/4″ D: 14 3/4″
Red oak with a white pine seat. Iron oxide mixed in linseed oil, with lampblack squiggles for the finish.
$600 plus shipping.
This little joined stool is not new. I made it a few years ago, and completely forgot it was in the house. We found it when we moved stuff around to get the chest of drawers in place. So I took it to the shop, gave it a fresh coat of linseed oil and here it is. Priced as “gently used” –


——————-
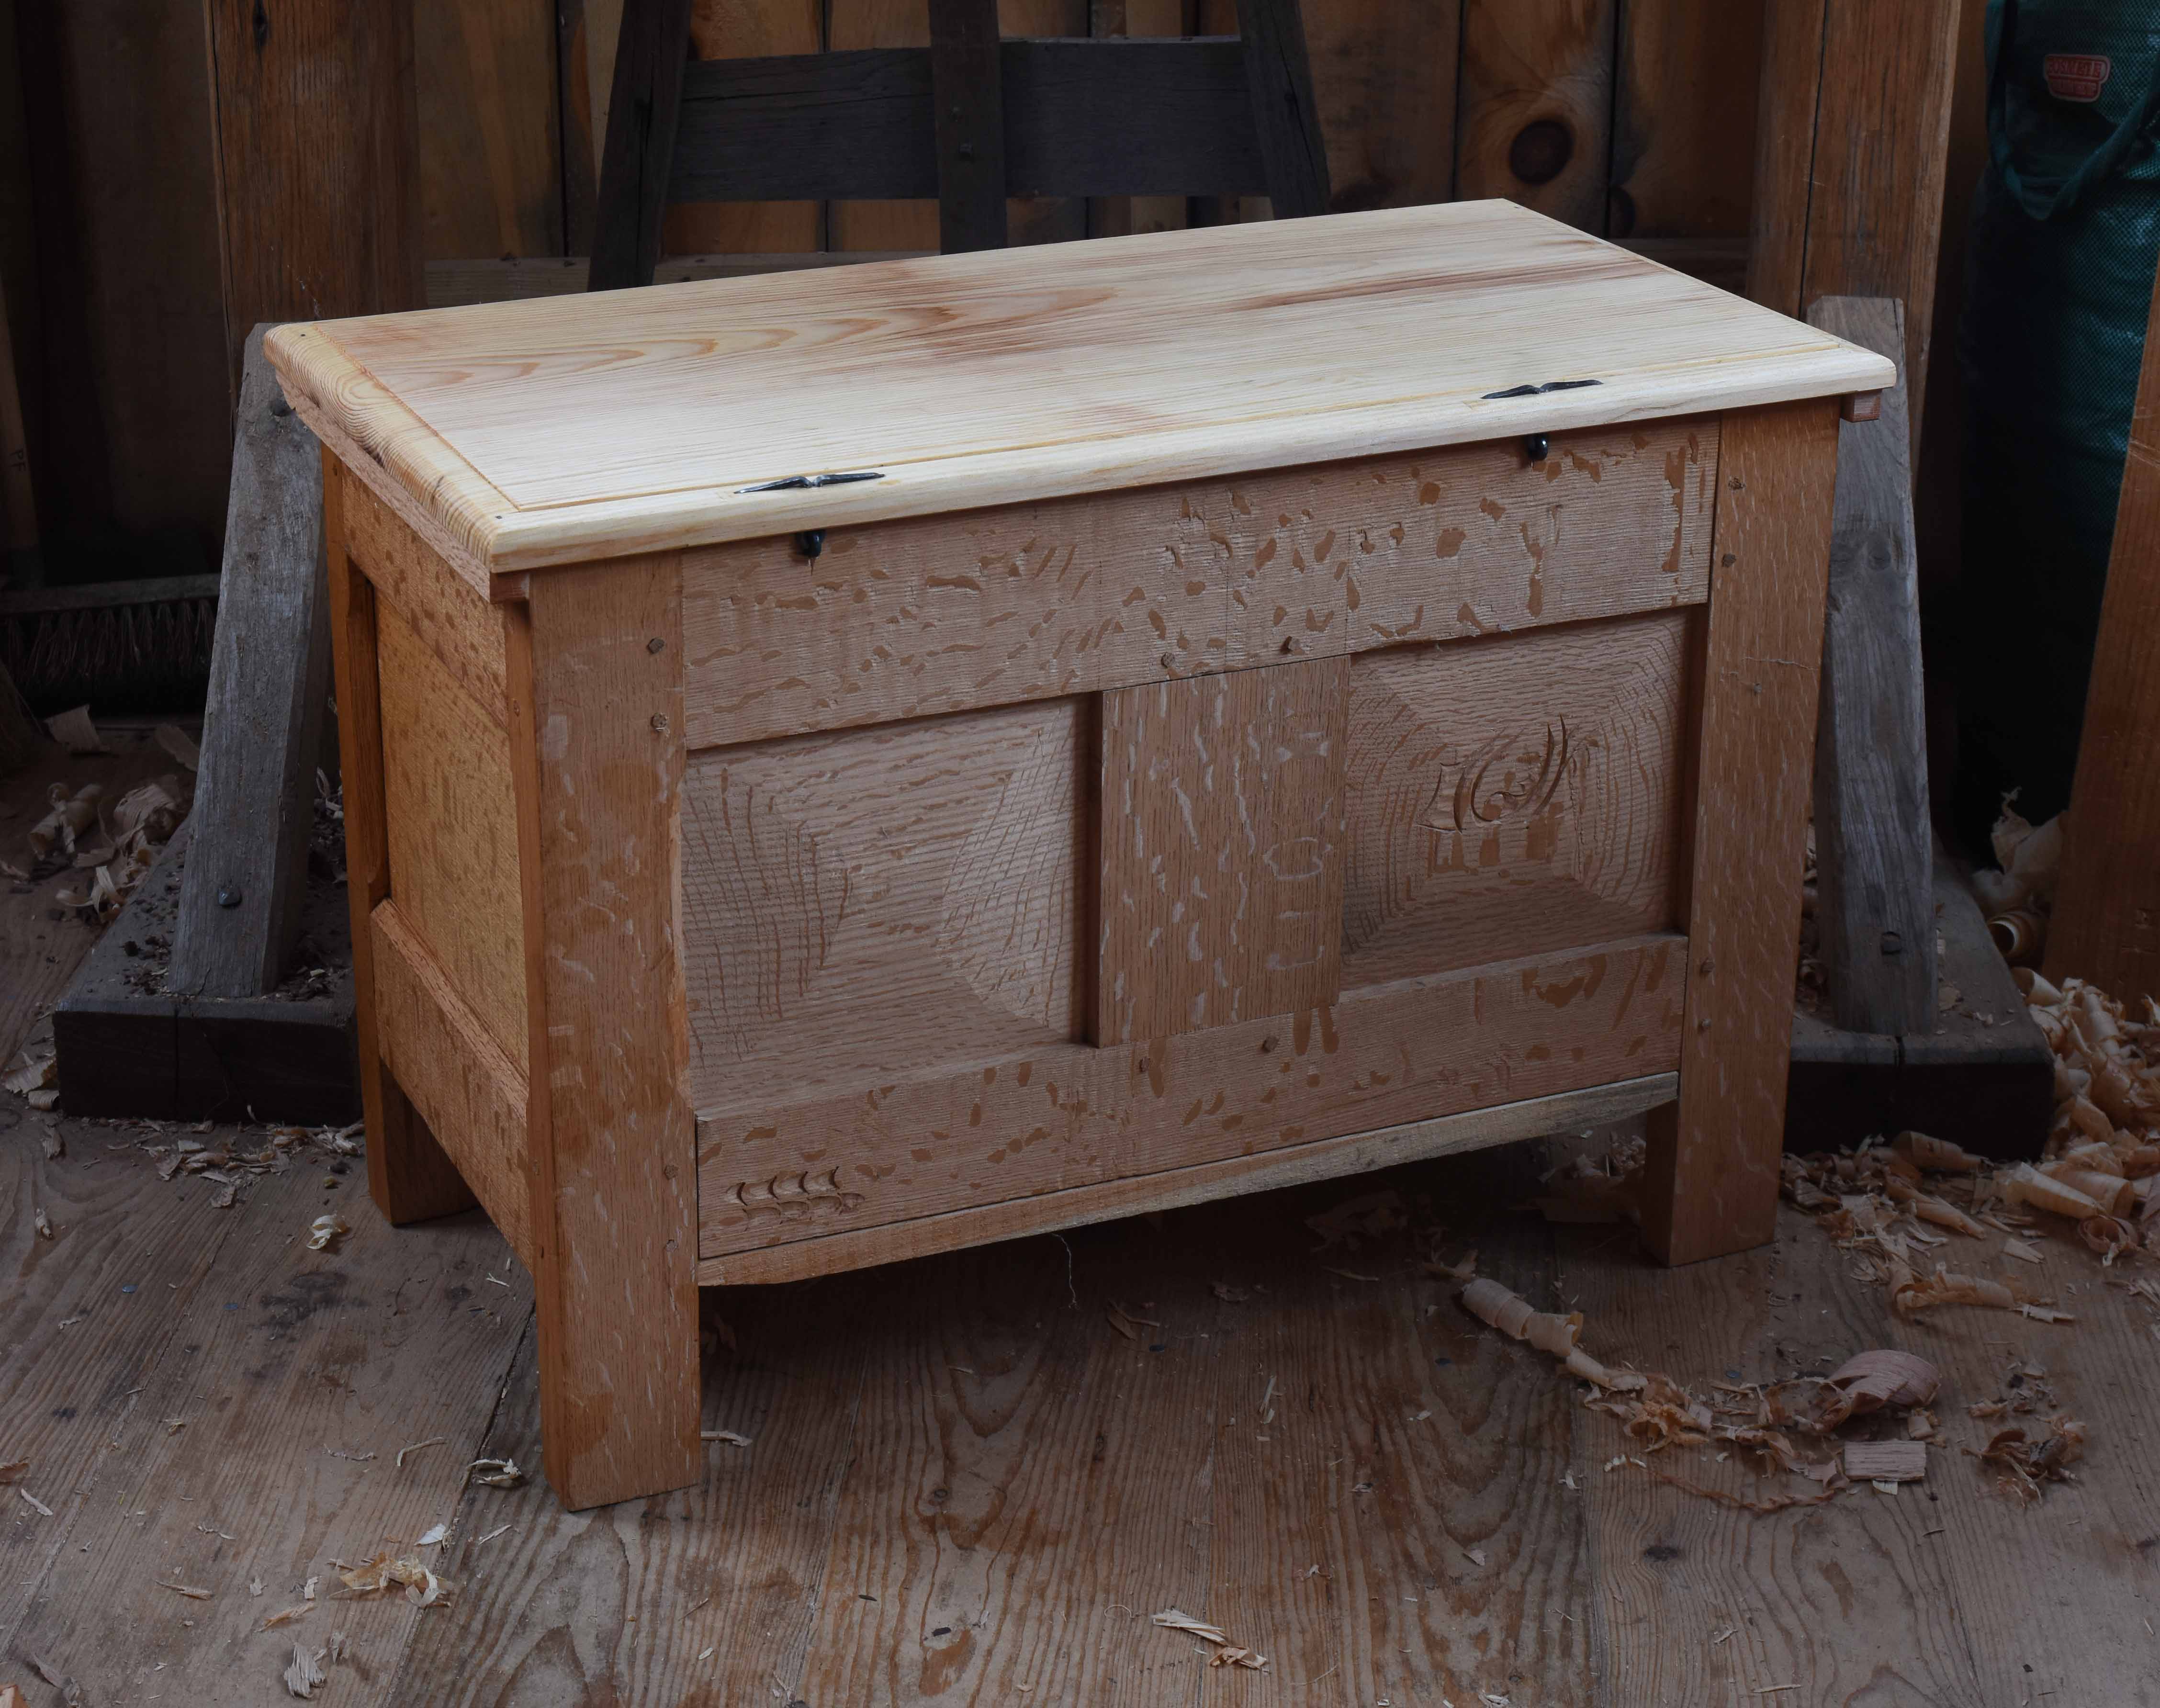
JOINED CHEST
Oak with a pine lid and bottom, till is oak & chestnut.
Dimensions are H: 21″ W: 30 3/4″ D: 16 1/2″
$3,000 plus shipping.
This one was in the house, but we knew it. I just put a lid on it after several years. I wrote it up a week ago or more, but just added it here so all the items for sale are in one place. (you can read the lowdown here: https://pfollansbee.wordpress.com/2019/11/17/a-small-joined-carved-chest-for-sale/


———————
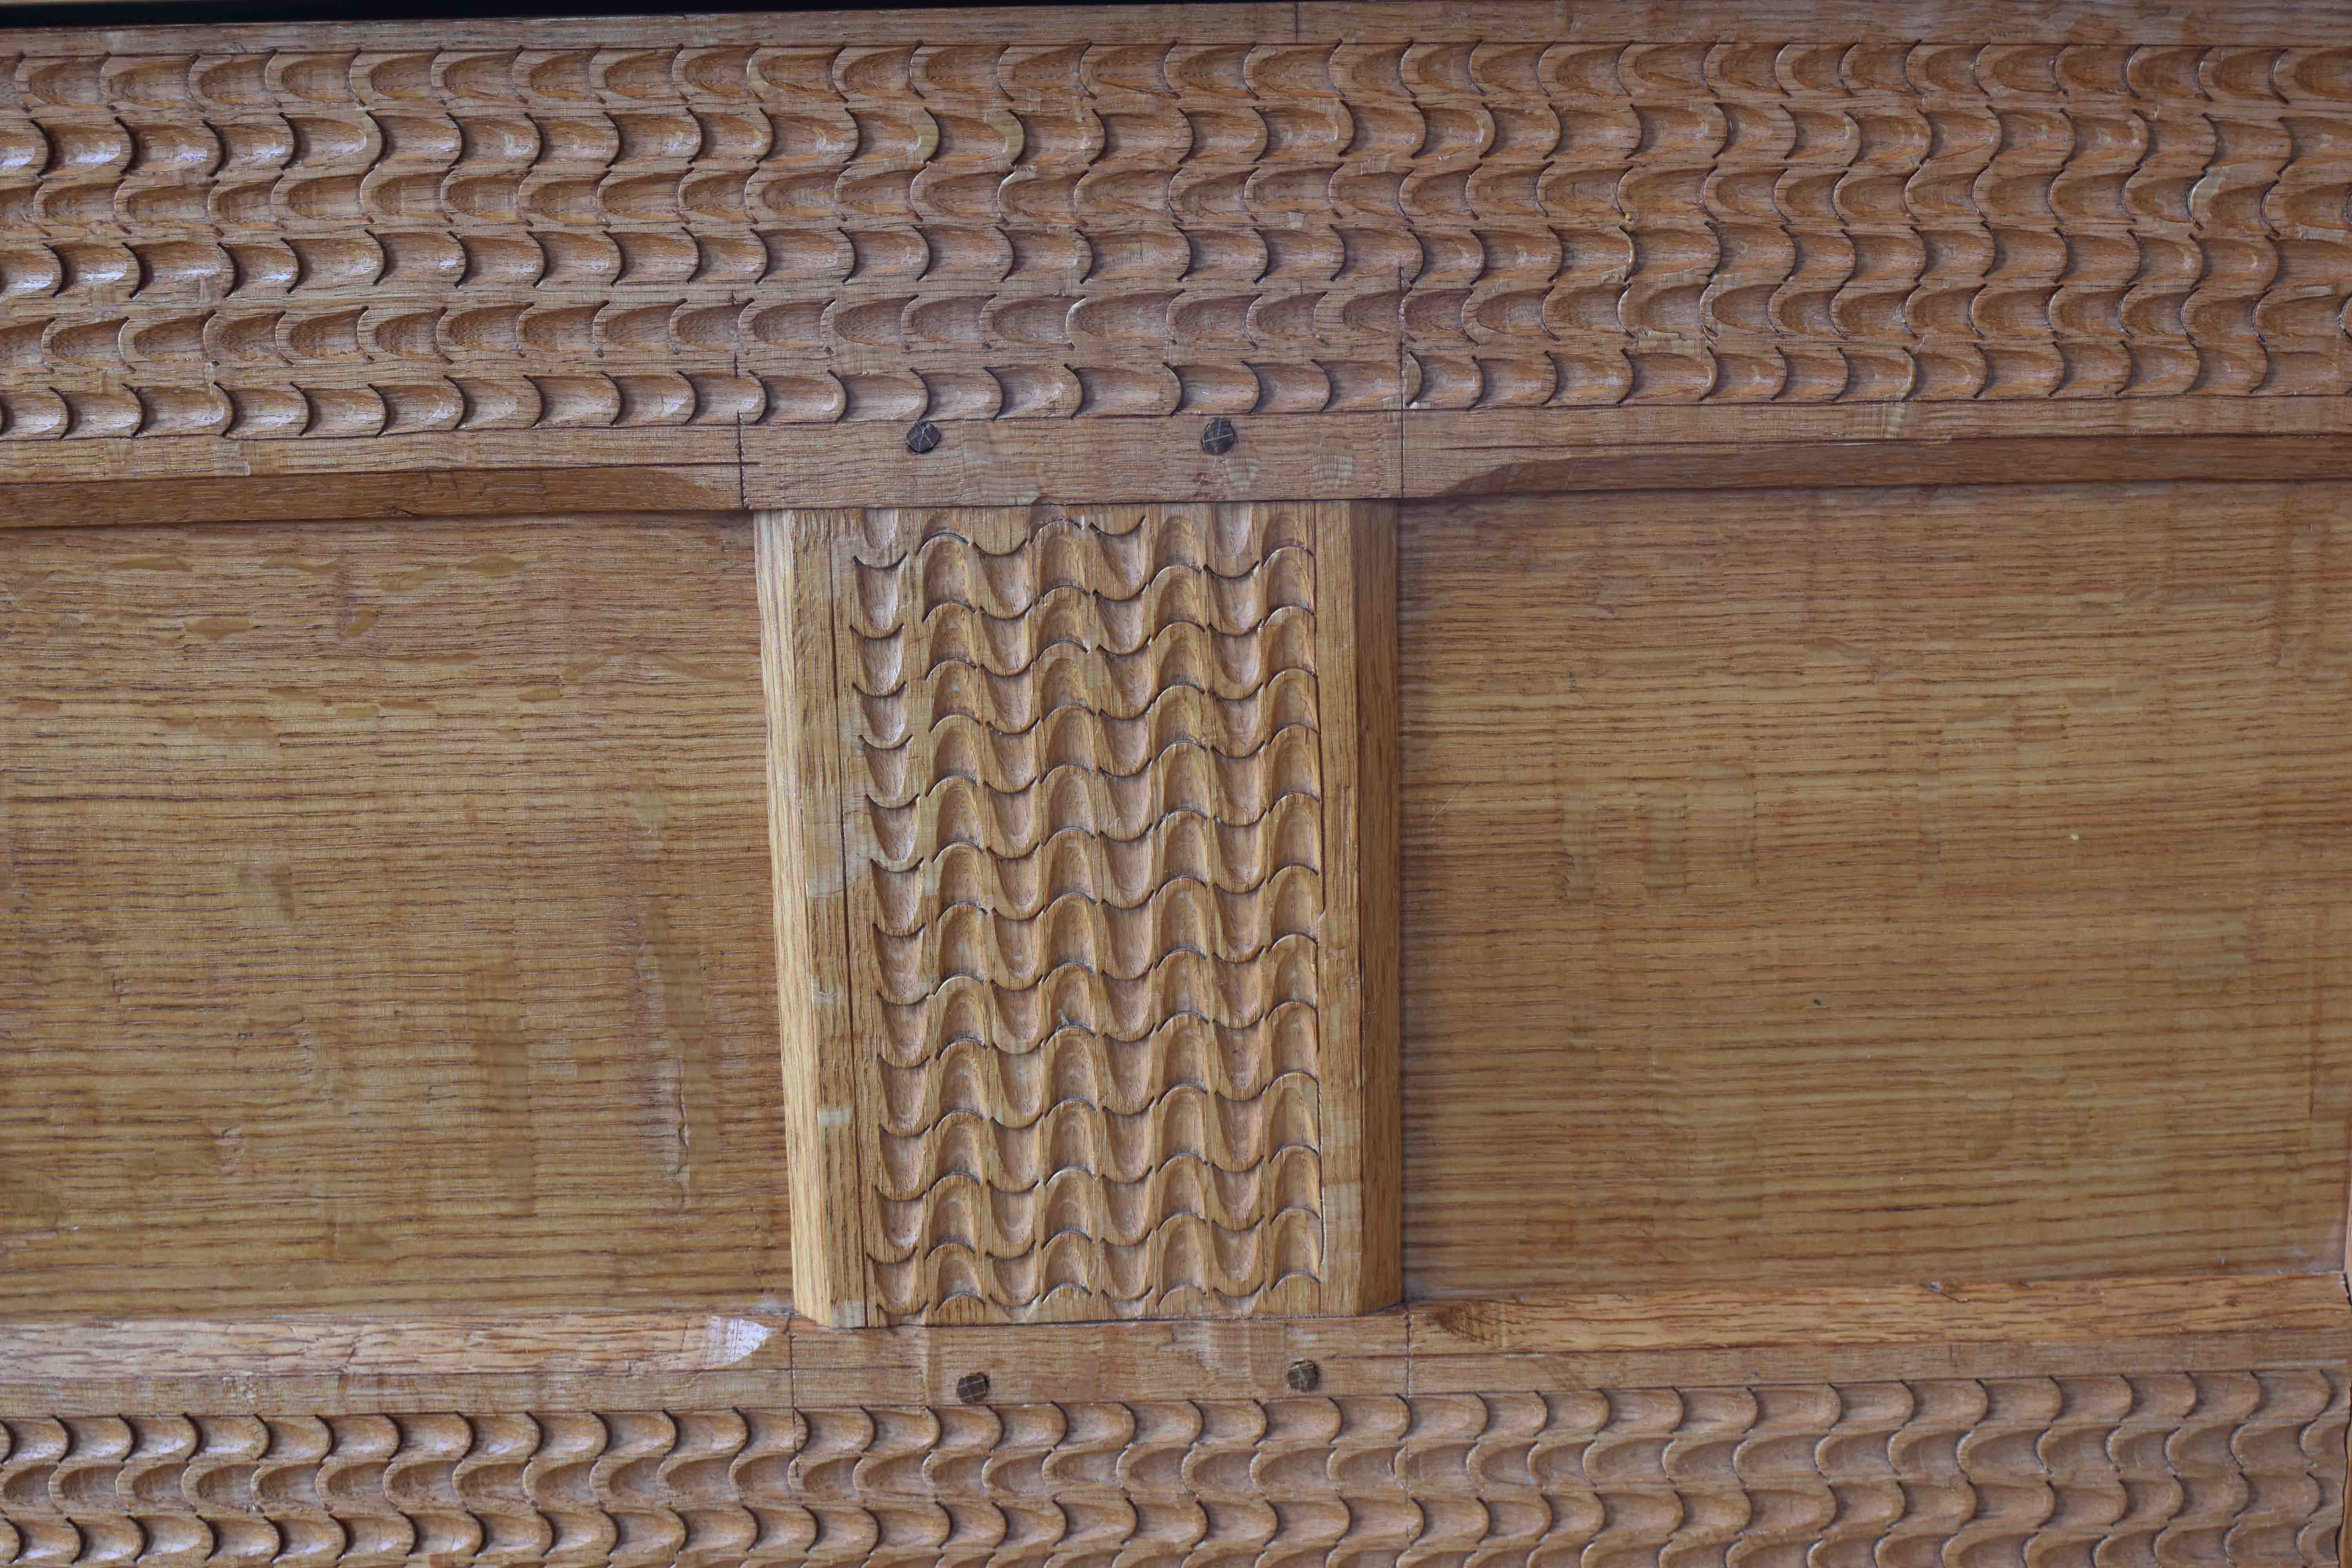
CARVED FRAME & PANEL SOLD
H: 17 1/4″ W: 13 3/4″
$500 including shipping in US.
It’s been a while since I made one of these carved frame & panels. I forget why, but I had the panel first, then made a frame to go around it. To turn it into a cupboard would be more work than I have time for, so it’s a wall hanging.

—————
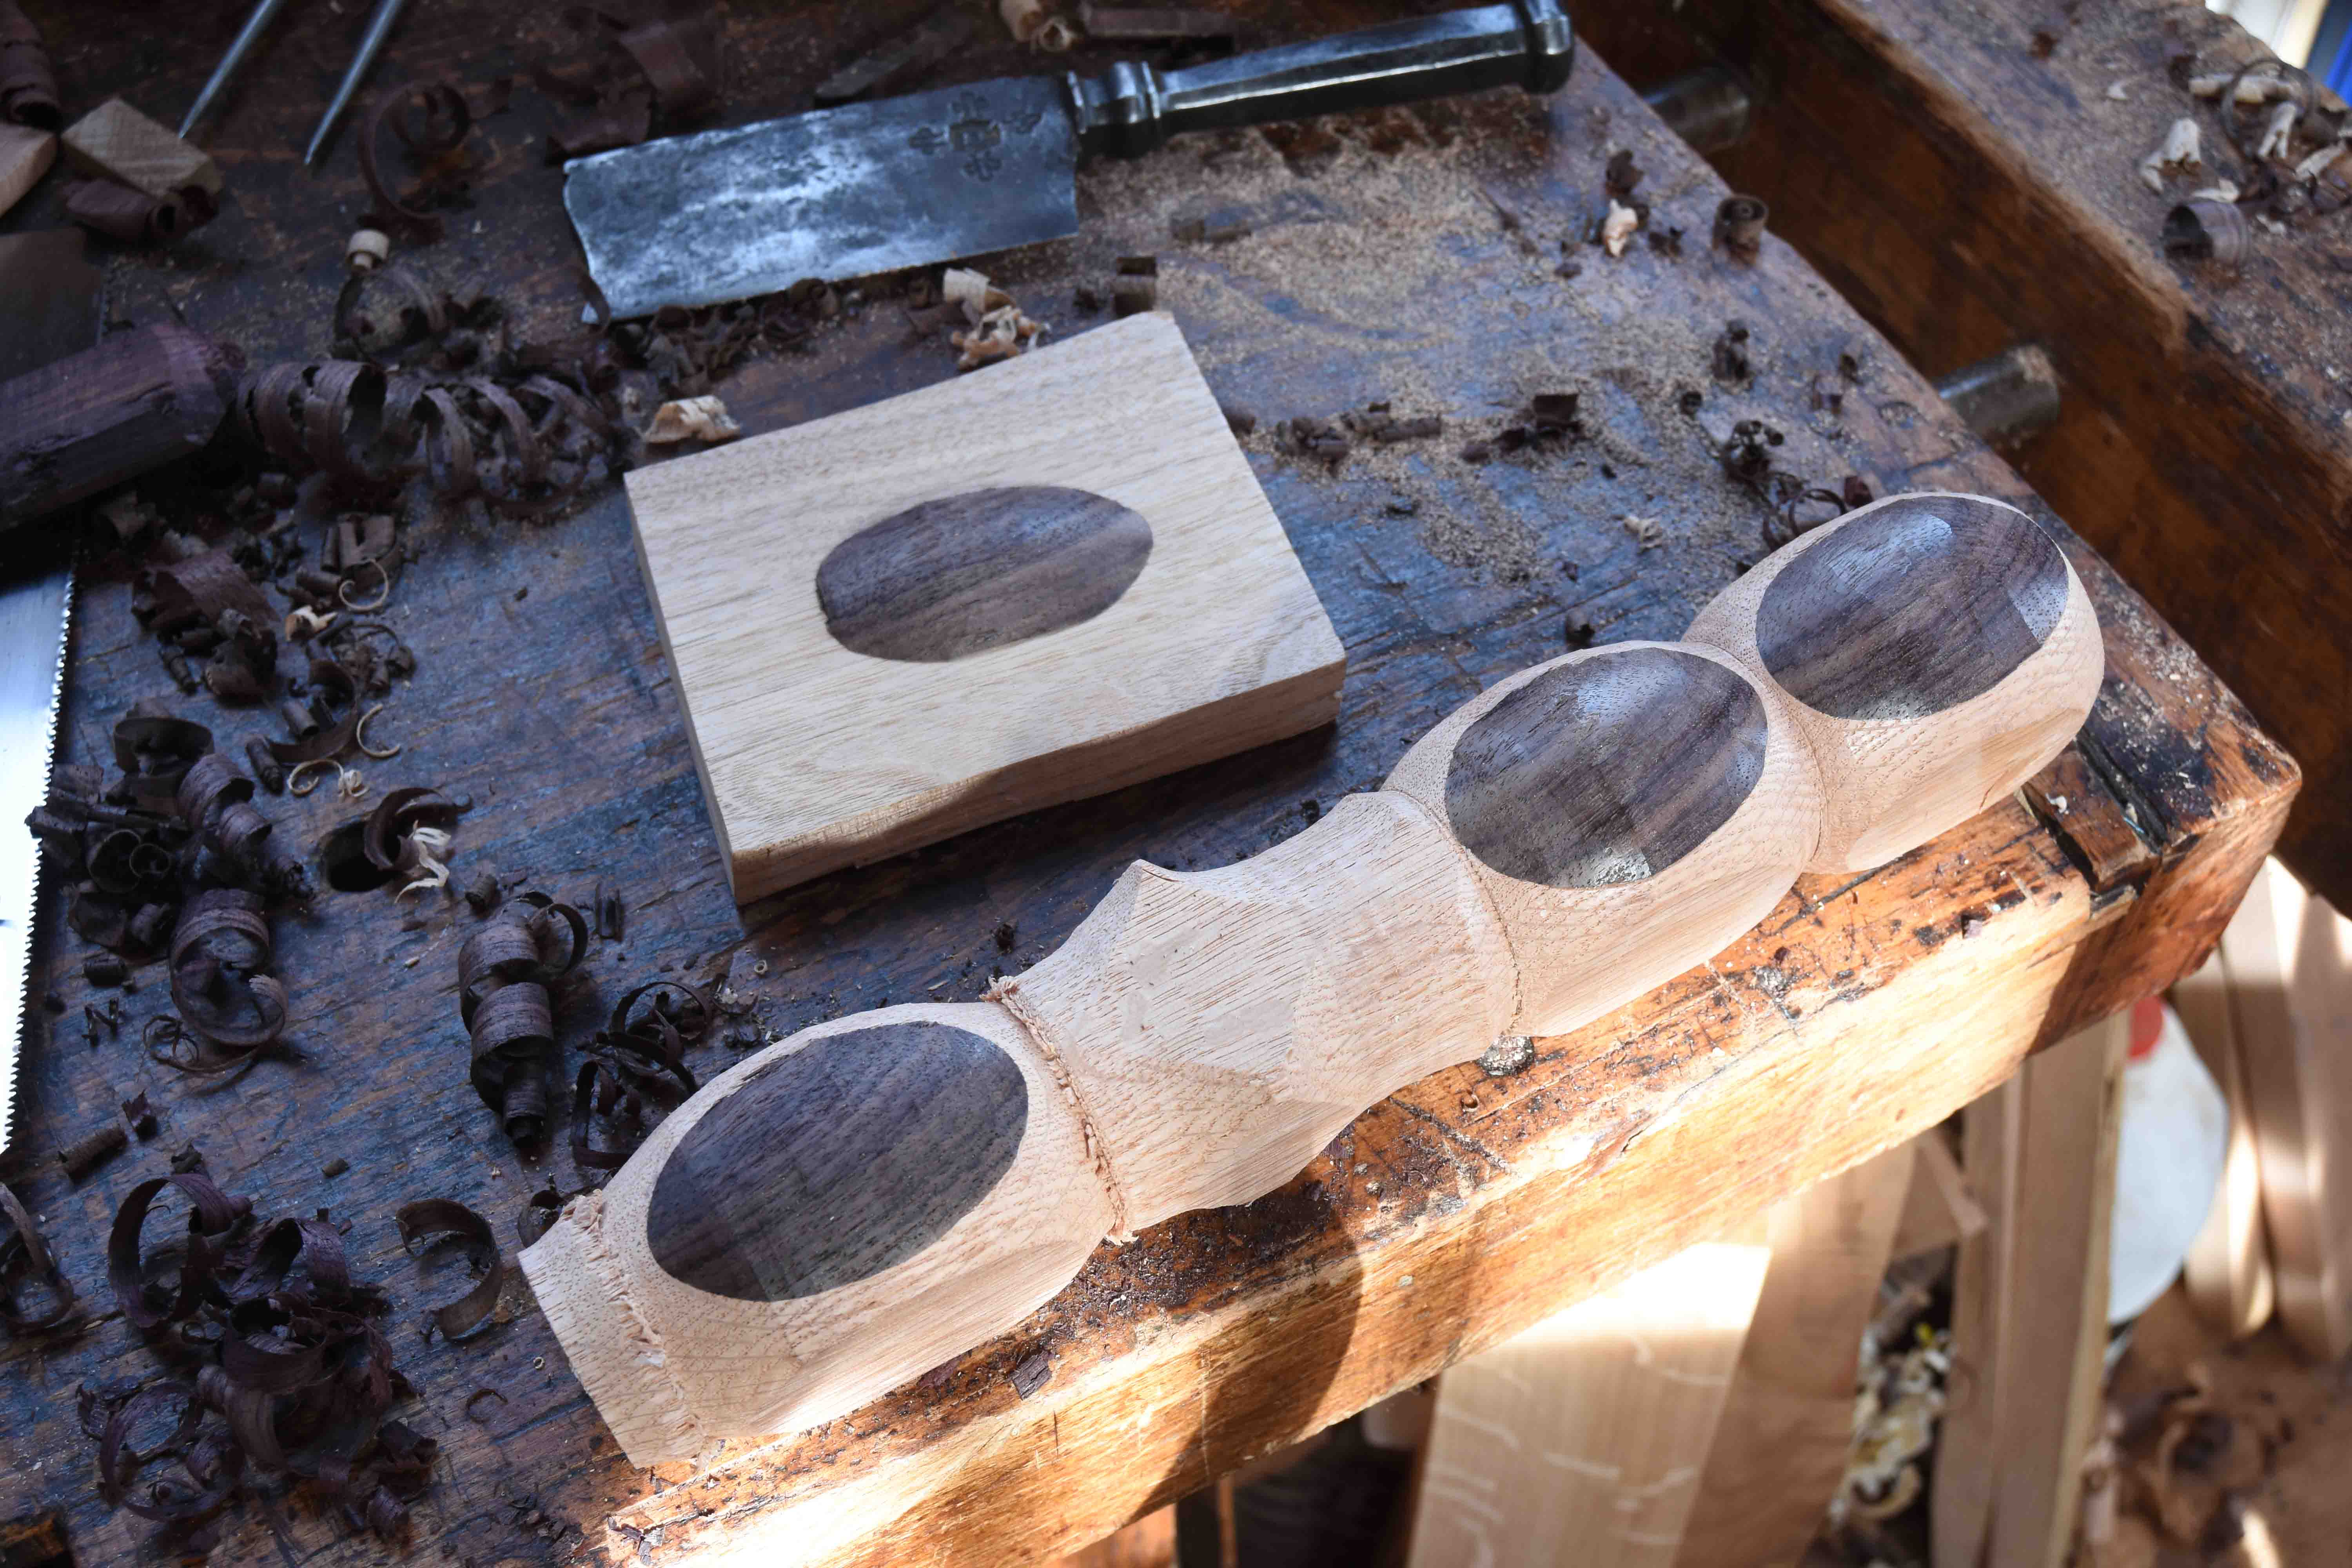
SPOONS
I haven’t forgotten how to make spoons, just haven’t had much time. Some of these go back to the summer when I started them.
Spoon #1, cherry crook. SOLD
L: 10 1/4″ W: 2 1/4″
$110 including shipping in US


—————
Spoon #2, SOLD
rhododendron crook
L: 9 1/4″ W: 2″
Carved this one in September, from a rhododendron crook someone gave me in the summer. I love to carve this wood. Some fear using it for a spoon, thinking it’s poisonous. The leaves and things apparently are, but the wood is fine. I’ve used it as spoon wood whenever I could get it for nearly 40 years.
$110 including shipping in US.


—————–
Spoon #3, black birch
L: 10 3/4″ W: 2 1/2″
A shape I accidentally carved one day for my wife, and we use it all the time in the kitchen. So I give it another go every so often. Black birch is a great spoon wood – a little harder than grey birch. I like carving it a lot.
$110 includes shipping in US.


——————–
Spoon #4, black birch
L: 11″ W: 2 5/8″
$110 including shipping in US.
Similar to above, different carving on the handle. Made them at the same time.


Spoon #5, walnut SOLD
L: 11″ W: 3″
$110 including shipping in US.
Found it in my spoon carving basket. Finished it off while I did the others above. People go crazy for black walnut.


—————–
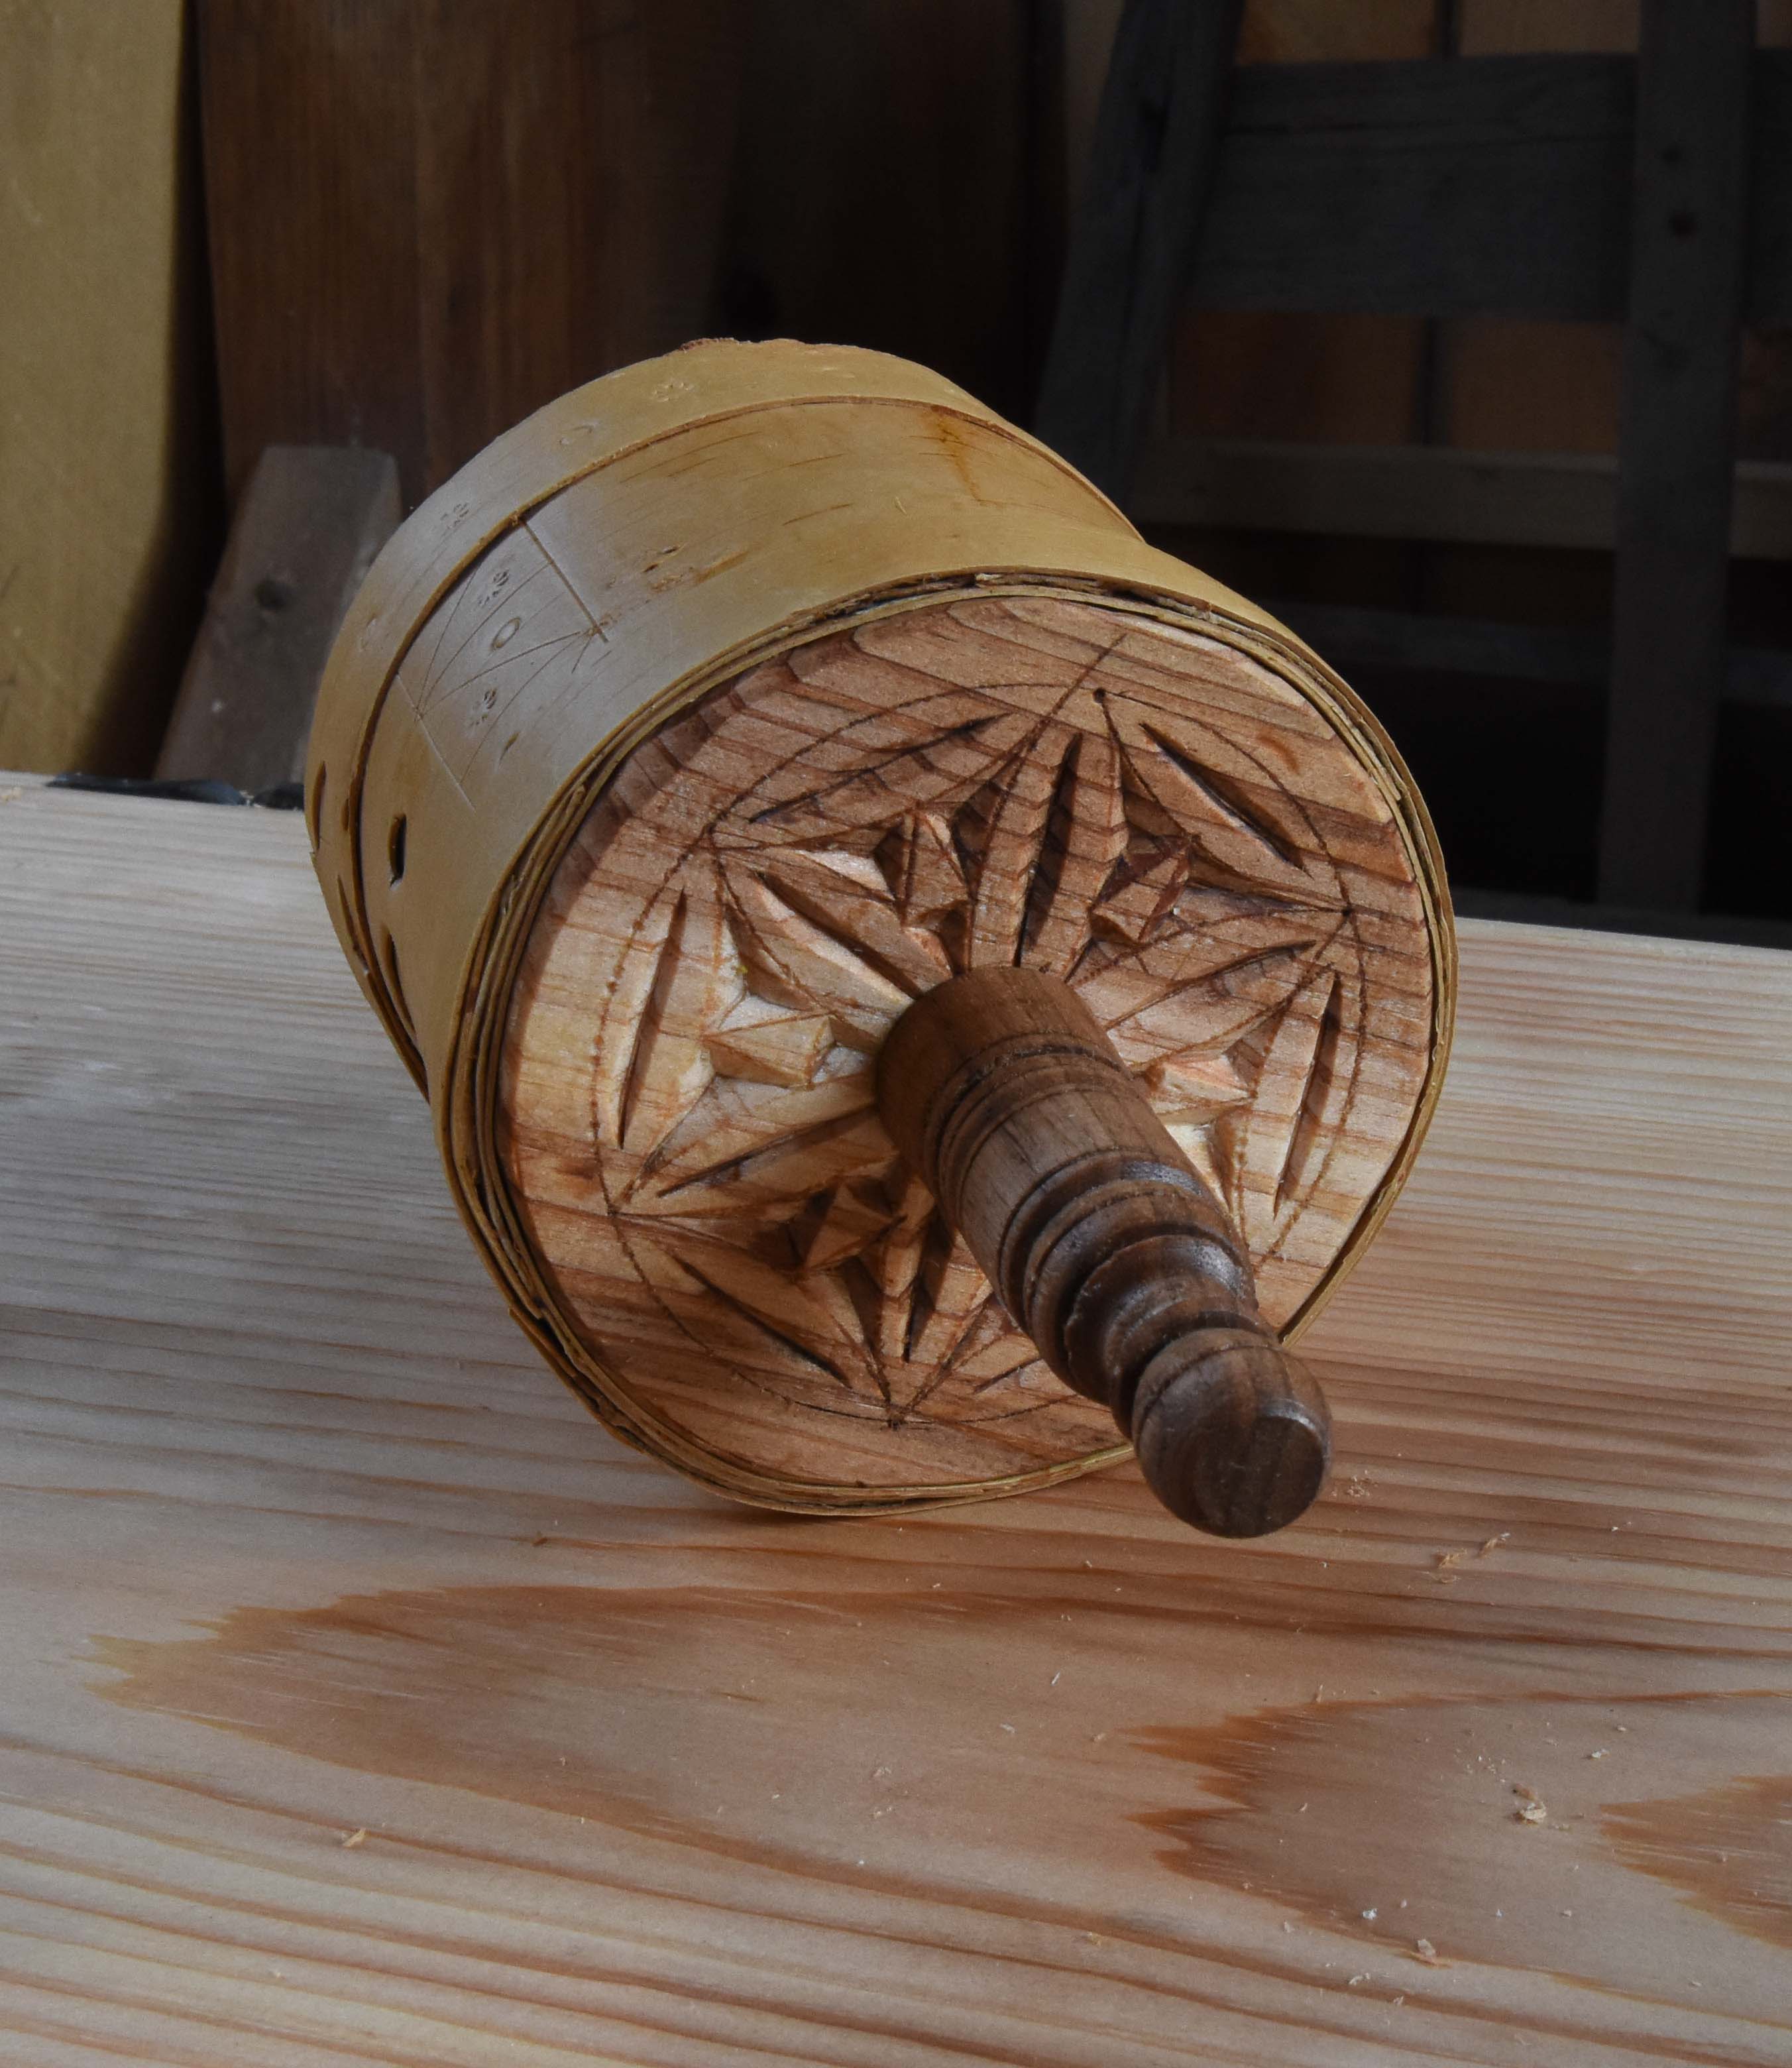
BIRCH BARK CONTAINERS
These are something relatively new for me. I learned bits and pieces of this work, principally from Jarrod Dahl. I like making them, I’m never going to make them as a regular thing. Last June we got some birch for JoJo Wood to carve, and I sliced the bark off before anyone could get at it. I wrapped the bodies then, and made the lids just a bit later, and added some chip carving. Then just turned some handles for them recently from butternut. I don’t imagine I’ll often have things like this; I rarely get the bark. But they are fun to make…
BIRCH #1 – SOLD
H: (not including handle) 6 1/2″ DIA: 4″
$110 including shipping


BIRCH #2 SOLD
H: (not including handle) 6 1/2″ DIA: 4 1/2″
$110 including shipping


———————
BIRCH #3 – SOLD
H: (not including handle) 4 3/4″ DIA: 3 3/4″
$90 including shipping


———————–
BIRCH #4
H: (not including handle) 3 3/4″ DIA: 4 1/4″
$90 including shipping

——————
BIRCH #5 – SOLD
H: (not including handle) 7″ DIA: 4 1/8″
$110 including shipping


——————
BIRCH #6; this is the “saved the best for last” – I made most of this one in Jarrod’s class. Then added the chip carving and a boxwood handle.
H: (not including handle) 9 1/2″ W: oval = 4 3/4″ x 6″
$300 including shipping