why did this take 30 years?

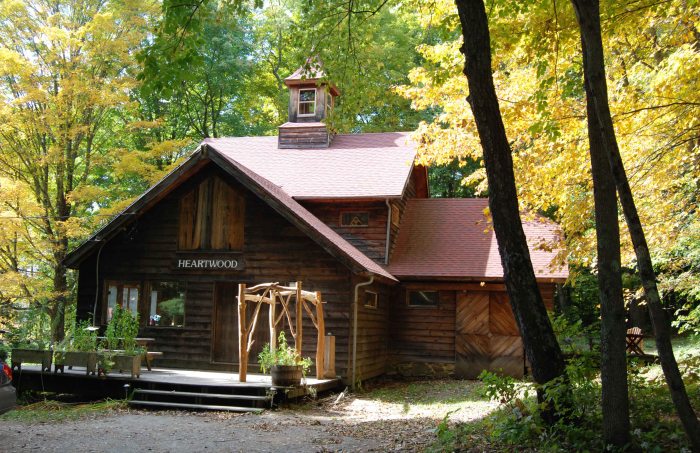
I just spent a week back at the Heartwood School for the Homebuilding Crafts  http://www.heartwoodschool.com/ – after being a student there in 1984, I finally returned to teach a small class in making the carved boxes. What a treat! Run all these years by Will & Michele Beemer – Heartwood is a great place. Woodsy, small-scale, friendly and exciting all at once. They have done a great job with this school – it was such a thrill to be there and see how it has developed. When I was first there, I was as green as the wood; but by now I know my way around woodworking schools, and this one gets very high marks. In many ways, it reminds me of my friends Drew & Louise Langsner’s Country Workshops. Both schools are a husband & wife endeavor, very homey (although Will & Michele commute about a mile to work – one of the nicest commutes I have ever taken), and both have a community of supporters and involved participants. I know I will be back before another 30 years. Hopefully next year. Lots of pictures & captions. I wish I had shot the surrounding Berkshire hills…but was sorta busy. 


heartwood 2
Heartwood school building
heartwood
from the framing yard
wood storage
some wood storage
splitting
splitting w wedges
brett hewing
Brett hewing
shop view
inside the shop
planing in shop
planing and
planing
more planing
ed carv ing
carving
carving
carving
v tool
V-tool
student carving scroll
carving in progress

A few things set this box class apart from previous ones – because there were only 4 students, we made larger-sized boxes. More like ordinary period ones; about 20-22″ long, 6″ high, 12″+ front to back. And we made tills. Added some fumbling & headache – but they really add a lot to the finished box. 

till notches
notches for till side and bottom
4 hands till
even with 4 hands, it can fall down during test fit
till parts
till side & bottom in test fit, till lid being prepped
box w bottom & till
assembled box, w till & bottom – next is lid

Heartwood’s lunches are legendary – thanks to Michele’s hard work. 

lunch 1

lunch w will
no wonder Will is so happy

lunch 2

lunch 3

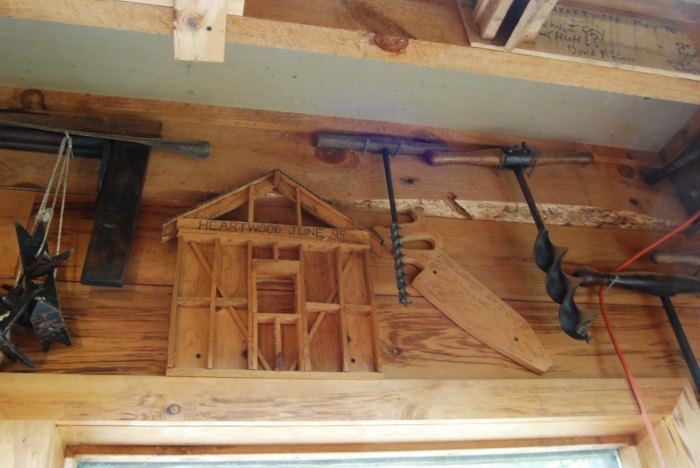
Scattered throughout the shop are mementos from previous classes, and apprenticeship grads – going back quite a ways…

student gifts

student gits 2

And projects from specialty timber-framing classes – here’s an example of how to scribe and cut a post to sit on stone. Look at that fit. Will says “now it’s Art”

scribing

scribing fit


we didn’t get to it, but there’s a pizza oven. Need I say more? (the frame is a class-project; fitting square timbers to round, round-t0-round, etc – like a sampler)

pizza oven & shelter

pizza oven


I didn’t shoot enough the last day; we had lots to do, fitting the wooden hinges, making lids and so on. I wish I had shot some of the local landscape as well. I always joke about those of us from eastern Massachusetts, and how we never go to western Massachusetts (& vice-versa, mostly) – ask my sister who lives in Springfield. But I was thrilled to be there, and reconnect to Will & Michele. BUT…the very next day when I got home, it was off to a perfect fall day at low tide. 


sea

2015 workshop dates, first batch

box 2013 finished


Before I tell you all about last week’s class out at Heartwood, (a great time. what til you see it) =  I have a bit of stuff to run down about next year’s classes. First off, two new places. Three new places I mean. All begin with vowels. 

Alphabetically, Alaska comes first. I think I won’t drive to this one. Late April, just a  tiny bit early for migration, but there should still be lots of stuff to see. Oh, & we’ll make some boxes, but from boards, not logs. Might do a one-day spoon class there too…

http://www.alaskacreativewoodworkers.org/peter-follansbee-is-coming-to-alaska/

Another in the series of classes in places that begin with vowels, England. http://www.newenglishworkshop.co.uk/

Seems I’m there for 2 weeks, teaching the log-to-box version twice. Once in Somerset, once in Warwickshire. WOW. These classes are part of an I-don’t-know-how-many ring circus. Me, Chris Schwarz, Roy Underhill, Jeff Miller, Tom Fidgen – mostly all at the same time. I know Chris & I are on the same schedule – I got lost eventually trying to map it all out. I haven’t been to England since 2005 – can’t wait. Somerset – where they carved stuff like this:

somerset chair detail
Somerset wainscot chair, detail

The last vowel destination for now is also a new one for me, Marc Adams (Indiana) – so the only venue in the lower 48 where we’ll do the carved box from a log in 2015. They’re working on the schedule now, I’m there in late Oct, the 19th-23rd. http://www.marcadams.com/ 

There’ll be more of the usual places; Lie-Nielsen, Roy’s, Bob Van Dyke’s – I hope to be at home some too. And I’m working on more new places too. I’ll post more of it soon so we can get 2015 sorted. As always, thanks to the students who put aside time, money etc to come out to these classes. It makes it possible for me to have fun for a living. 

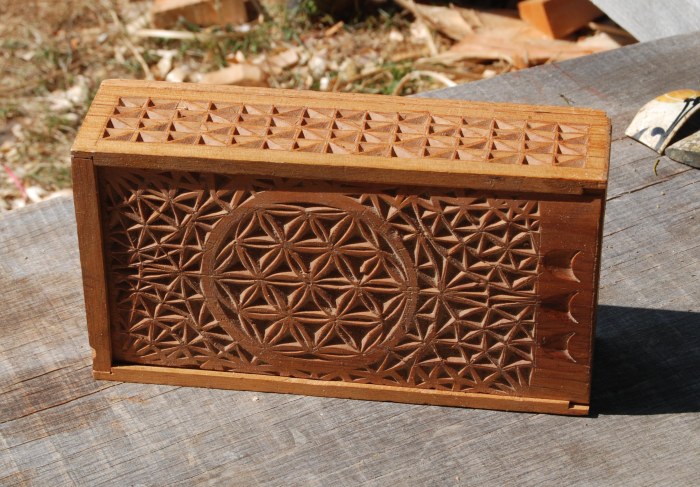
Chip carving details


pine lid

to add a bit more to the previous post about chip carving, here are some details. When you isolate parts of the designs, you see things differently. Here is just one repeat of the  compass-generated motif.


pine detail close


Then when you shift it another way, and look at the squares instead of the circles, voila.

pine cropped


I have have great fun with these ideas, and I always joke about my high-school math teacher rolling in her grave when I teach geometry. I was the typical wise-guy “what do I need this for?” -incredulously. Nowadays I like to think if there had been an application for it, a use for it, I might have listened better. Maybe not. Here it is drawn out on paper first, something I rarely do with gouge-cut 17th-century century carvings.

drawing


. This shot is for Bob Van Dyke.

for Bob

a box distraction


butternut

It begins with this little box I made. Had been practicing chip carving in butternut & pine. Turned it into a box that right now holds small sharpening stuff. Nailed construction. 

butternut top

That led to this one. Not very practical for holding carving tools; which is what it’s doing right now. they slide around when you open the drawer. It will be re-assigned soon.


Then, two things happened. No, three. I finally met Winston James Burchill, who has been kind enough to send me some of his chip carvings – and I saw these two boxes; the Pennsylvania one in a book, the Swedish one on the web. 

chip carving
chip carving by Winston James Burchill
detail
detail

The minute I saw this box in the book Paint, Patterns & People I knew I would make some. It’s just taking me a while to get to it. http://villagecarpenter.blogspot.com/2011/03/paint-pattern-people-book-review.html


PA box
painted box, Pennsylvania; early 19th century

This Swedish one is slightly different; its removable end board is at the same end the lid slides out from. Makes construction  a little easier, I think. 


27797
pained box, Sweden, 1806

Now, I have one underway that will be chipcarved instead of painted. But I am going to make more; and will paint one too. Because I have never seen one in the flesh, I am making up the construction. I haven’t made the drawer yet. 

poplar w dts

poplar open

poplar end off

poplar workings

Gotta run out to Heartwood & teach the oak boxes. I still love them, too. Don’t worry.


test fitting the box w drawer

I did some more work on the box with drawer that I started the other day. First of all, this is as close as I get to having drawings to work from…and shortly after I begin, these are out the window. 

as close as I come


Today I had to finish cutting the housings for the till, and then bore the pilot holes for nailing the box together. These nails are the real thing, i.e. handmade nails. Rectangular in cross-section. Thin, wedge-shaped. Makes boring pilot holes tricky. https://pfollansbee.wordpress.com/2012/08/15/for-some-work-cut-nails-dont-cut-it/

the real thing

One of the great things about oak is that it splits so well. One of the drawbacks of oak is that it splits so well. Here, I used a tapered reamer to open up the pilot holes. I wedged it back & forth more than reaming it around & around. Have to be very careful here, it’s easy to break out the wood beyond the holes. 

wedge em open


I have sometimes hit on the idea of installing the gimmals/snipebill hinges into the rear board before assembling the box. Makes it easy to get at them, and reduces the chance that you knock the box apart while setting the hinges.  (for more on these hinges, see https://pfollansbee.wordpress.com/2011/12/14/setting-gimmals-you-might-know-them-as-snipe-bills/ )

the real thing pt 2

hinges

I didn’t get a lot further than this – I assembled the rear-to-sides, then temporarily tacked the front board in place so I can measure for the till parts.

http---makeagif.com--media-9-18-2014-76jcPp

Then I cleaned up & went home. Won’t get back to this til the 29th or so. Off to Heartwood School this weekend for next week’s class in box-making. Here’s the test-fit, with some Atlantic White Cedar that will be the till side. 

got this far


Oak doesn’t go bad…for the most part

trimming scraps


I have a collection of bits & pieces of oak that I have carved over the years. One is a panel 7″ x 24″ – I wrote about this design way back when = https://pfollansbee.wordpress.com/2009/07/27/incised-wgouges-versus-v-tool/

When I started planning for my next spate of joinery projects, it seemed logical to warm up with something simple, a carved box. I’m off next week to teach a class in fact; so the timing was perfect. But then I dug through some oak I have stashed, and found the carved panel above; begging to be a box with a drawer. This is something I’ve never made, and have wanted to build for some time. https://pfollansbee.wordpress.com/2014/02/18/i-had-been-wanting-to-see-this-box-for-years/

box with drawer, Thomas Dennis, Ipswich, Massachusetts, made between 1663-1706


So right away, I’ve made it more complicated than originally intended. Mine will follow the format of the Thomas Dennis box; but different decorative details. When I briefly studied the the original, I didn’t record all the pertinent details of construction. So I have to make some stuff up – I learned on another project recently that when you don’t know what you’re doing, it’s easy to make mistakes. 

I gathered up some wood, carved new sides to go with the existing front.  


carved bits blog

Usually on a box, the carcass is fitted together, then the bottom nailed up to the lower edge of the carcass. In this case, the front is the same height as the side and rear. So I planed a rabbet in the inside face of the front board, for the box bottom to fit into. 

rabbet in front

Can’t have a box with this much pizzaz and not have a till, so I sawed & chiseled trenches for the till. Bored a hole for the till lid. 

till trenches

till bits

The front of the box is only 7″ high, but the sides and rear boards are 11 1/2″ high. On account of the drawer. The sides are glued up from narrower stock; as they were on the original. But the rear board I used a solid piece of 12″ riven oak – from this log https://pfollansbee.wordpress.com/2013/08/02/i-dont-have-time-for-this/

In this shot, I was fine-tuning the rabbets with a shoulder plane. I was going pretty quickly it seems. 

quickly trim rabbets


Then I plowed a groove in the rear board to further capture the bottom. This is one of the conjectural construction pieces – I didn’t handle the original box to see how the box bottom really fits. 


plowing

It’s a lot of fun being back at the task of joinery…and photography. 

old & new

It’ll look something like this

When I left Plimoth Plantation in June, I wrote that I would be pursuing other aspects of woodworking beyond 17th-century joined oak furniture. But I also laid out that I wasn’t giving up the oak stuff, just adding to it. Bowls, spoons, baskets, weirdo boxes (coming soon) and more…

test only a test

And I have had the best summer ever, picking away at aspects of woodworking both old and new to me…but now it’s time to bring back to the blog some joined oak furniture, carved all over.

I dug my “real” workbench out of storage, and some tools and borrowed a work-space from my friend Ted Curtin – who thankfully almost never makes joined furniture anymore, (he’s a school teacher now – that’s good, because he’s better than me at oak stuff!)

Today I shuffled some stuff around, and will start in soon on shooting carved boxes, chests and more for an upcoming book on joinery.

Between travels that is…

Immortality

I’m rendered in oils! It’s like having my name up in lights. While travelling this summer, I stopped to spend a day with my friends Heather & Pat in Pennsylvania. Heather posed me for this painting, part of her on-going teacup series.

Here’s the link to her blog; I’m always amazed at Heather’s work…

http://heatherneill.com/studio-blog/

http://heatherneill.com/

PF as tea cup series


Don’t forget box-making https://pfollansbee.wordpress.com/2014/09/10/make-a-carved-oak-box-sept-22-26/

Make a Carved Oak Box – Sept 22-26

We just had a cancellation in my up-coming class in making a carved oak box – so if you would like to tackle this sort of work, September 22-26 in the Berkshire hills of western Massachusetts, Heartwood School is the place to be. http://www.heartwoodschool.com/


open, with till
open, with till
opposing lunettes
opposing lunettes

oak carving box side Sept

till
till

This is going to be a really small class – so we will be able to really delve deeply into these boxes. I usually do this with 10 or 12 students; this time we’re hoping for 5! Lots more attention to carving patterns, and come hell or high water – tills! Students always ask, “can we put tills in our boxes?” – and the answer is usually “maybe” which really means “no.” 

This time – yup. I bet we will. 

come on, fall in the Berkshires? Send Will Beemer a note – it’ll be great. http://www.heartwoodschool.com/coursefr.html

oak bolt


co-inspiration

I greatly appreciate the notes & emails, etc that I get from readers, students and more. It’s nice to hear that my work inspires some folks to go shave wood. Woodworking has saved many a man’s life (woman’s too…) – and I am glad that my work sometimes gives others a nudge. Likewise, when I hear these things, it inspires me to keep posting my stuff here – someone might get something from it. Co-inspiration.

I’m very late as usual with this post. I owe some of you answers; and had promised to show your stuff to the blog readers. Keep ‘em coming, I like to show this stuff you folks are making. That way, someone else might be inspired to have a go at it. How hard can it be?

In absolutely no particular order – here’s a stool-in-progress from Jason Estes of Iowa. Look at his details; nice chamfers; and square “turned” decoration. Great work, Jason.

Jason Estes Iowa


Jason had a question about seats = it’s probably too late now (sorry Jason)  – but for next time here goes.

“If two boards are used for a seat, are they fastened to each other in any way, or just to the aprons or stiles?”

Alexander & I did them just butted up against each other in the book, but in period work, usually they are glued edge-to-edge, sometimes with registration pins between them. I have seen chest lids done with splines in grooved edges of mating boards. No tongue & groove in chest lids, table tops, etc –  they are used in chest bottoms, however.

When I make a wainscot chair seat, I usually edge glue two narrow riven boards together. sometimes w 5/16″ pins between them; maybe 2 in the whole seat.

“If I elect to go with a single board of quartersawn oak, it will likely be kiln-dried – does that require any accommodation, or can it go on like a tree-wet board?”

Nope – if it’s well-quartersawn, it should behave perfectly well.


Sean Fitzgerald (I think I got that right) of parts unknown made a joined & chamfered dish rack…why didn’t I make one of these? Here’s a case I often talk about – my work is 17th-century reproduction, but you can adapt these construction and decoration ideas in new formats; designs, etc – the mortise & tenon is timeless, as is oak.

sean fitzgerald chamfered dish rack


Here’s a bunch from Matthew LeBlanc – we finally met this past July up in Maine. We had corresponded many times, then finally connected. Matt’s made a slew of stuff – great going. For a teacher to have students like these, I’m a lucky person.

Matt stretched out his stool, made it wider side-to-side. Poplar & sawn oak. If you have no green wood, don’t let that stop you!


Matthew Leblanc stool_edited-1


Matt also made one of Jennie Alexander’s post & rung chairs – or maybe it’s from Drew Langsner’s book. either way, all the same gene pool. Nice chair. Looks like red oak to me.


Matthew leblanc JA chair


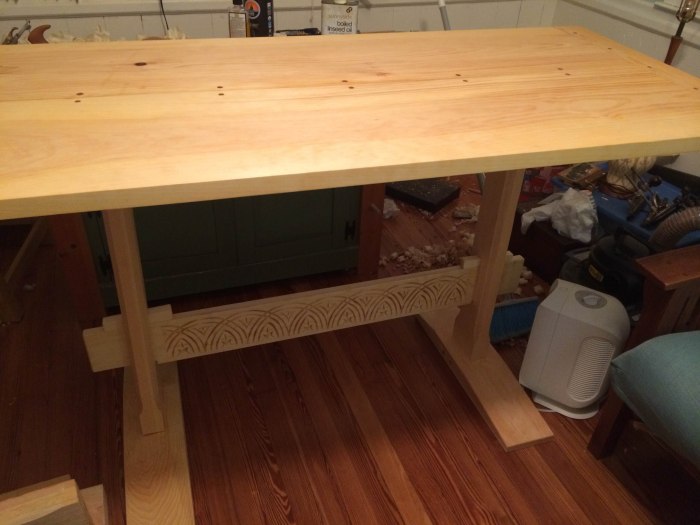
And then he sent along this trestle table w carved stretcher. & these were a while ago – I bet he’s kept on going. Nice work, Matt.

matthew leBlanc table

Here’s Matthew making a pile of shavings while we were at Lie-Nielsen this summer..