Carving Crossed S-scrolls video

Daniel started school lessons recently, so I have to compete for his spare time. Promised him money, that worked this time. We got the next video in the Carving Oak Patterns series – these are to accompany the Carving Drawings https://pfollansbee.wordpress.com/carving-drawings-17th-century-work-from-devon-england-and-ipswich-massachusetts-set-1/


This is the third video in the series; fourth if you count the intro to the drawings. I have several more to go, some of which have already been shot and just need editing. The floral panel I plan on shooting in the next week or so. Then it’s on to finishing the next set of drawings. I post all of the videos here on the blog as well as on youtube.

This one I shot the steps and discussed them as I went along, then carved the whole pattern a second time with little commentary, trying to just carve it in “real” time. (I hate that expression). So the back 12 minutes or so is a bit redundant. You’re warned, repetition is the mother of retention.


thinking about chairs: past, present & future

I don’t need the calendar to tell me the season is changing – the light in the shop is distinctly different now, a bit lower, coming around a bit earlier. A nice time of year…

Our neighbors put out some stuff for sale by the side of the road from time to time. I wouldn’t let Maureen bring home a small table last week, so I couldn’t bring home these chairs this week. But I could photograph them…some fun stuff to see. One with four slats, but still a small chair.

A hideous knot in the rear post – ugh. But it’s lasted quite a few years.

This was my favorite of the pile. Worn down on the feet, probably was about 4″ higher I’d say.

I like the top slat of this one.

They were $20 apiece – nobody bought them. Not enough traffic these days, I guess.

I’ve had chairs on my mind lately. I told you I pay attention to Curtis Buchanan’s work. Recently I bought a set of his new drawings for the democratic arm chair.

I finished this example of the side chair earlier this year – and started another. Now I hope to finish that one and then make the arm chair.

I shaved parts for the arm chair in red oak, but mine are a bit heavy. I’ll wait a little to see how much they shrink, then will go over them just a little more to slender-them-up a bit. Or down, I guess.

Curtis’ shaved chairs really hit me right at the right time. I made Windsors many years ago, learning from Curtis and Drew Langsner. Quite some time ago, my friend Michael Burrey took me into his house to show me some things he’d bought at someone’s estate sale – including this continuous arm settee I made back in the late 1980s/early 1990s. I took one look at it, and immediately thought “I couldn’t make that today.”

and that got me to thinking about how I’d like to recover some of those techniques/skills. Then along came Curtis’ democratic chair. It reminded me of some shaved chairs I made way back when, inspired by my friend Daniel O’Hagan. Here’s a settee my brother and his wife still have, I must have made it around the same time as the one above.

This one I still use, I’m sitting in it right now – it’s my version of Curtis’ sackback chair, just with shaved bits instead of turned bits. Tulip poplar seat, cherry legs/stretchers/arm stumps. White oak, ash & hickory above the seat.

In case you’ve not got to Curtis’ chairs & plans yet – here’s his links:

https://www.youtube.com/user/curtisbuchanan52/videos

https://www.curtisbuchananchairmaker.com/store/c1/Featured_Products.html

Curtis’ plans are the inspiration for my Carving Drawings https://pfollansbee.wordpress.com/carving-drawings-17th-century-work-from-devon-england-and-ipswich-massachusetts-set-1/


Two carved boxes for sale

A couple of carved boxes available for sale. If you’re interested in one, email me or leave a comment. Peterfollansbee7@gmail.com

(for some reason, when I previewed this post, to enlarge the photos I have to click them twice. It’s worth it.)

I’m making some chairs next; and still have two of those for sale. https://pfollansbee.wordpress.com/ladderback-chairs-oak-boxes-for-sale/

CARVED BUTTERNUT BOX – SOLD

The first one is made from butternut (Juglans cinerea) – a relative of walnut. This was a wide board that I cut apart to make quartersawn stock. I chose a strapwork pattern for the front and sides – I wanted to make the most of this fabulous wood for carving. Wooden hinges (the back board and the cleats under the lid are oak), a till inside. Pine bottom as usual.

H: 9 1/2″   W: 24 1/4″ D: 14 1/2″
$1,200 including shipping in US.

———————–

CARVED OAK BOX
white & red oak, white pine bottom.
H: 8 1/2″ W: 23 3/8″  D: 13″
$1,000 includes shipping in US.

This pattern is often found on 17th-century work – a surprising amount of detail in small spaces. (the bottom photo shows the detail well…)
Glued & pegged at the corners, bottom nailed on w handmade nails. Handmade hinges as well. A lidded till inside.

Carving video – upright S-scrolls

I uploaded the next carving video to go along with the drawings. This video builds on the previous one, now the S-scrolls are standing upright rather than running in a row (or rows).

I first saw this as a box front, and have used it that way many times over the years. Here’s one from earlier this year, I think.

It could just as easily be a horizontal panel in frame-and-panel work. Or a wide framing member in the same sort of construction. The example I carved is 6″ high, with a margin of 1/2″ top & bottom.

Here’s the video –


And the drawings are available here https://pfollansbee.wordpress.com/carving-drawings-17th-century-work-from-devon-england-and-ipswich-massachusetts-set-1/

If you’re just getting to this set of drawings and videos – the previous posts for this batch are

https://pfollansbee.wordpress.com/2020/09/04/carving-s-scrolls-video/

https://pfollansbee.wordpress.com/2020/09/01/carving-drawings-for-sale-now/

and – https://pfollansbee.wordpress.com/2020/09/09/carving-gouges-2/


Carving gouges

First, thanks for the quick response on the Carving Drawings – I have 6 sets that haven’t gone out yet; but the 2nd print run should be here today. I’ll get those out right away. https://pfollansbee.wordpress.com/carving-drawings-17th-century-work-from-devon-england-and-ipswich-massachusetts-set-1/

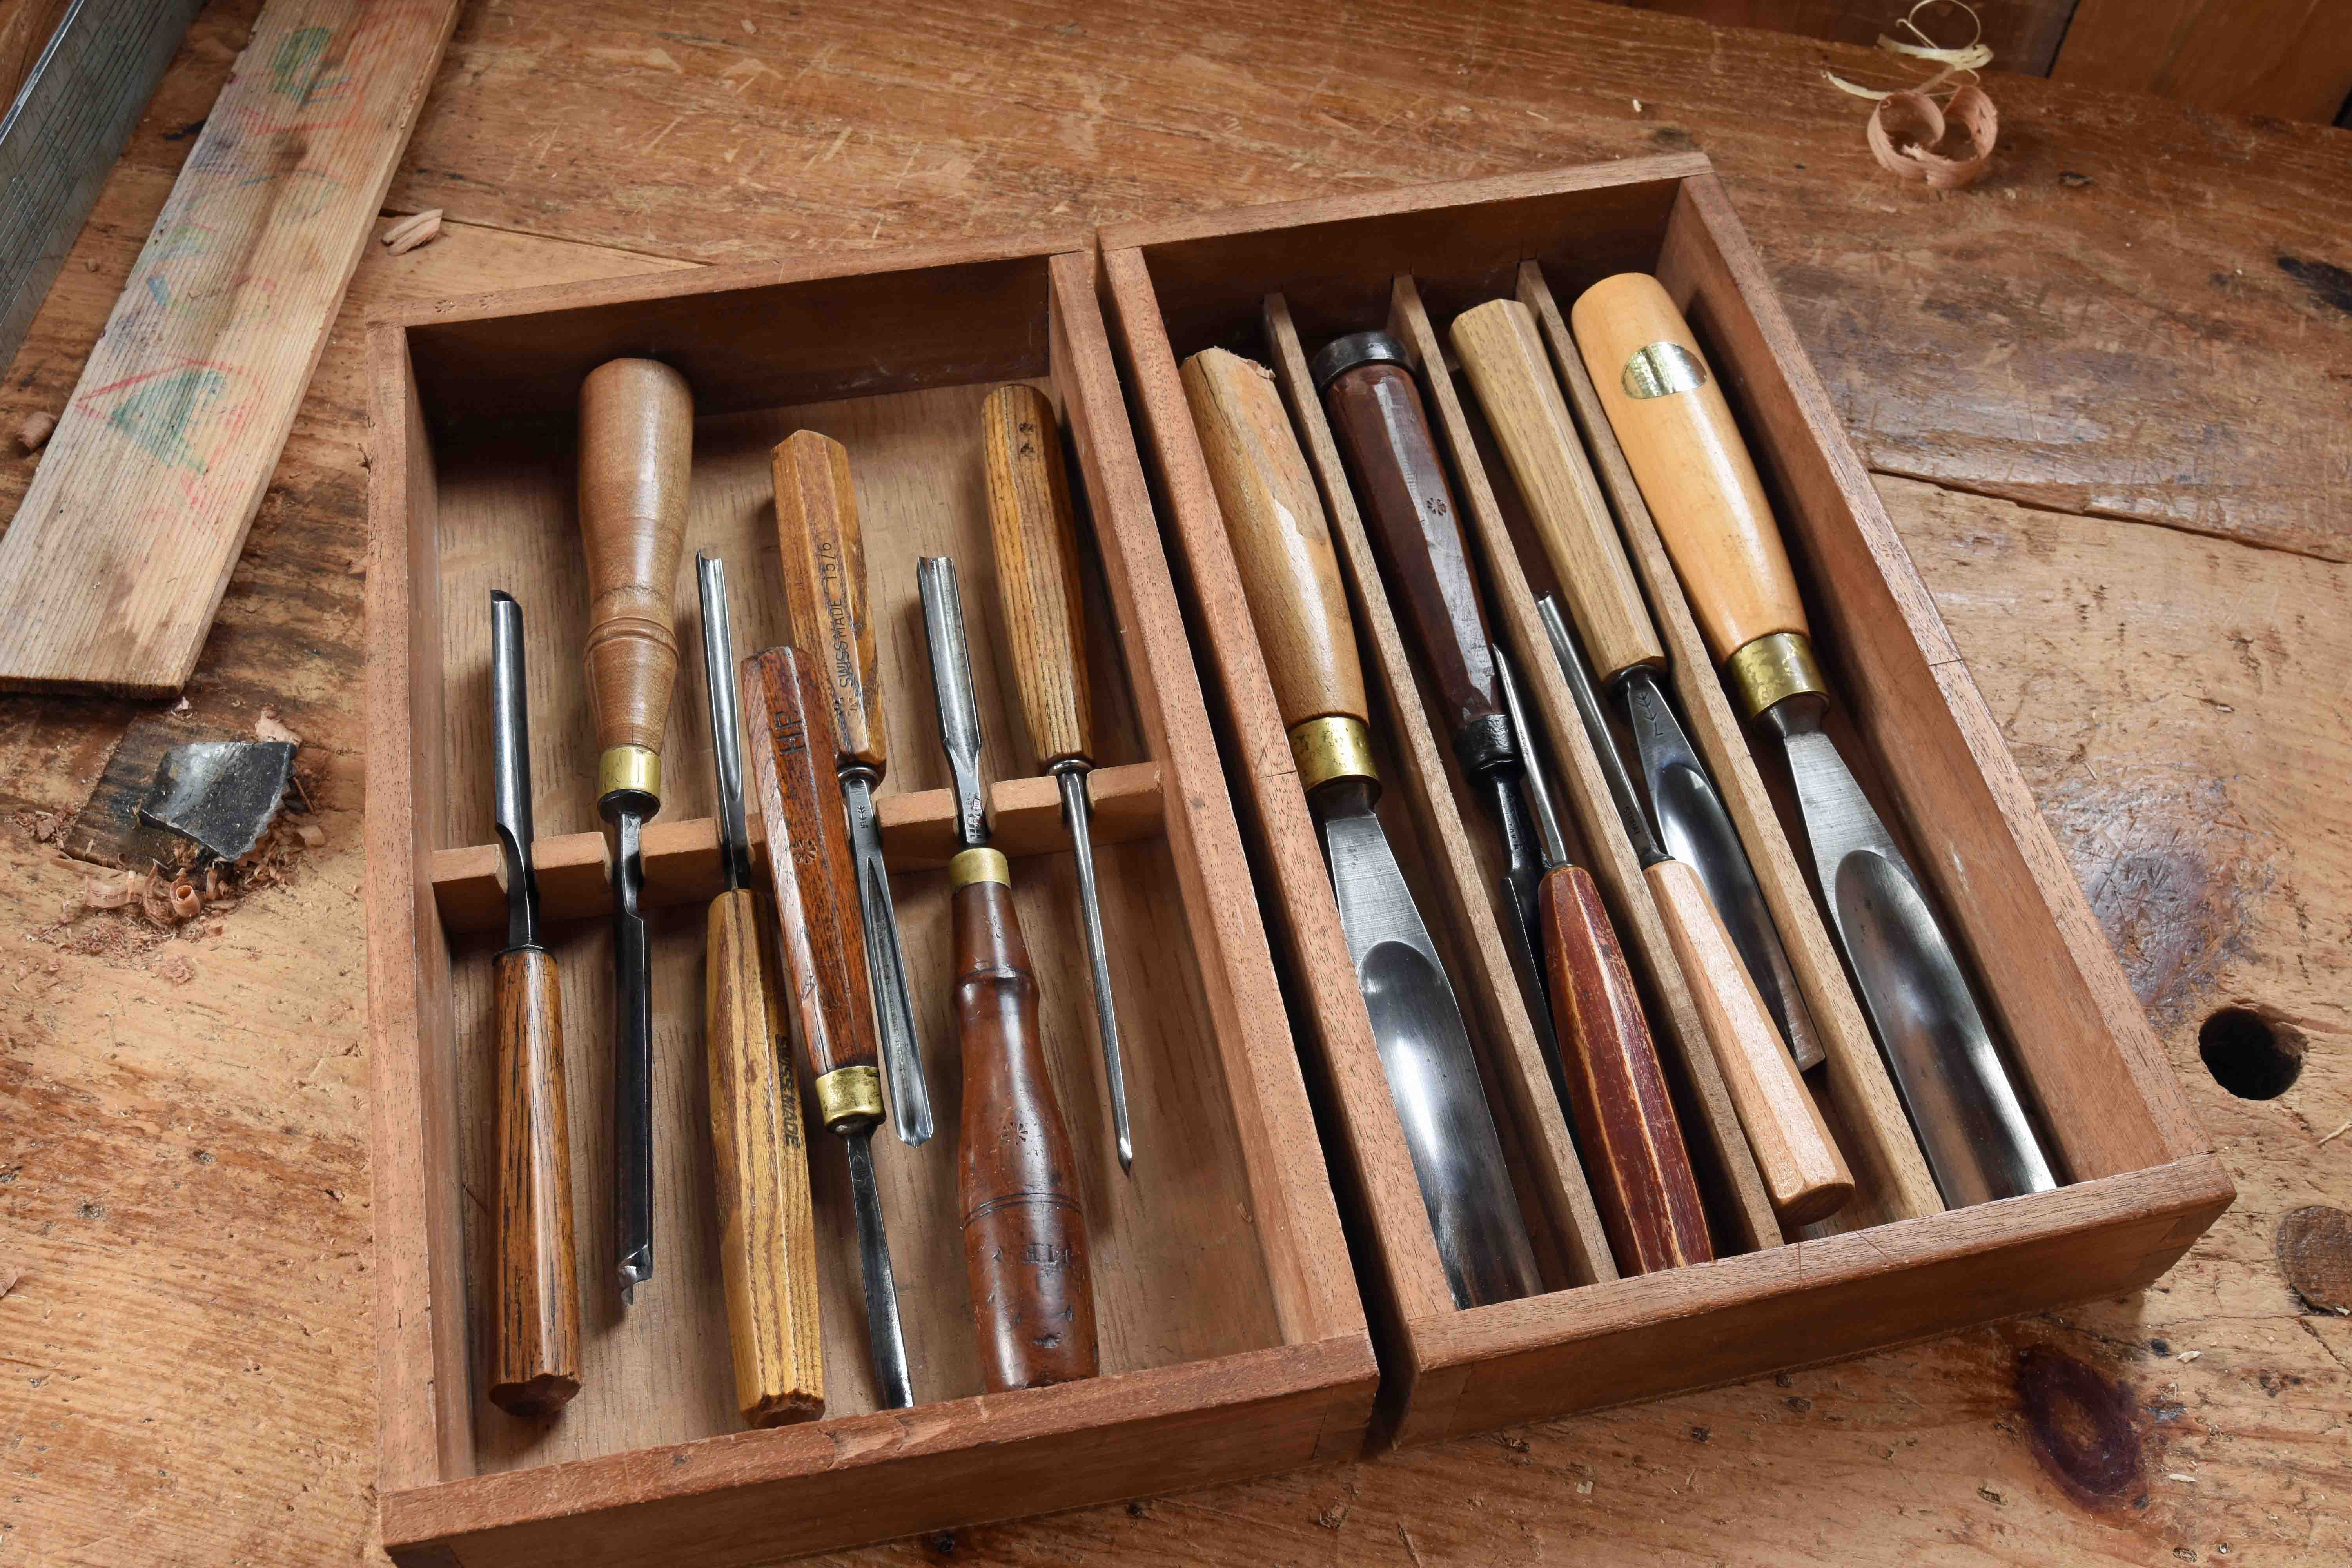
I thought this would be a good time to look at the carving gouges I use everyday. I checked and it’s been 7 years since I last did this run-down (& 3 years before that…). My gouges are a mixture of modern and old, some made here in the US, some English ones, some Swiss-made. A couple of other odds and ends too. As you see above, I keep them in shallow trays. In use I bring the trays to the bench, and try to keep the gouges in the trays as I work. It might make for more picking up & putting down, but my goal is to keep from hitting the tools’ edges together on the bench. When not in use, the trays fit into the upper drawer in my tool chest.

I count 13 tools in that photo above. I never use that many in any one carving, or even one project. Typically it’s about 4-8 tools per carving. Because of the mixed-batch of tools, it’s hard for me to tell students what to shop for if they want shapes like I use. In person, I usually end up whacking each tool into a scrap of wood and sending them on their way with that as a guide. So these photos aim for that effect. (I just previewed this post, and for some reason I have to click the photos twice to enlarge them.)

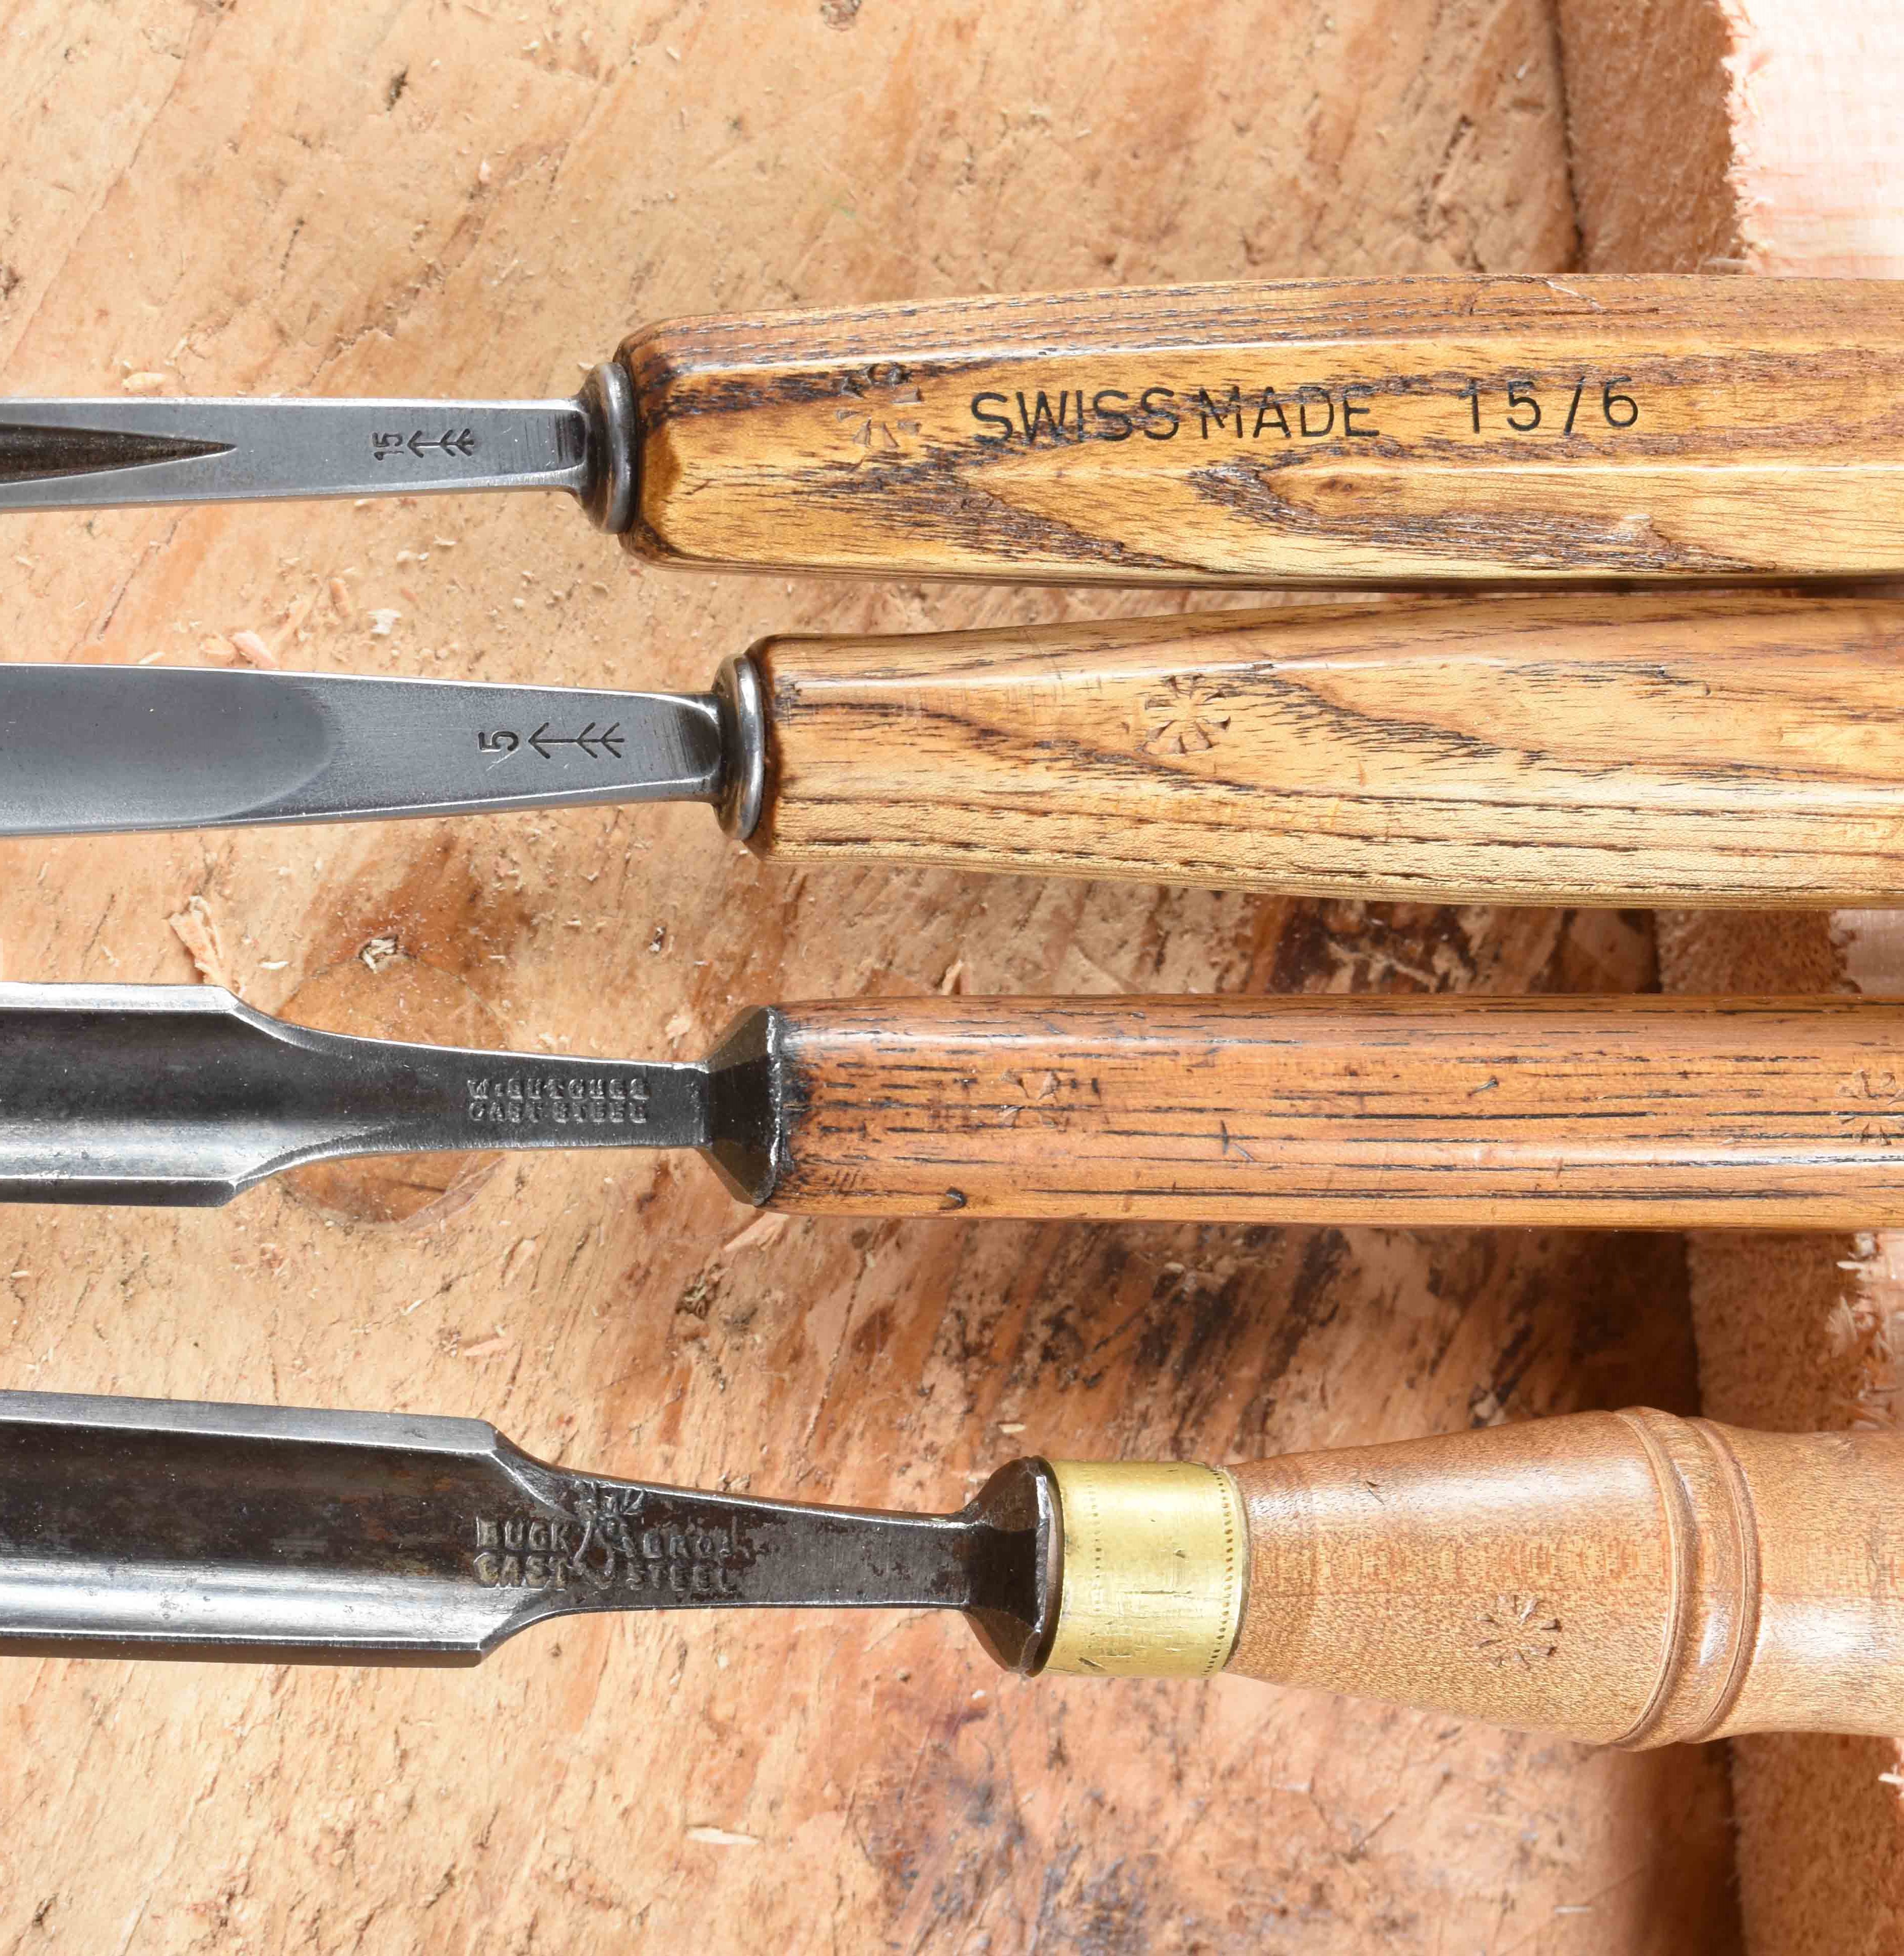
Left to right here, a Swiss-made (Pfiel is the company name) V-tool. Sometimes called a V-parting tool. Mine’s their #15 6mm wide. I tried to measure its angle and it seems to be around 55 degrees. Next is also Swiss-made; a #5 I use for removing background and shaping some patterns. Then two antiques, so no numbers. These are similar to the Swiss-made #8s, maybe a little more curve than that. Below are the same tools, with a ruler just below them to give you an idea of scale.

Below are the marks on those tools – the top two the Swiss-made, then W. Butcher (English I think) and Buck Brothers (Massachusetts, here in US).

There’s a few small gouges that get tucked into that box; these are only used once in a while. The first two from the left are essentially the same size and “sweep” (a term for the curvature of a gouge’s edge) – the difference being the one on the left is ground straight across its end, the middle gouge is crowned – sometimes referred to as a fingernail gouge. The narrow one is maybe like a #5, I use if for shaping in tight spots. It’s a Henry Taylor, made in Sheffield.

Some of the larger gouges are in the next tray. These are all about the same sweep, the one on the left is a Swiss-made #7, about 3/4″ wide. I use it in almost every carving I do, probably 2nd most important gouge after the V-tool. Middle is Austrian, Stubai is the maker. And the large one on the right is English/modern by Ashley Iles – here in the States they’re from https://toolsforworkingwood.com/store/dept/TXQ

The English sweeps are I think one step off from the Swiss/Austrian ones – that Ashley Iles is maybe a #6, but it’s a similar curve to the #7s beside it.

A few more, like in the first tray, these are less-used than the others. On the left is another antique, of these three, it gets used the most. It’s W. Butcher again. Then another Ashley Iles, more sweep than the previous one, and an antique Henry Taylor small shallow gouge.

A detail showing the edges of the tools above.

While we’re looking at carving gouges, here’s a few #5s – I use them for background removal, shaping & beveling, etc. The one on the bottom is straight across its edge, the other two are crowned across their cutting edge. I much prefer this shape, I feel it’s more versatile, better able to meet curved lines – just all around easier to handle. My everyday one is on top of this batch.

These V-tools were difficult to photograph to show what I want here – my everyday Vee is on bottom, it’s cutting edge is angle up from the V to the tops of the “wings” – the German tool above is an excellent V-tool, but its edge is pretty much 90 degrees to the line of the tool’s shank. I find the angled end slices a little easier…I can carve with either, I prefer the bottom one.

You can go back & read what I said about the same subject 7 & 10 years ago…I skimmed it. Not much has changed. I’ve switched some tools out here & there. There might be some better photos there…

https://pfollansbee.wordpress.com/2013/12/05/carving-tools-i-use-for-oak-furniture/

https://pfollansbee.wordpress.com/2010/06/21/carving-gouges/

Late-summer blackbird flocks

Time for my annual late-summer post about the flocks of blackbirds in our marsh. Each year at this time, they get up in huge flocks and come out of the marsh right as the sun is coming over the trees. I try to get down to the river most mornings to see it.

It begins down river from us, in the phragmites in the distance in this photo

You can hear them before you can see them. After a while they begin to fly up into the treetops across the river. Right about the middle of this photo – (shooting this stuff is awful, it shows me all the dust on my cameras’ sensors)


It’s easiest to see them on bare or nearly bare branches against the sky – but they’re on every branch regardless.

They begin to leave those trees in flocks that at first seem large…


When they get up over me, they begin to catch the sunlight…they’re almost all red-winged blackbirds (Agelaius phoeniceus) and common grackles (Quiscalus quiscula) as far as I can tell.

As they get up in the sky, there’s two (or more) places to watch – those up there…

And the larger flocks now moving up to take their place…

Then it really begins to get big…

The sound is as impressive as the sight…

a few pictures as I tried to follow the whole flock both coming up and across the sky…

Once the large flocks begin to move, the whole thing only lasts about a minute, maybe a minute & 1/2.


Now – count ’em. There’s a lot of them…


A short video from 2 weeks ago. The flock gets bigger for a while, then it will taper off in a while…some of these birds leave here in the autumn, but some winter-over now.

Carving S-scrolls video

First, thanks for all the positive response to the sets of Carving Drawings/Patterns. I ordered more, so they’ll be here soon. Daniel & I finished the first video associated with the drawings, so here it is. Hope it helps.


You can order the drawings here https://pfollansbee.wordpress.com/carving-drawings-17th-century-work-from-devon-england-and-ipswich-massachusetts-set-1/

And a video showing the content is here – https://pfollansbee.wordpress.com/2020/09/01/carving-drawings-for-sale-now/

there’s a full-length video I did with Lie-Nielsen than includes this and other version of S-scrolls – https://www.lie-nielsen.com/products/17th-century-new-england-carving-carving-the-s-scroll?path=home-education-videos&node=4243

Carving Drawings for sale now

UPDATE – I’ve had some problems making the paypal button work – as of 9:35 this morning I think it’s working. The page for the drawings is here –

https://pfollansbee.wordpress.com/carving-drawings-17th-century-work-from-devon-england-and-ipswich-massachusetts-set-1/

I’ll keep an eye on things and will try to respond to any problems. Thanks for your patience. If only it were wooden, I could fix it easier…


I’ve got the first set of the carving patterns available finally. I think I’ve ironed out the international shipping wrinkles, but bear with me. I don’t have great faith in my setup. But the US option is working, I tested it with some guinea pigs. 

A youtube video showing just what’s in this set – (if you watch the whole thing, keep an eye peeled for the hummingbirds)


If it looks familiar, that might mean you’ve seen Curtis Buchanan’s videos – I picked his brain a lot over the past couple of months getting this together. He’s the inspiration for the whole project…

This set of patterns is part of my interpretation of carvings found on furniture from Devon, England and Ipswich, Massachusetts in the 17th century. This body of work is quite varied, and contains designs that can be used in many combinations. This particular group of furniture is quite large, with many surviving works. The furniture I study and make mainly uses frame-and-panel construction, and the designs reflect this format. The drawings include patterns for framing parts, from 2” high rails to 5” wide vertical muntins. In addition there are three designs for wider vertical panels, as well as horizontal box fronts. 

I’ve drawn most of them “full scale”, I chose typical sizes for the patterns, based on some chests and boxes I’ve measured over the years. I worked the same way I carve them, using some basic geometry for the layout, and tracing the carving gouges to establish some of the curves. Many shapes are drawn freehand; these represent V-tool outlines.  

This style of carving is readily adaptable. These are not templates, nor are they to be slavishly copied when you’re carving. Treat them as a pattern, something to base work on, but make adjustments as required. You might have slightly different carving gouges, or stock narrower or wider than what I have drawn. That just gives you a chance to change things around a bit. As you study these patterns, you’ll see common themes in them. The intention is that some of these will recur and be expanded on in future sets of related works. 

If you’ve seen other drawings & plans drawn by Jeff Lefkowitz for Curtis Buchanan, Dawson Moore, Tim Manney, Pete Galbert and others, these are different. I’ve drawn the images, Jeff did the layout and planning. These pencil drawings reproduce differently than the line drawings noted – and the curves and shapes are not perfect, nor are they supposed to be. As I said, I drew them just like I carve them. It’s just that carving is quicker! 

There’s step-by-step sequences for several of the patterns; a couple of designs include alternate sections, some are layout sequences. 

Here’s the page where you can order them https://pfollansbee.wordpress.com/carving-drawings-17th-century-work-from-devon-england-and-ipswich-massachusetts-set-1/

(the international shipping is the part I’m the least confident about. Advance apologies for any mixup, I’ll do what I can to make it work.)

As for instruction in the actual carving, there’s lots of options. The free one is/will be a series of videos on my Youtube channel https://www.youtube.com/user/MrFollansbee  

My book Joiner’s Notes published by Lost Art Press has __ pages on carving, including some of these patterns. https://lostartpress.com/collections/books/products/joiners-work