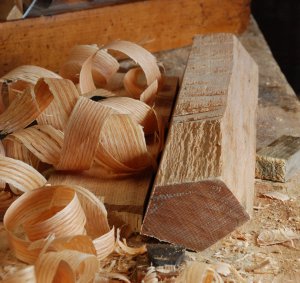


I have a client with a 1680s cupboard base, and I am making the upper section for it…one of the three-sided versions, with a door in the front section. The front stiles are therefore five-sided. Here I am hewing an outstanding piece of red oak, preparing it for planing. This log is the best I’ve had in a while, a real pleasure to work.

This log split almost perfectly flat, and the shavings peel off beautifully.

Here’s one of the stiles planed; the hewn & riven surface is inside the cupboard, so not really necessary to work it much.

On a good snowy day, I’m more likely to stay home and enjoy the view, than to go down to my shop… and this past week I was not disappointed. Great blue herons are around here all year long, but we most often see them in the winter, they are often hunkered down in the river. The other day we had a good snowstorm, about 8″ or so. It’s gone now, from warmer temps, & rain. But I managed to get out & snap a picture of this one in the middle of the snow. To me, this is the river at its best.


To finish off the ends of the mortises, I often use hand pressure. In this view, I’ve risen up onto the balls of my feet, and come down with my whole body to drive the chisel. Then I can pry the waste up from the bottom of the mortise.
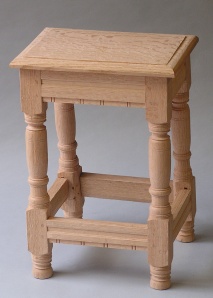
The pictures here are the beginnings of a set I am doing to illustrate the making of a joined stool. There are many more steps to chopping mortises, but these few are the gist of it. The moisture content of the oak is important, usually it’s fairly wet inside when I chop these joints. The stock in the photos was planed wet from the log less than a month before…


I have been working on some carving/photography lately. A few projects coming up in 2009 will feature some of these carvings. The one above is a chest rail; once again a motif borrowed from some furniture from Devon, c. 1660s and beyond. The same general source is used for this “scissor” motif, below, which I used on a chest I built this past spring. This is a close detail; the motif is about 3″ high in reality.

Here’s a quick view of the beginning of a carving. You can see the panel is nailed to a backboard of pine. The pine board is in turn held to the bench with a pair of holdfasts (not shown in this view). I’m using a V-tool to outline the pattern; after using a compass to define the arch at the top of the panel.


Some upcoming projects/appearances in 2009 include a trip to Colonial Williamsburg and another to the Winterthur Museum. Both are furniture forums, and I will be demonstrating structural and decorative techniques relating to seventeenth-century furniture.
here is the link to the program for the CW forum in early February:
http://www.history.org/History/institute/institute_about.cfm#antiques
The Winterthur forum is in mid-April. Here’s the link:
http://www.winterthur.org/calendar/calendar.asp?Month=4&Year=2009#forum
Then, in August I will be returning to Drew & Louise Langsner’s Country Workshops to teach a week-long class in making a carved box. We did a class in 2007, and had a lot of fun. It means a lot to me to teach there, it’s where I really got the foundation for all the work I do these days…last I heard we had some students already, so if you’re inclined, get a hold of Drew: