half a pair of joint stools

half a pair
half a pair

I have two joint stools to finish to go along with a table and joined form I am making. For the seven-foot long table top I opted for quartersawn white oak. So I made the tops of the stools and form from the same material. Yesterday I planed the board for the stool tops. I kept it at double-length to make handling it easier while I planed it flat and dressed the thickness. I decided to keep it that way while I ran the molding too.

 I trimmed it to width, then dressed both faces and trued up the edges. I then crosscut both ends and marked out the middle where I eventually would crosscut it in two.

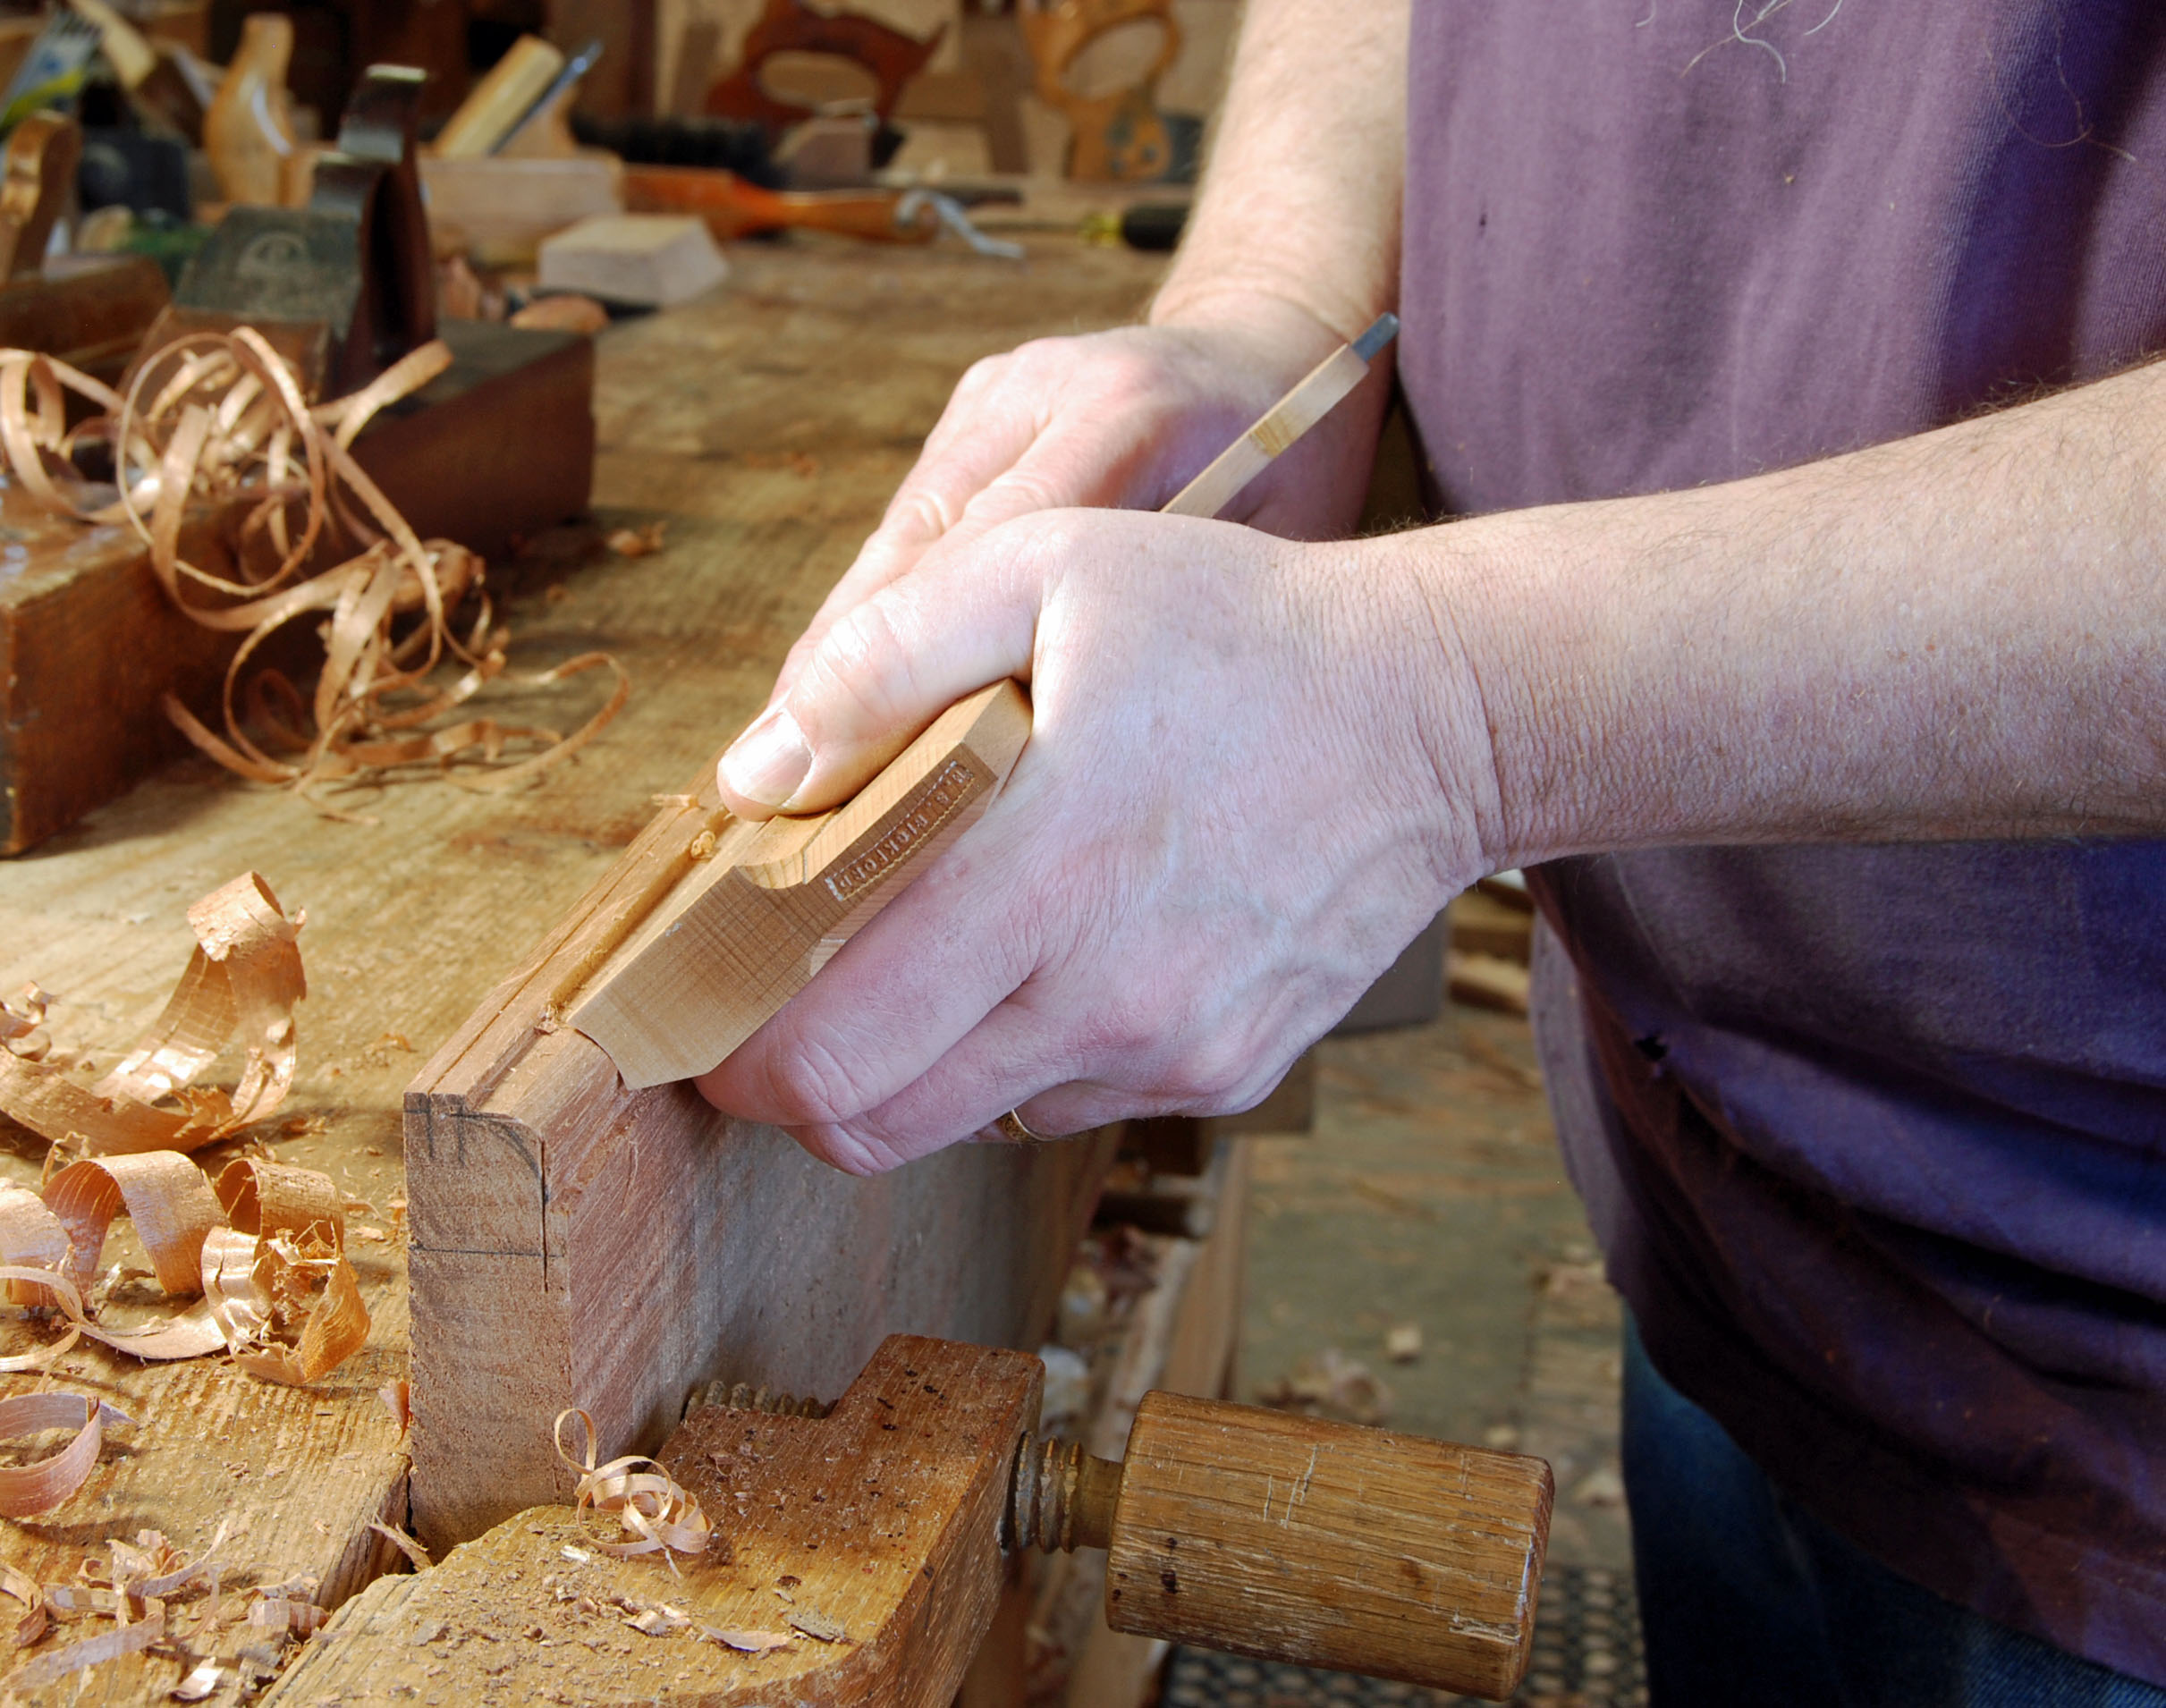
 I marked out the 7/8” wide thumbnail molding spacing with a marking gauge along both long edges. Then I followed the steps I outlined in the joint stool book for making the molding; a rabbet plane (in this case, a filester) to begin to define the depth, then bevelling off the shape with smooth plane/jointer. I fiddled a little with a hollow plane like what Matt Bickford does; I had the rabbet, then I chamfered that, then ran the hollow a bit. It was just a bit shy of the right size, and was not perfectly fettled. So it served to further rough out the shape, but I still did the final definition with the smooth plane.

filester plane
filester filetster plane
hollow plane
hollow plane


shaping molding
shaping molding

I ran this molding along both edges, then did the two outside ends. Here, I marked the width with a knife and square, rather than a gauge. Then cut it apart and finished each seat with one more molding. Usually I do the end-grain moldings first, but in this case it was worth reversing that order.

quartersawn stock
quartersawn stock

The wood is amazing quality; clear, wide and perfectly quartersawn. Air dried. The next best thing to riven. I then finished shaping the seats, and bored one & fit it on the stool. Just like in the book…. http://www.lostartpress.com/Make_a_Joint_Stool_from_a_Tree_p/bk-majsfat.htm

boring & pegging
boring & pegging

 Now, fresh on the success of “Riven Cedrela” I have the phrase “half-a-pair of joint stools” ringing in my head like “four-and-twenty blackbirds…” so stay tuned. It could be my first nursery rhyme. 

I have until December…but might need that much time

I have  hard time lately getting things going on the blog. I’m still blaming it on the time-change…but there’s probably more to it.

Anyway, I started working full-time in the shop again. Just didn’t shoot much. I have a small version of Schwarz’ tool chest underway, for when I travel to workshops. I haven’t decided whether to paint it like the first one. https://pfollansbee.wordpress.com/?s=paint

One idea is to nail moldings on it, to mimic a joined chest. I’ll shoot some of it next week.

Then I did some tool handles today, an old Karl Larsson hatchet, and a new knife blade. Mark Anderson at Winterthur told me of a great website where you can buy more knives than you can shake a stick at. http://www.ragweedforge.com/index.html#catalog I held back and only bought three blades…but I know I’ll be back there someday.

Meanwhile, I have until December to finish the chest of drawers I started as part of my Winterthur demonstration. I’ll need all that time for sure. I had framed the basic upper case, which will house two shallow side-by-side drawers above one very deep, full-width drawer. The top drawers are about 4 1/2” deep, with a rail above and below them.

nailing drawer bottom
nailing the bottom on the drawer
drawer detail incl bottom
drawer detail

When I framed the side elevation, I forgot that the upper rail at the side corresponds to the top drawers in front, and the moldings that runs above &  below them. So my first side upper rails were only 3 1/2” high, but once I started to look at it, I realized I had to go back & re-do these rails. 6 1/2” is more like it. I hate having to extend mortises, it’s a nuisance. But it’s worth taking the time this early on to make sure this piece is right in the end. (note that in the picture, you can see the pin holes bored for the initial, wrong-sized upper rails. I will put one more pin hole down near the bottom of these rails.) There will be applied moldings run in line with the top and bottom edges of these rails.)

upper case side frame & panels
corrected upper side rails
interior view cedrela panels
interior view, showing the beveled panels

Mine is not a copy of a particular example, but is based on the one at the MFA and one at Yale. The MFA one is made almost entirely of riven cedrela (Spanish cedar). Mine has an oak frame, but (sawn) cedrela panels. The moldings will be cedrela as well, both those applied to the framing, and the drawer fronts’ decorations. Working with a timber like this is a bit dicey compared to how you can treat riven oak. I beveled the panels without the hatchet, started with a plane, finished with a spokeshave. Easy does it, these can break if not handled carefully. 

(here’s some of the previous mentions of the chests of drawers that I am studying for this work… https://pfollansbee.wordpress.com/?s=cedrela )

beveling cedrela
planing bevels on cedrela
bevel w spokeshave
finishing a bevel w spokeshave


Which brings me to the next part. Unfortunately, my classes at the Port Townsend School of Woodworking in April had be be cancelled due to under-enrollment. I appreciated Tim Lawson & Jim Tolpin taking a chance on me, and I’m sorry it didn’t work for us. Maybe my New-England-y 17th-century outlook doesn’t fly out in the newer West. BUT one door closes, another one opens. It means I get time to be a student in Matt Bickford’s class at Lie-Nielsen in April. I’m bringing some cedrela with me, and Matt says we can work on that on the 2nd day. That will give my moldings a jump start so I can keep the chest of drawers moving ahead.


UPDATE: I forgot to include this shot from taking the kids to school today. In the Home of Applied Paranoia, it’s good to have someone watch your back. Here, it’s a case of “you watch my back, I’ll watch  yours.” – Red-shouldered hawks. 

watch my back I'll watch yours


Furniture Journals I read

I’ve been reading a lot about furniture lately. Tonight’s post is about journals, I have one about books in mind, but am out of time for writing tonight. Here goes. We’ve been over this before, but there’s new folks. 


There’s many shades of furniture enthusiasts. For those who lean towards “period” furniture, (not a clearly defined term – but maybe it’s stuff made before machine-work’s dominance), there are two journals I regularly read that are essential. Milwaukee, Wisconsin is home to the Chipstone Foundation – http://www.chipstone.org/ a non-profit foundation dedicated to preserving decorative arts, and promoting research and publications in the field. Since 1993 they have published American Furniture, an annual journal edited by Luke Beckerdite. It featurs various articles and an extensive bibliography. I am often surprised at the number of woodworkers I meet who don’t get this journal. Even if you don’t read it, the pictures alone are worth the investment. Usually runs about $60 per issue…I just saw some back issues for sale at $37-55. Many will say “read it on chipstone’s site” – but not all the photos are there, and they haven’t got all the articles up yet…they might never catch up.


American Furniture
American Furniture


In the US even less-well-known is the British group, the Regional Furniture Society. http://www.regionalfurnituresociety.com/home.htm Much different than the Chipstone Foundation, RFS is an all-volunteer, or mostly all-volunteer organization with no direct museum affiliation. Many of its members are in the museum field, but some are woodworkers, some antiques dealers or collectors…there’s quite a range of people in the group. Their annual journal, these days edited by Adam Bowett, is called Regional Furniture, first published in 1987. Their newsletter, published twice a year, often makes me want to leave home. They have field trips, study days, visits to collections both public and private – an amazing array of information. Book reviews, etc. The publications are available to members – right now US membership runs about £40, so around $60.

Regional Furniture
Regional Furniture

OK. Three journals. The Society of American Period Furniture Makers (SAPFM) have been publishing their journal, American Period Furniture and newsletters since 2001. http://www.sapfm.org/index.php Joining the society also brings you in touch with a wide range of woodworkers, some of the best in the US today…they have regional chapters with frequent meetings, demos, events – I am lucky enough to be part of the New England chapter, and Freddy Roman (and others) keeps arranging great events. When I attended one early this month at the Connecticut Valley School of Woodworking, there were around 90-100 people there to see/hear Brock Jobe, Mary May and Don Williams. And pizza.

SAPFM's American Period Furniture
SAPFM’s American Period Furniture

How to Make a Comb-back Windsor Chair w Curtis Buchanan

My woodworking career began with logs. I first made lots of ladderback chairs for several years, then in 1987 I spent a week as a student in Curtis Buchanan’s first Windsor chair class at Country Workshops, run by Drew Langsner in Marshall, N.C. The following summer, I was an intern at Drew’s place, so got to sit in on Curtis’ next class. That time, I didn’t make the chair again, but tried to soak up the content that was over my head the year before. After that, I would regularly write or call Curtis for more plans, details and chairmaking tips. I eventually made somewhere around 50 Windsors before detouring into joinery and oak furniture. Every blog post I write here is composed while sitting in my copy of Curtis’ comback arm chair that I made about 1990.

Curtis w student at his shop in Jonesborough


I was quite surprised when I opened the mail the other day & received a set of DVDs from Curtis, along with 3 pages of full-sized plans for making the current version of his comback arm chair…

chairspin_32
comback Windsor chair, Curtis Buchanan


Maybe you’ve seen Curtis’ videos on Youtube, but now you can get the full set directly from him in a binder. It’s broken down into 10 discs, amounting to around 11 hours of video. There is an additional disc that has more than 30 photographic views of the completed chair from almost every conceivable angle. These are home-made videos. If you have ever met Curtis, then you know what to expect. It’s just as if you were watching him explain the process as he makes the chair. I’ve done several how-to videos, and no matter how much practice I have at explaining my craft, to stare into the camera’s lens and talk to it is weird. Curtis tried a professional video production once, but quickly realized that it’s not his style. But don’t confuse informality with un-professional. Curtis really teaches you how he makes this chair, step by step…if I had any room at home, I’d take a shot at making another. 

chairspin_01

Just to be clear, I did not buy these discs. Curtis sent them to me gratis. I have always been struck by his generosity, and have tried to keep it in mind as I have been an instructor and teacher for the past several years. Curtis always shared his drawings and plans whenever I asked, I remember him telling me that’s what Dave Sawyer did for him, and so he did it for others. For all I know, these videos might still be up on Youtube for free. But if you are interested in chairmaking, or want to be, I’d say buy the set from Curtis. They are very reasonably priced, and if you opt for the drawings too, then you’ll be well on your way. Curtis still teaches down at his home shop in Jonesborough, Tennessee, just about the quaintest place you can imagine. Here’s the link – buy the discs under the tab for “classes”  http://www.curtisbuchananchairmaker.com/home.html

One of the best thrills I had in recent years was when I taught a box-making class at Drew’s and Curtis came to be a student. After 20 years, I finally had something I could give him.

Riven Cedrela…(to the tune of On Top of Old Smokey)

Riven Cedrela
Riven Cedrela
Riv-en ce-drela
And chestnut & oak
Make up this chest of drawers
Once covered in smoke
 
It’s really quite snappy
But inside it’s rough
My wife really wants one
To store all her stuff
two cases
two cases
Riv-en ce-drela
As light as you please
It built in 2 cases
To move it with ease
 
The turnings & moldings
Are the latest style
To learn to cut rosewood
Will take me a while
 
An allergic reaction
is surely no joke
And if I get one,
It’s back to red oak
dovetails
dovetails
The drawers they have dovetails
And bottoms of pine
The furniture forum’s
An excuse to build mine
 
It’s fussier work than
I usually do
But it’s about time I
Tried something new

Getting ready for Winterthur; dalbergia turnings, dovetailed drawers

planing dalbergia
planing dalbergia

Well, two days in a row and I come up with my next all-time favorite turning wood. Last time it was the Bolivian rosewood, this time it’s East Indian rosewood.

It’s hard to judge based on one experience turning this stuff, but so far so good. It does require sharp tools, but that’s what we’re supposed to have anyway. I had long wondered about the Boston turnings of the 17th century that feature woods like this…what lathe did they use, how did they cut it, etc. 

I finally decided the thing to do is try some and was glad to find that the pole lathe handled it just fine. Things clunked along, but mostly due to me trying to photograph every step of the way, in part for a record, and mostly for slides for the upcoming Furniture Forum at Winterthur…so juggling lights, camera, tripod, etc then checking the results and adjusting things. 

ready to turn it
glued up, octogon-ed, and ready to turn
rough shaping
long sleeves & gloves
detail large gouge
the large gouge roughing out the shape
burnished
some burnishing w Roubo’s polissoir
finished turning
mostly done, for the day anyway

Next time I turn this stuff, I will put the camera away & concentrate just on the turning. This example needs a little attention; but it should come out fine.

Meanwhile, I cut one of the small drawers I need…half-blind dovetails join the sides to the front. The rear is rabbeted & nailed to the end of the drawer sides. Spanish cedar moldings will decorate the pine drawer front.

half blind DT
test fit the half-blind DT
plowing drawer groove
groove for side hung action
plowing groove drawer front
groove in drawer front for bottom
nailing drawer back
nailing drawer back to sides
drawer glued up
ready for the Forum