It was April 10th when I wrote here on the blog about the previous assembly of one of these chairs. I was too busy in May with the Essex County cupboard project and birding to spend much time chairmaking. So it wasn’t until today that I assembled the next one – 6 or 7 weeks apart. That’s a long enough gap to un-learn things for me.
One thing I changed this time is the seat – a thumbnail molded edge instead of just a bevel. And the front corners snipped off – something I saw scrolling through photos of antiques and museum pieces online.

I bored the mortises for the rear legs with the back in place – an attempt to keep the rear leg from bumping into the through-tenon of the back under the seat. It almost worked – I must have wiggled on one of them. But a minor wiggle.

I turned the leg’s tenons to their final dimension (in this case 15/16″ x 1 3/8″ long), Then sawed a kerf in them for a wedge and knocked them into the battens. With glue too. The batten is lifted off the bench top so the tenon can protrude through the top of the batten.
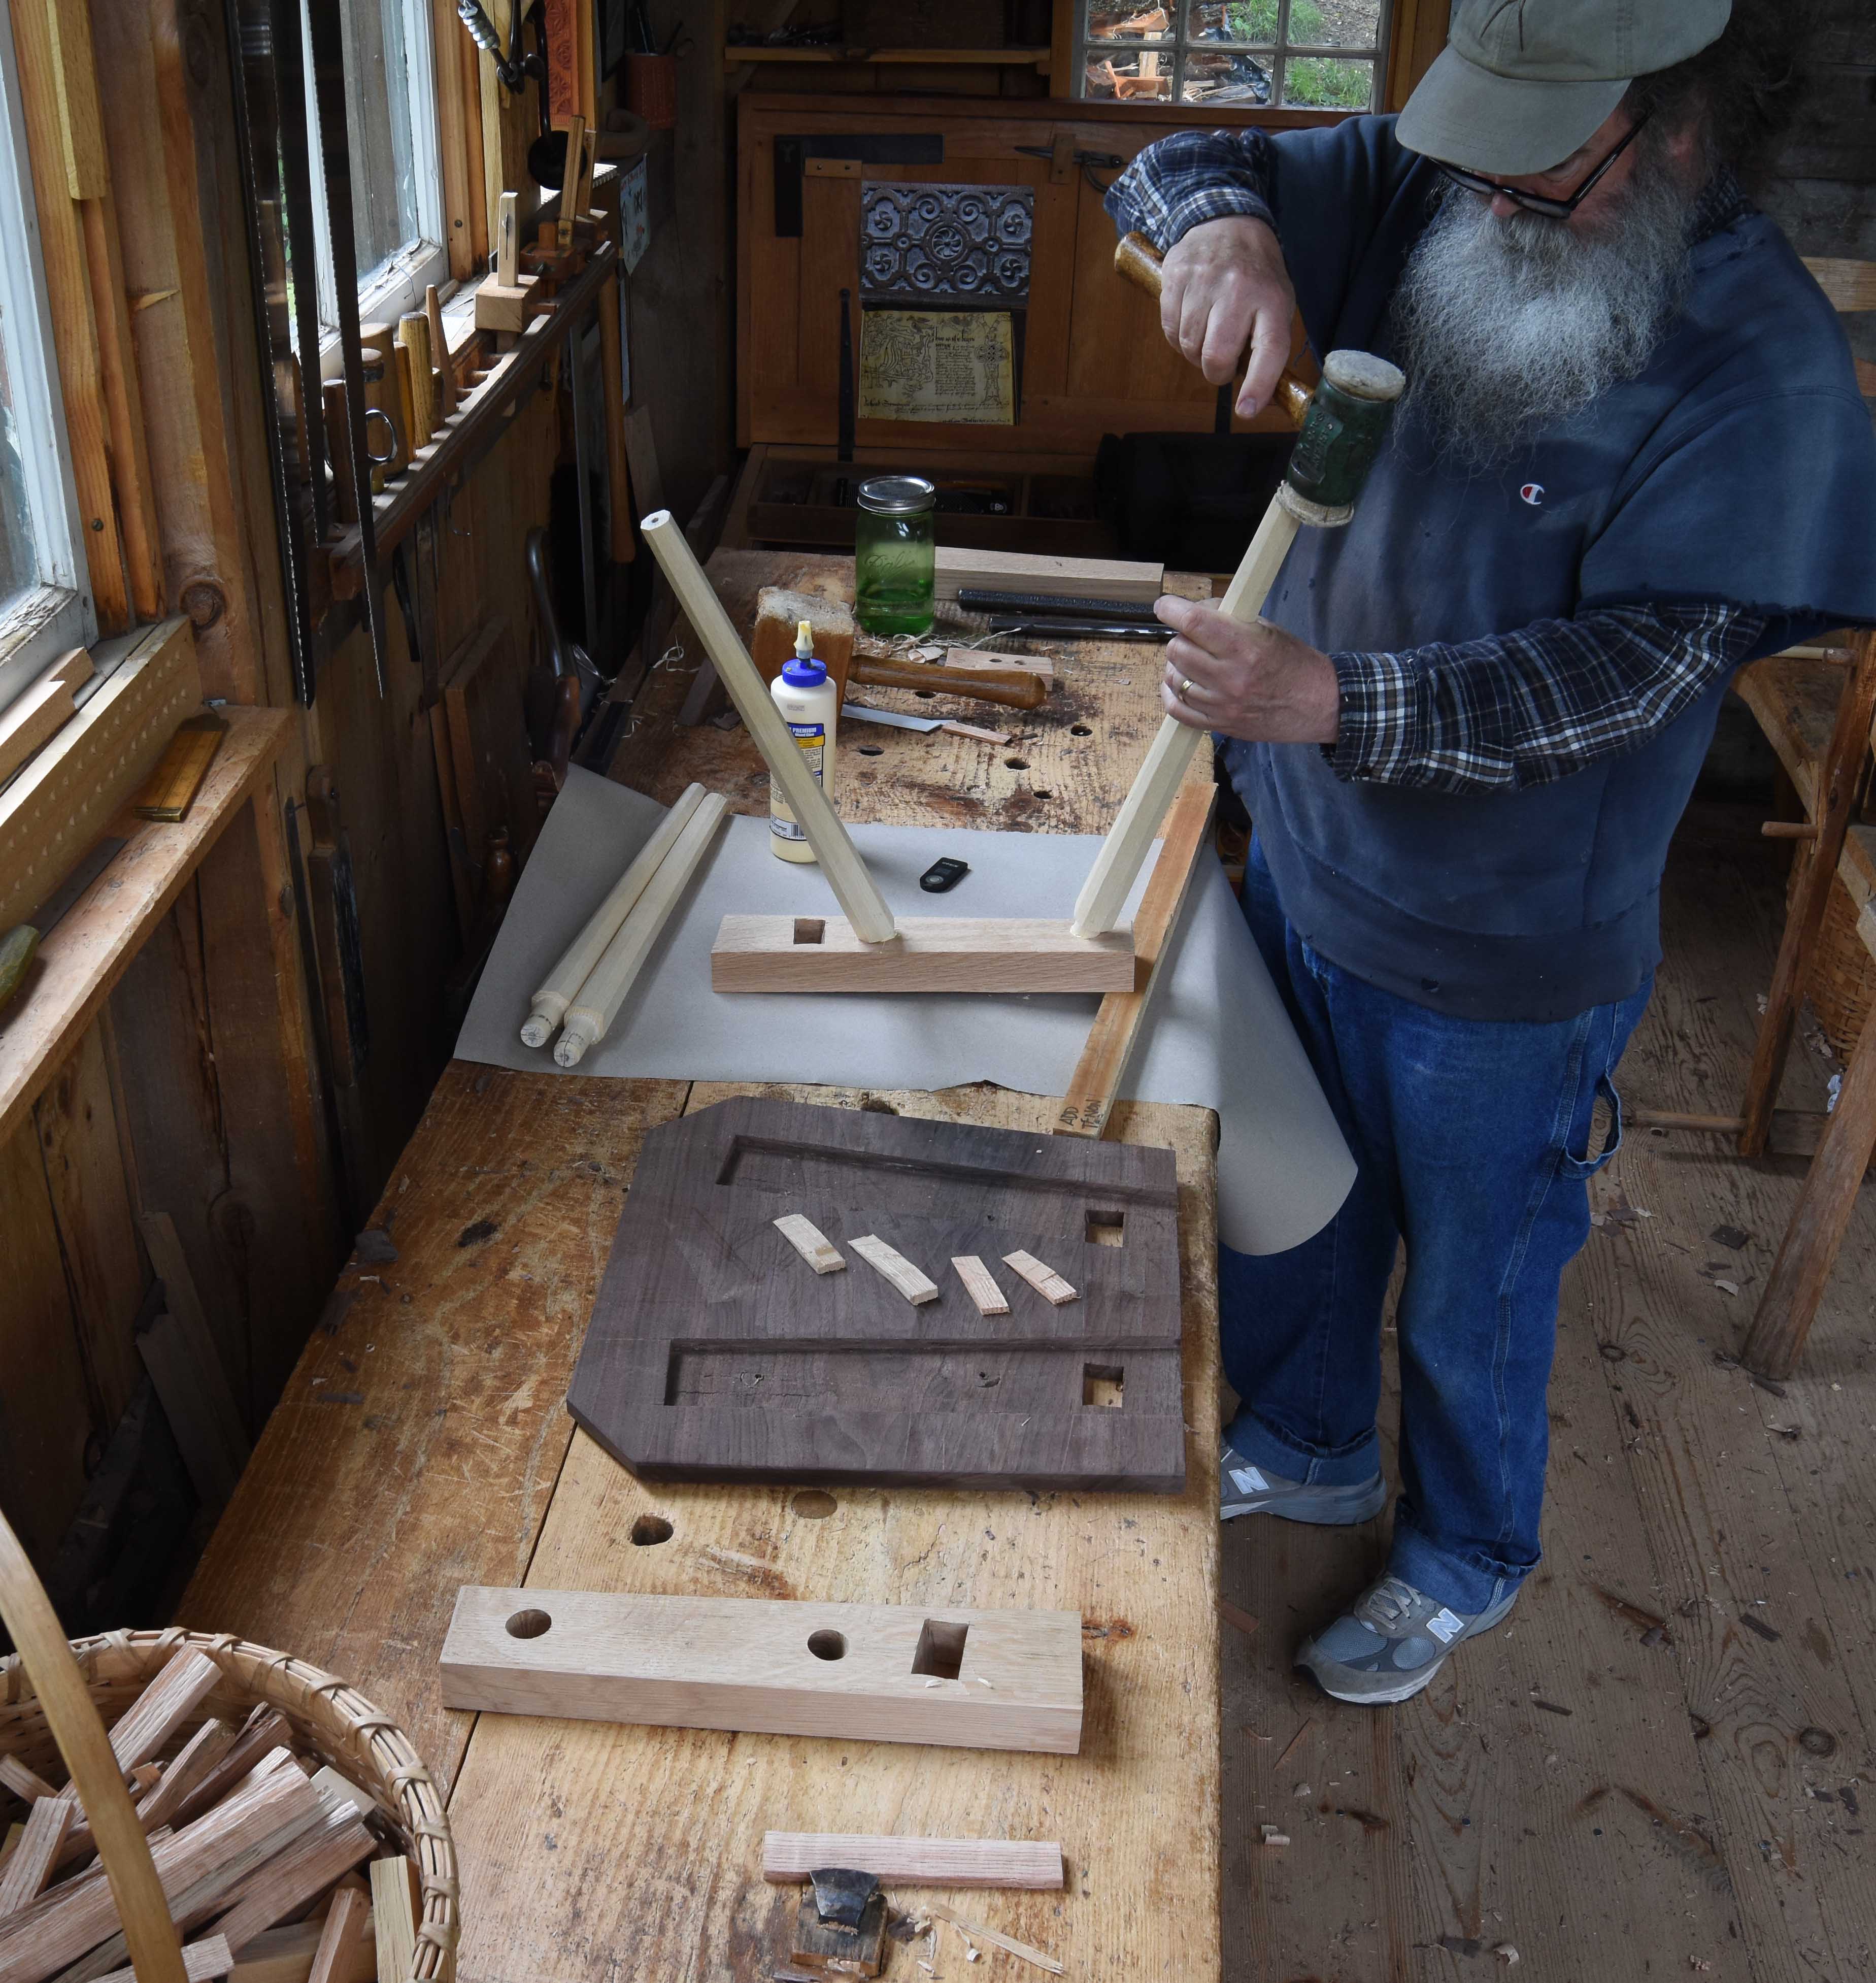
My notes from last time said “make the tenons longer so they all exit completely.” A combination of the angle the mortise is bored at and the length of the tenon can leave the tenon either through like this one, or not quite all the way through like some of the others today. Oh well. Not the end of the world. I still wedged them and they glue helps too.

Driving in the tapered beveled battens is pure fun. They’re very loose for a good stretch, then all of a sudden they get as tight as can be. Brilliant concept.

Then I insert the back in its mortises through the seat and the battens. I don’t use a mallet, it’d be easy to split that back right in half. I’ve done it, a very discouraging move. After it’s all the way in, I scribe for the wedge mortises in the through tenons.

I consulted the previous chair when I laid out the mortise for this wedge. I made it 5/16″ wide and just eyeballed cutting out the wedge angle. Then I used the wedge to lay out the angle of the mortise.

Knocking the wedge in from the back. I drive it in, mark where I want to trim it front & back, then knock it out, trim it & put it back.

Here’s today’s walnut one beside April’s butternut example. These chairs are a great combination of challenging and fun.

The impetus for this diversion into these German/Austrian/Italian/Swiss etc chairs was first of all Drew Langsner’s article “Two Board Chairs” in the Jul/Aug 1981 issue of Fine Woodworking. At first, I felt skittish making them because I’ve never studied an old example. But 2020 blew that notion out of the water anyway. So I started in, figuring I’d make some blunders here & there, some changes to Drew’s instructions and find my way into them. One thing I have seen online is the wedging that fastens the back under the seat is usually a pin, not a wedge. I like the wedge idea that Drew learned in Switzerland, but I run mine from the back toward the front – not side-to-side like the way Drew learned. All those options work of course. I have enough walnut boards to make three more. But they’ll take me some time. There’s that cupboard to get back to…
[if you missed the April brettstuhl assembly post – here it is https://pfollansbee.wordpress.com/2021/04/10/brettstuhl-2-done/ ]