I have some baskets & a few pieces of oak furniture for sale.
The furniture is all joined & carved by hand. Almost all the oak was split from a log, hewn & planed, etc. (except for the box lid and chair seat – those are quartersawn stock) Construction details are throughout the blog here, in my videos w Lie-Nielsen and books with Lost Art Press.
The carved box I can pack & ship. The larger pieces I will have to take somewhere (UPS probably) to be packed & shipped. Or I can deliver them within a couple hours’ drive of Kingston MA. (or you can come pick them up if you wear a mask…)
The baskets are all ash, with hickory rims & handles. There’s videos on the blog recently, showing all the steps in making baskets, from pounding the log apart, weaving, (and next up for the videos) shaving and bending handles & rims.
If you’d like to purchase anything, leave a comment here or send an email peterfollansbee7@gmail.com you can pay through paypal (with additional fees) or send a check. Just let me know which you prefer.
The carved box is the only one ready for sale right now, but I have two more underway, and will take orders for boxes anytime. They’re something I keep stock for all the time, so there’s never too long a wait for one. Email me if you’d like to order something.
Thanks as always,
PF
—————–
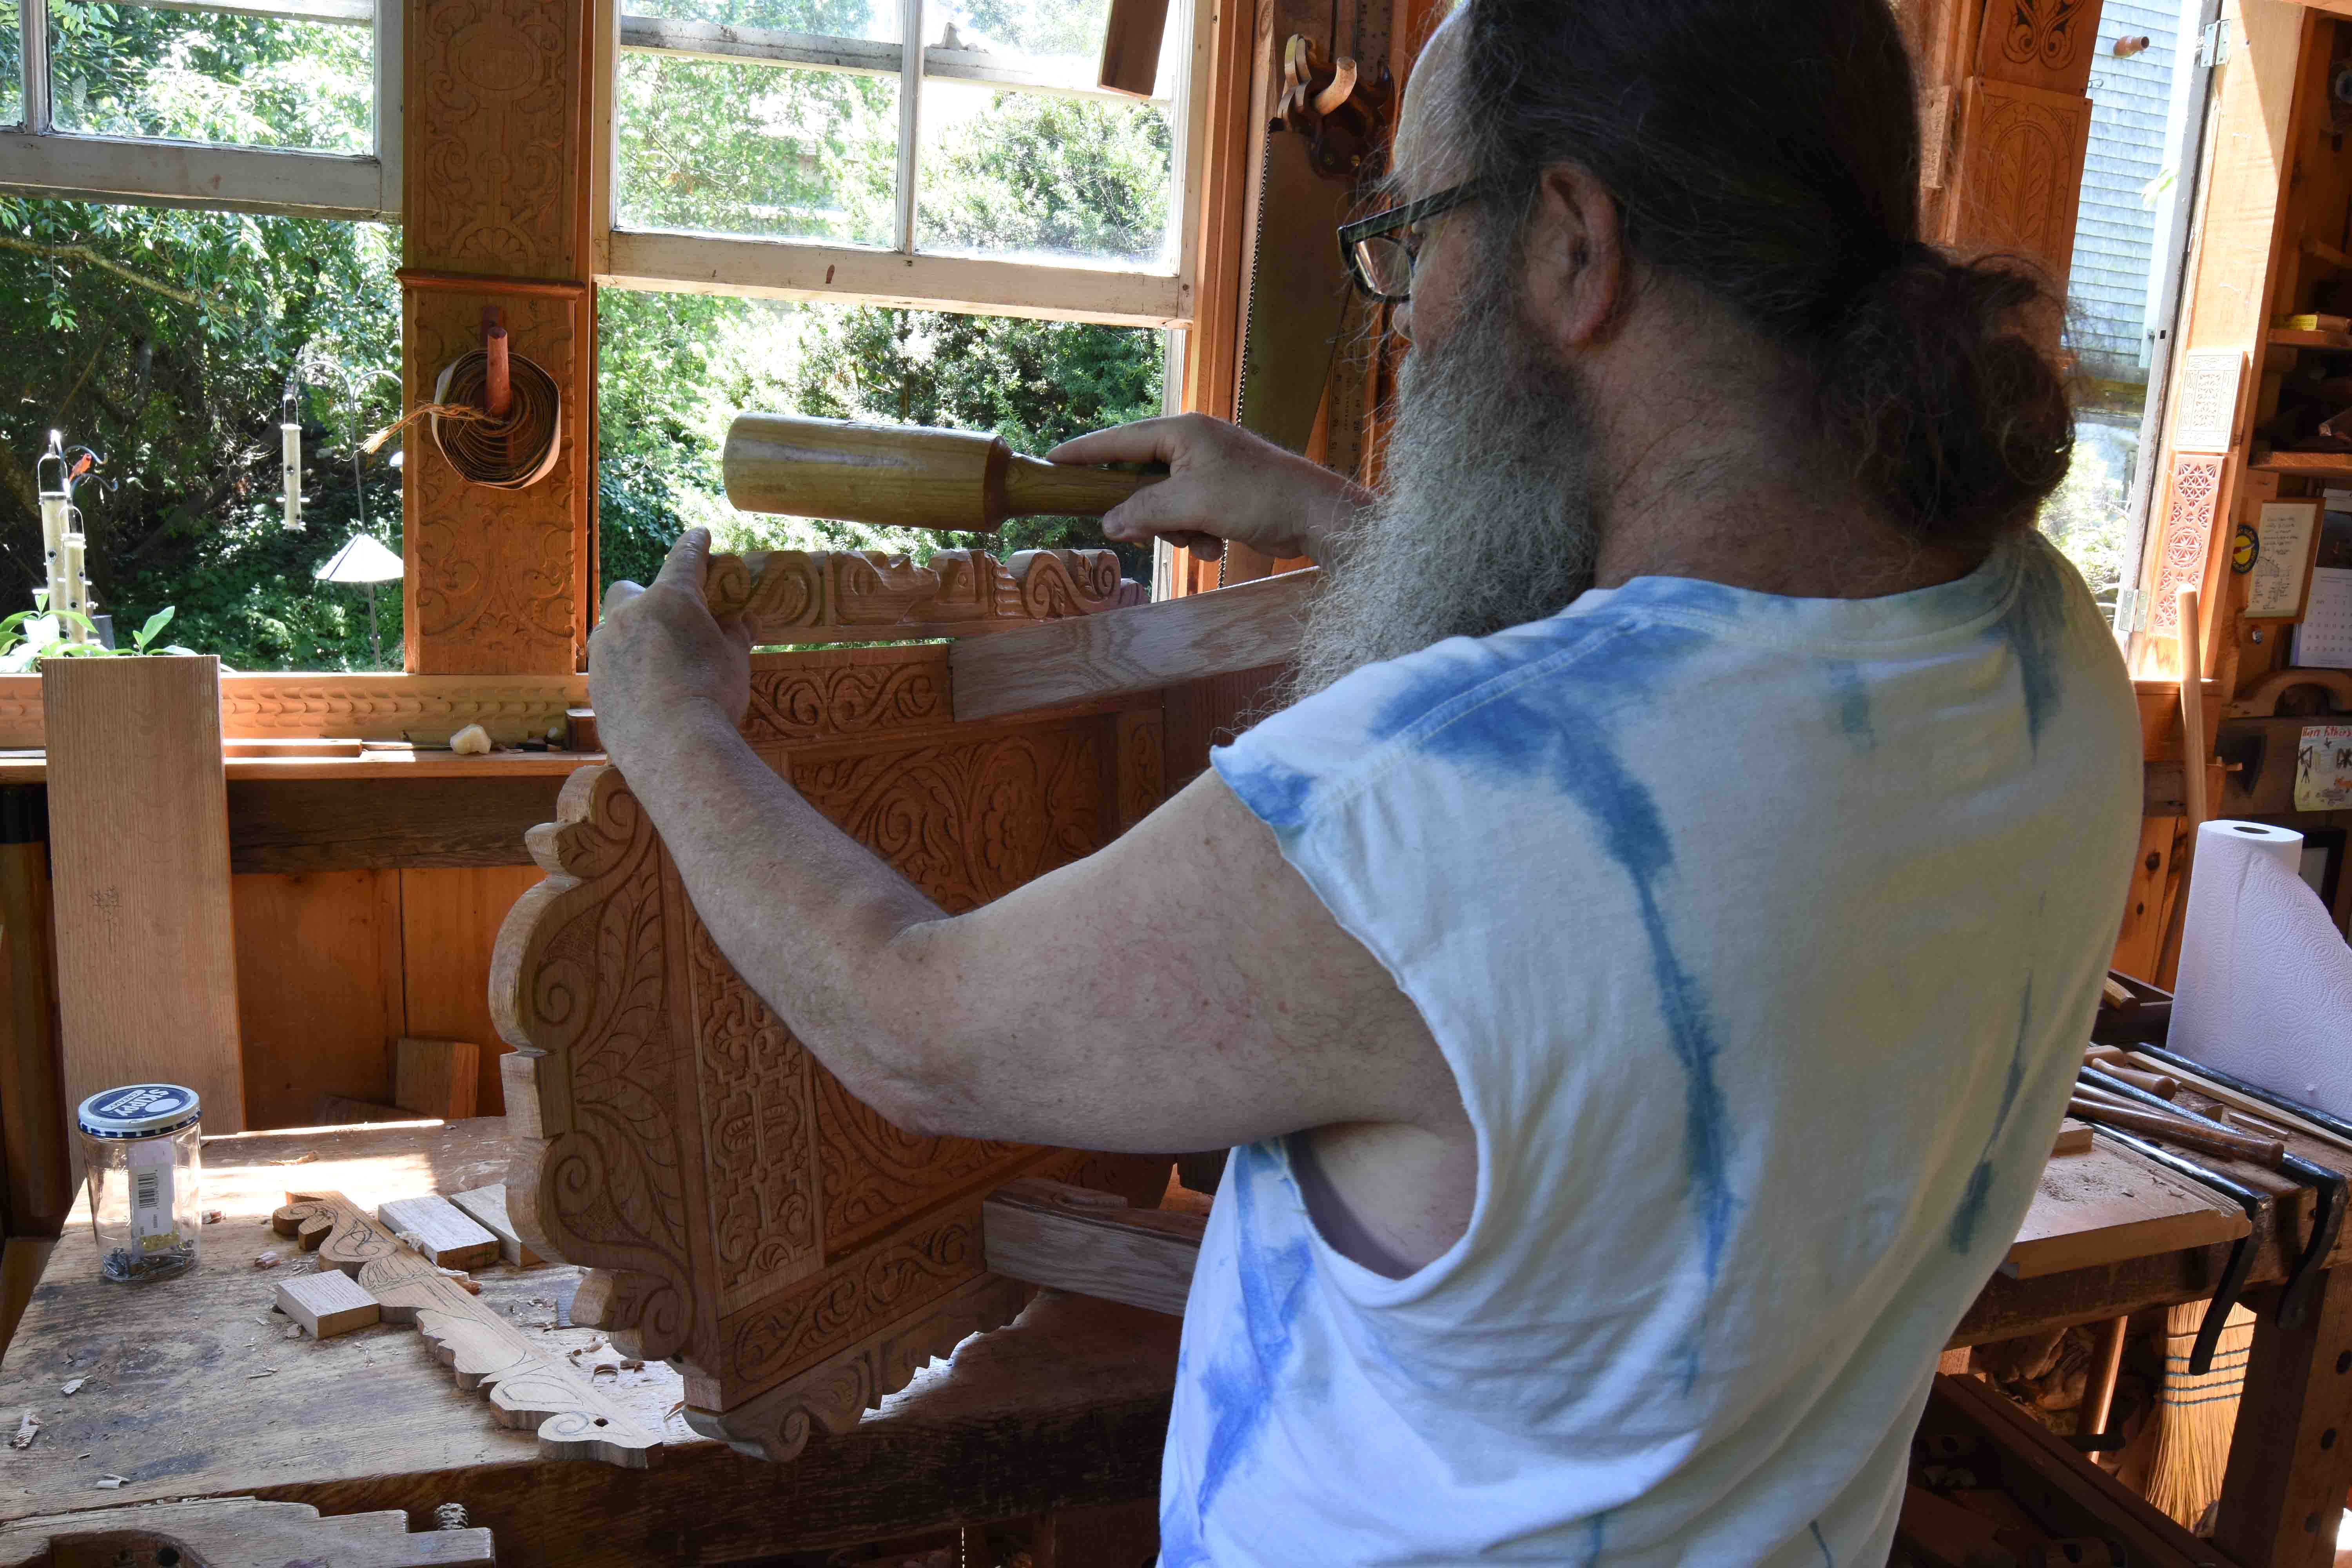
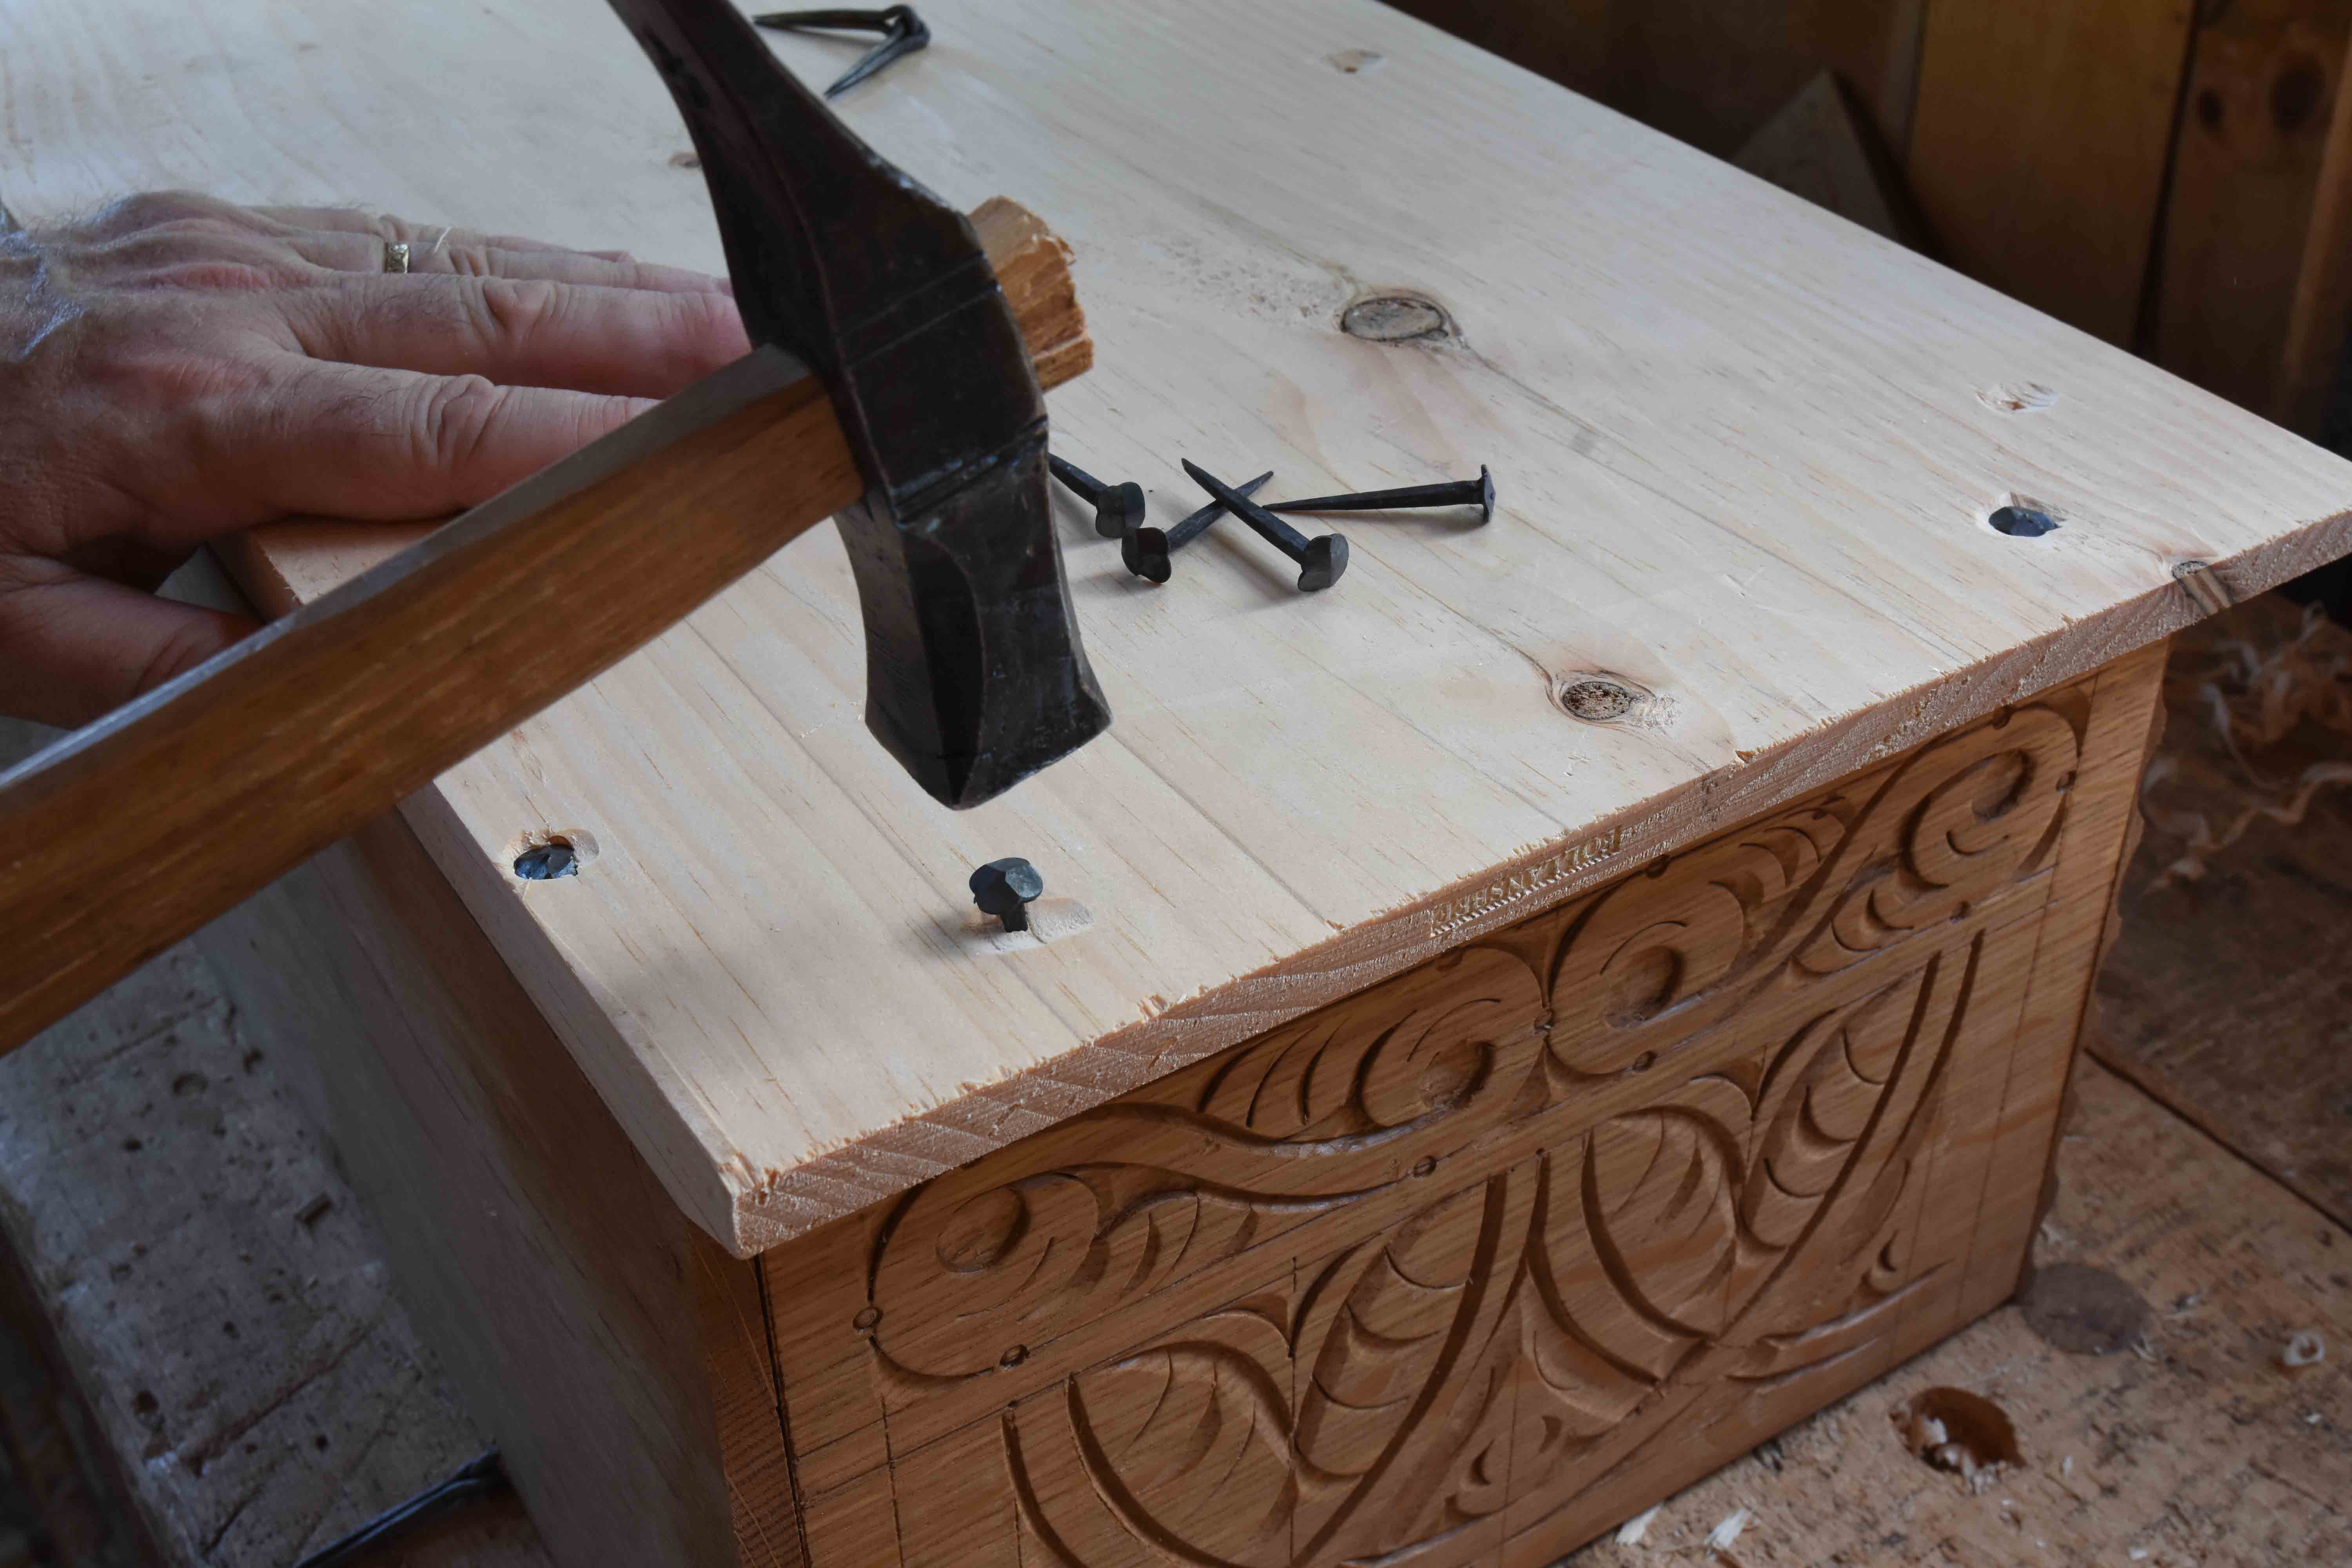
CARVED OAK BOX –
white & red oak, white pine bottom.
H: 8 1/2″ W: 23 3/8″ D: 13″
$1,050 includes shipping in US.
This pattern is often found on 17th-century work – a surprising amount of detail in small spaces. (the bottom photo shows the detail well…)
Glued & pegged at the corners, bottom nailed on w handmade nails. Handmade hinges as well. A lidded till inside.


JOINED & CARVED CHEST
red oak & white pine. Handmade hinges & nails. Lidded till inside.
H: 30 1/2″ W: 45″ D: 21 1/4″
$4,000 plus shipping.
I was recently trying to estimate how many joined chests I’ve made. It’s well over 60. This is one of my favorites – the wide front panels separated by an extra-wide muntin is an unusual format. I based mine on a Devon chest I saw 20 years ago, and have seen others presumably by the same maker since then in photographs. Back when I was writing my book, I wanted to include a short detour on making the “brackets” that fit under the bottom rail. So I made this chest just to get the photos for the book! Then it sat around unfinished for years. Now it’s done, and there’s no room in the house for it. Room for your (or someone’s) initials or date on the muntin…
Here it is with junk piled on it:

I cleared out some room in the shop today to take “proper” photographs (as proper as I’m going to get…) – but there’s only room for the 53″ wide paper, and the chest is 45″ wide. Technically, it fits on the paper, but not for a photo…so here is what I call a “half-view” –

The lidded till inside, and the handmade hinges visible in the rear rail.

The only way it fit, but you can’t see the front. Two-panel ends, typical of my chests. Single-board white pine lid.
 One of the panels in this chest:

WAINSCOT CHAIR
red and white oak. Finial is ash.
H: 47 1/2″ W: (widest point across front of seat) 25 1/2″ D: c. 24″ Seat height: 18 1/2″
$4,000 plus shipping
I’ve made versions of this chair three times before. This one I designed the panel as well as the top rear rail, just below the crest. Otherwise, it’s a close copy to two originals made in Ipswich Massachusetts, probably by Thomas Dennis, between the late 1660s and 1700.


Sometimes it seems from photos that these chairs are huge, there’s a shot in this gallery of me in the chair & you’ll get a sense of its actual size.


—————-
BASKETS – All of these are ash splints, with hickory handles and rims. Most, maybe all, have hickory bark lashing around the rims. These baskets are made for use; I’ve been using baskets like these around the shop and house for over 30 years.
If you’d like to purchase one, leave a comment here. Prices include shipping in the US – you can pay through paypal or send a check. Just let me know which you prefer.
large round basket –
14″ diameter at rims, basket height 9″ to handle 18″
$600 including shipping in US.


——————–
rectangular basket – SOLD
10″ x 13″ at rims; basket height is 8″, to handle about 15″
$400 including shipping in US.


———————
Swing-handle round basket – SOLD
12 1/2″ – 13″ diameter at rims; basket height 8 3/4″, overall 16″ high.
$500 including shipping in US.
This form is a favorite of mine, based on baskets made in eastern New York state in the early 20th century.


——————
long rectangular basket SOLD
10″ x 16 1/2″ at rims, basket height 6″, to handle 14″
$400 including shipping in US.


———————-
square-to-round basket SOLD
10″ diameter at rims, basket height 9″, to handle 17″
$350 including shipping in US.