Back when the book Make a Joint Stool from a Tree came out, I was making how-to videos with Lie-Nielsen. Made a bunch of them over a few years. For a couple of reasons, we never did one on the joined stool. I have a stool underway now, and a recent post brought a question about how the story stick is used. So I tried to cover it in a video – my video capabilities are limited and challenged. I am not going to try to learn video editing…there’s only so many hours in a day. I’m the camera man and the woodworker in these – so there’s your warning. I won’t cover every aspect of making the stool, but will try to hit many of them.
Once I had that stile marked out, I put one on the lathe & set the camera up to try to catch that work. I AM NO GREAT TURNER! – but I can do enough for joiner’s work. So to really learn turning, find someone else. (I like Pete Galbert’s video on turning…) – but here’s my series on turning this stile on the pole lathe. I chopped it up into 3 videos – mostly so I could fumble around & get what I need as I was working. You’ll see, warts n’ all. For short videos, they’re pretty long. Tom Lie-Nielsen used to ask me if I could make a video shorter than Ben Hur.
Part one is mostly turning the cylinder from the square.
Now some of the details; cove, baluster, etc.
I re-jigged the camera for the foot, to try to get some detail. The sun came on very strong, and made things both better and worse.
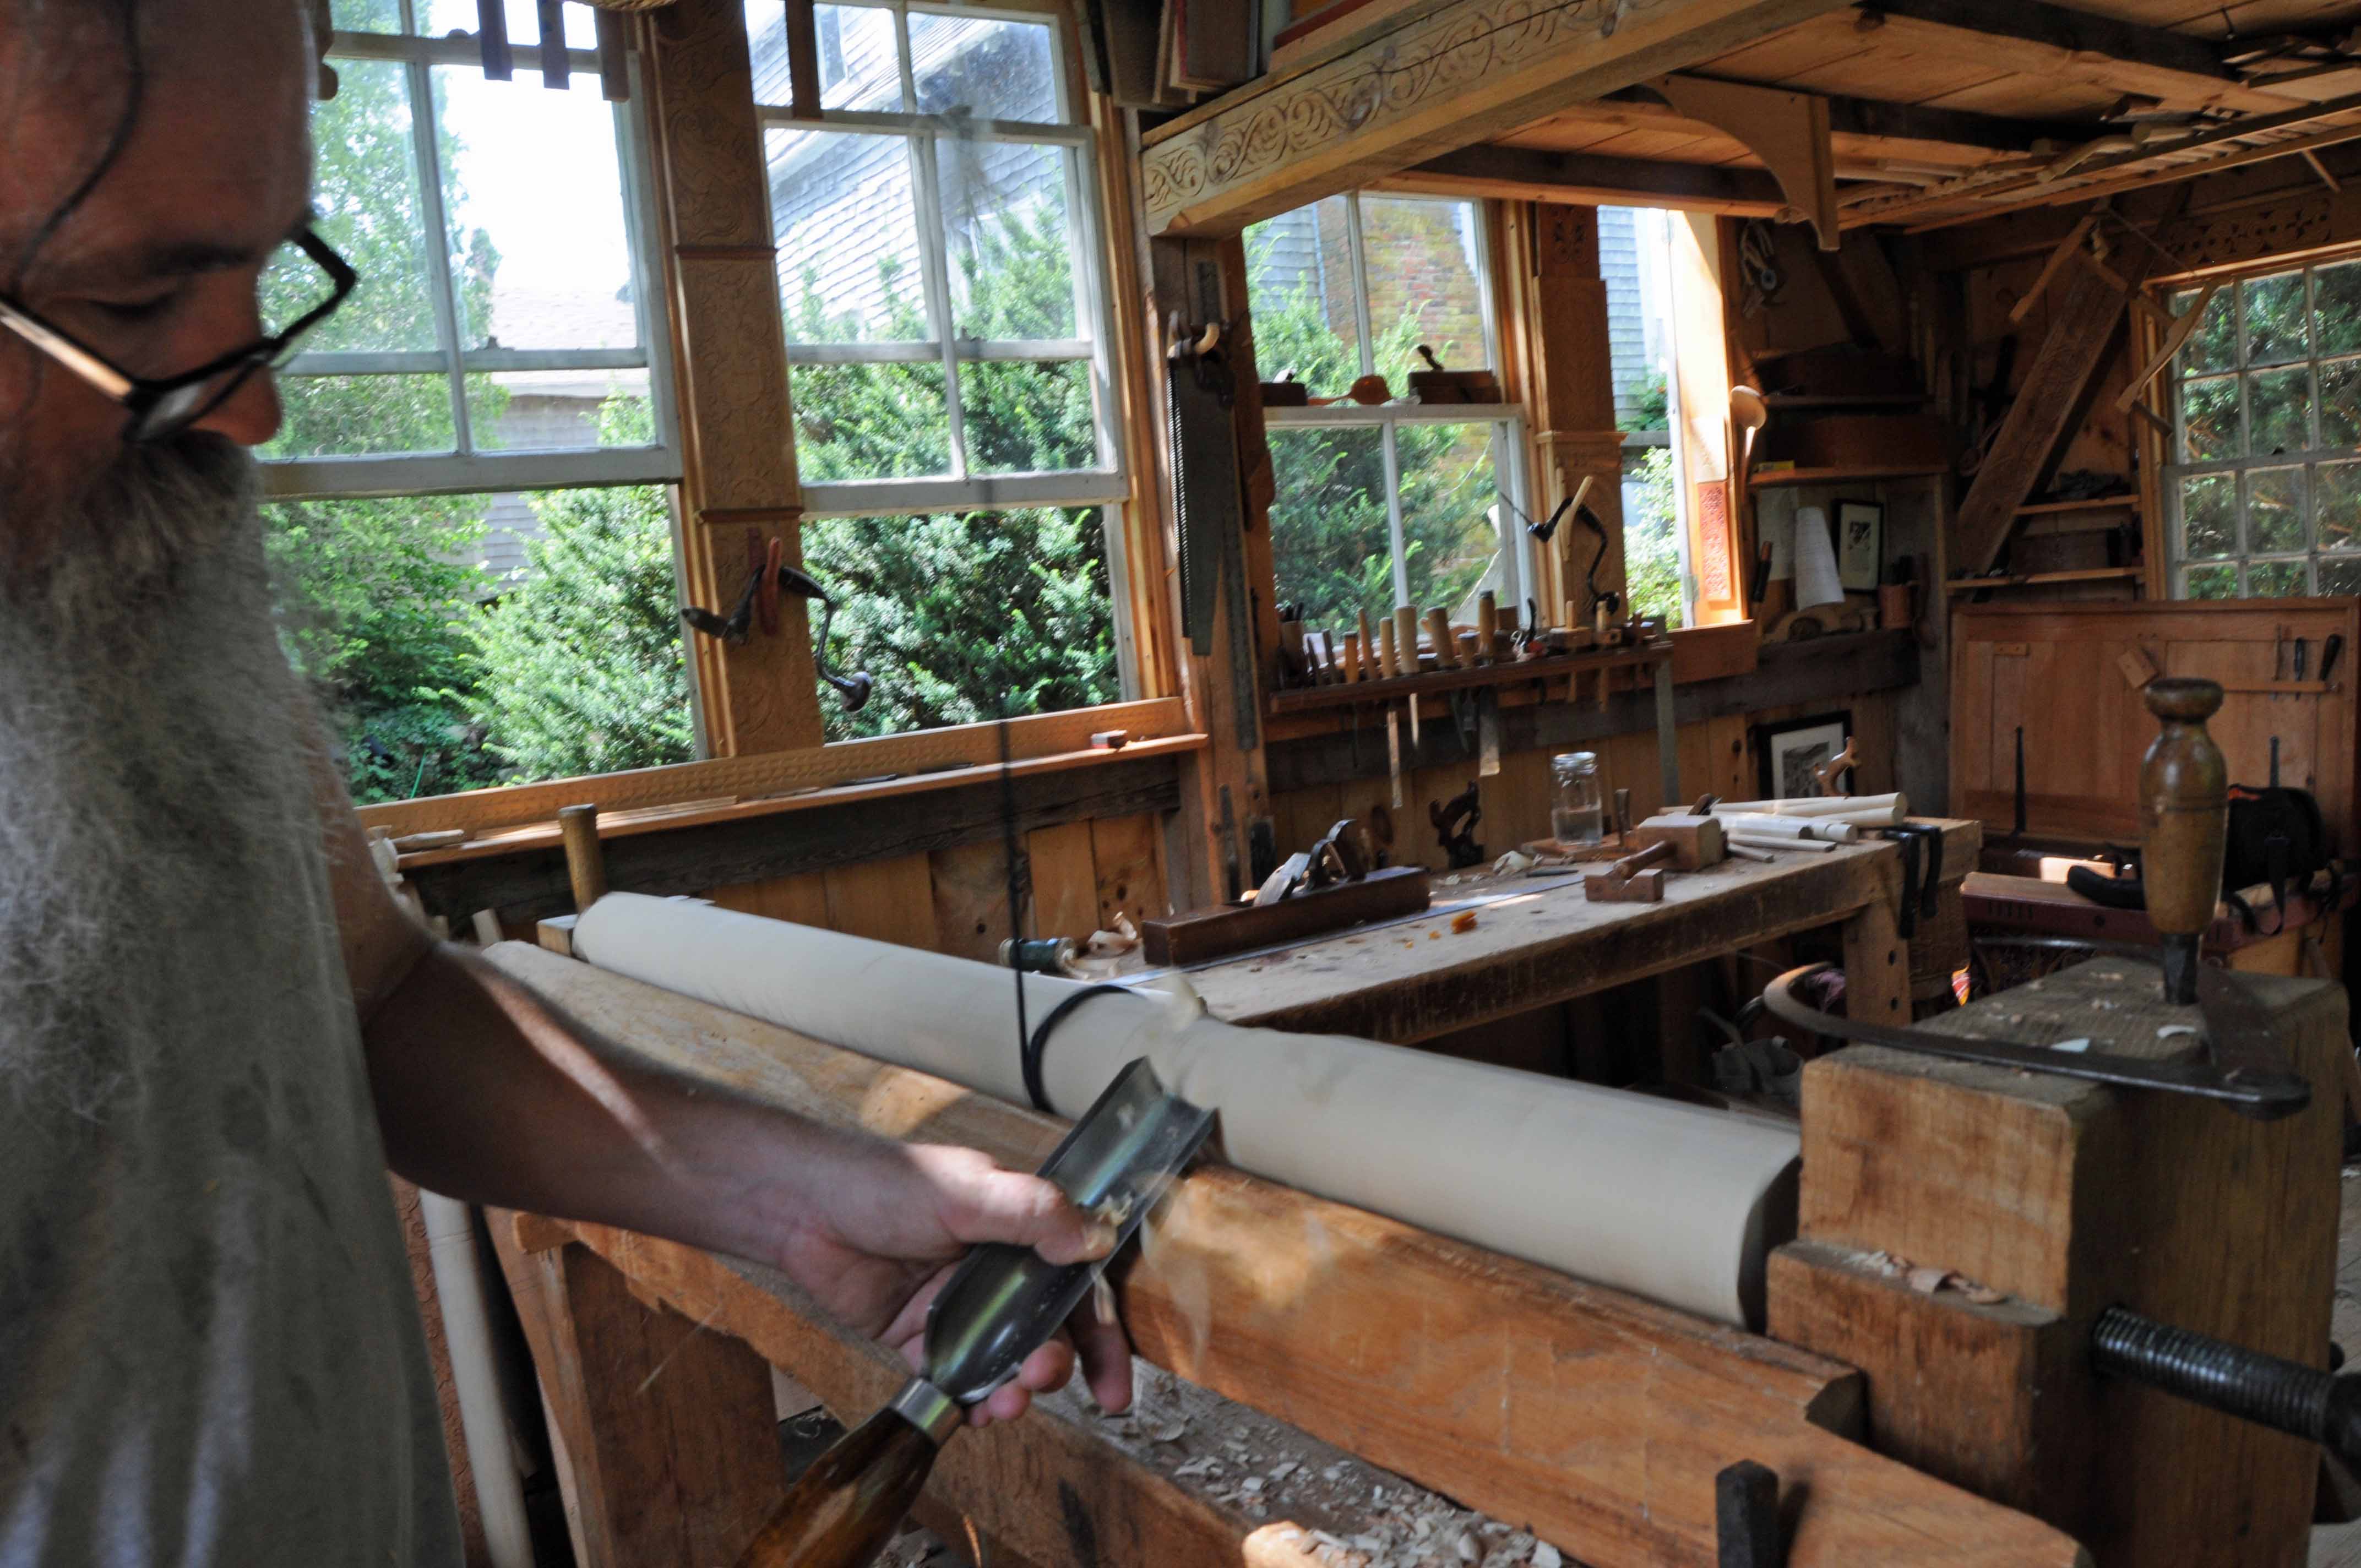
The concept is: How to get a pair of turnings that consist of just under-half-cylinders. There’s lots of ways to get there, but when using period style tools, including a pole lathe, there are challenges. Some turn a solid, saw it in half, then clean up the flat backs with a plane. That’ll get you there, but how to hold the piece for sawing & planing?
I do it this way. My first step is to glue up a turning blank with a spacer between the two halves. The spacer’s true function is to provide a solid material for the lathe’s center points. Without it, the centers are driven right into the glue line, and acting like a wedge, they can split the piece apart too soon. I know this for a fact. Remember, “Good Judgement is the Result of Experience, and Experience is the Result of Poor Judgement.”
I don’t use hide glue enough to bother keeping a glue pot running. The past week or so there have been some damp and some cool mornings, so I lit a fire in the stove. Perfect, I’ll heat up some glue while I’m at it.
Once the piece is glued up, I mark the center in the middle of that strip, in this case oak. Then scribe a circle.
Next, I make it octagonal; these short ones I find it easiest to hold them between bench dogs in the cabinetmaker’s bench. I’ve done them loose on my joiner’s bench, but this way is easier.
and then turning. I used to do some turning every day at my old museum job. Visitors to the museum would want to see the lathe work, so I’d stop what I was doing and show them. Now, weeks can go by without me touching the lathe…makes for rusty skills. I can see why people would like turning rosewood, it takes detail very well, and burnishes like no native wood I know.
But like I said, I’m out of practice. These two are OK, but need to go back on the lathe to be thinned down. For their length, (6 1/4″ long) they’re too chunky. Makes their proportions out-of-whack.
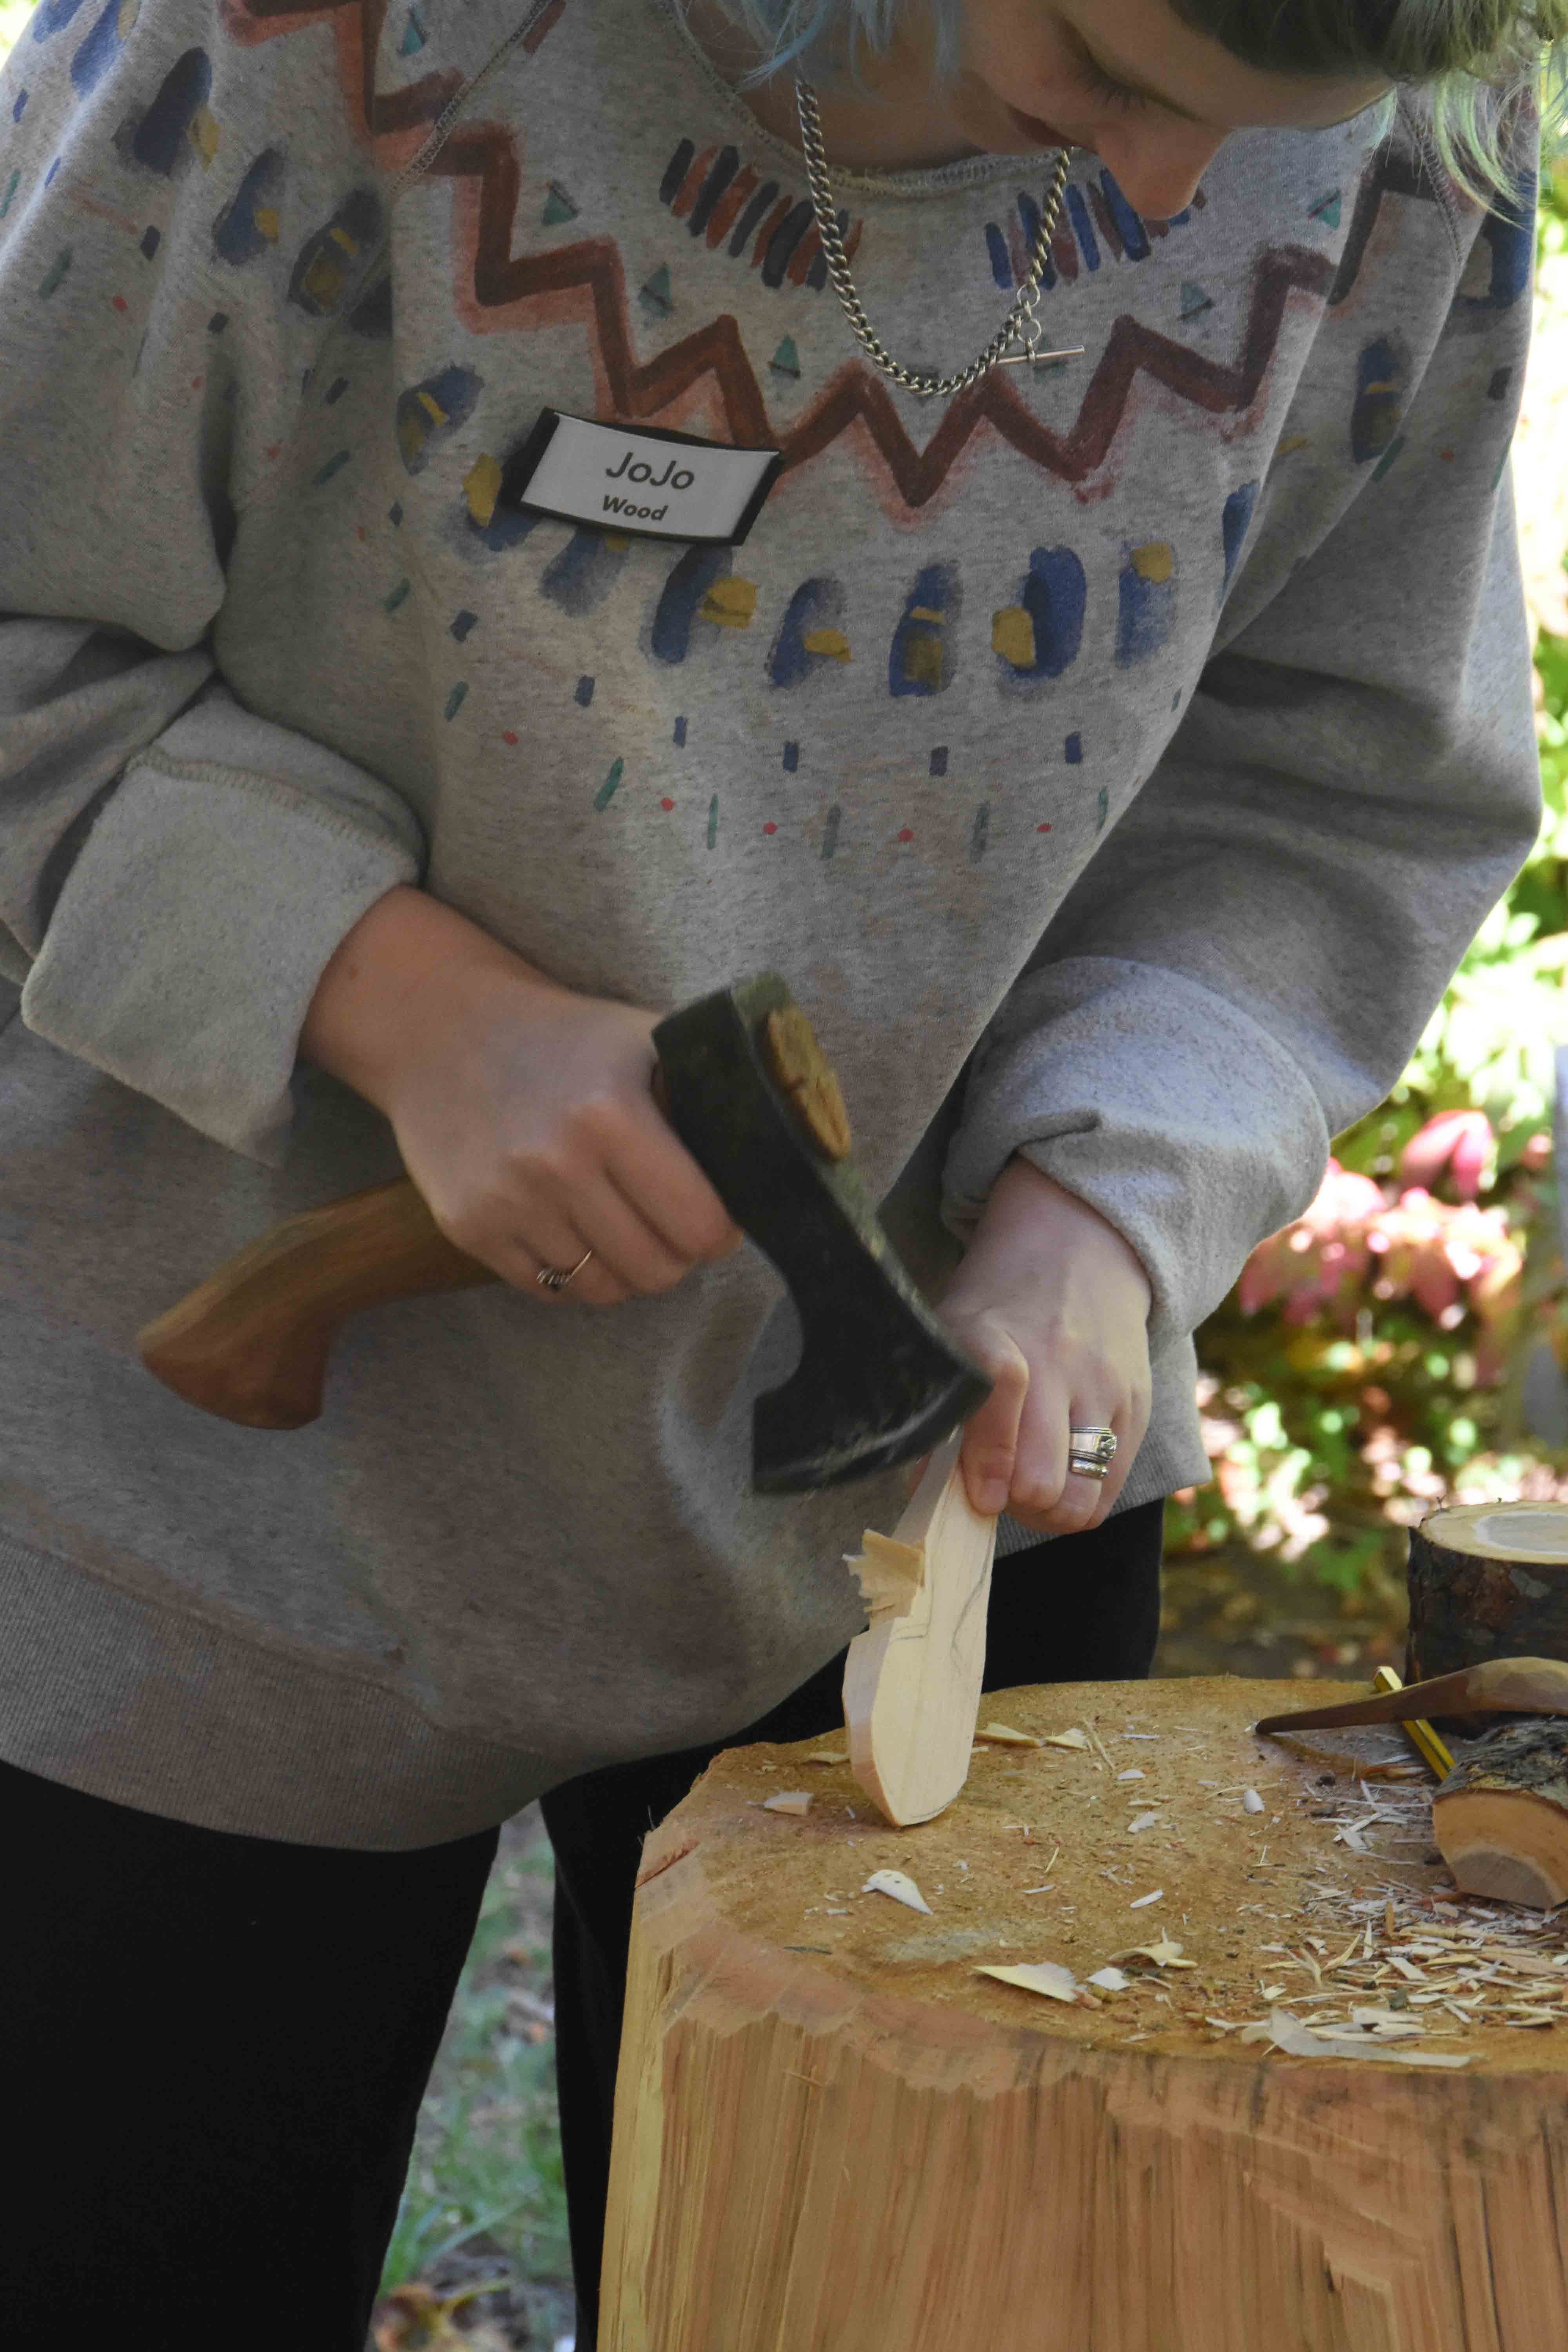
It’s taken me a while, but here’s my post about Plymouth CRAFT’s recent weekend of woodworking. We had JoJo Wood back for her Pocket Spoon class; and Darrick Sanderson came back to help folks dive into bowl turning on pole (really bungee) lathes. That’s JoJo’s students above, deep in concentration, also following the sunshine as the day went on.
If Plymouth CRAFT had a spiritual home, it would be Overbrook House. http://www.overbrookhouse.com/ It was here that we had our first workshops, and we’ve returned many times. In real life, it’s a wedding venue & more, but we turn it into something altogether different. The Ingersolls, our tolerant hosts there, are the greatest. The students know they’re close when they see this sign by our board member David Berman http://trustworth.com/index.shtml
It points them up to the house; which is the center of our world there. Paula’s lunches happen here…
All right, back to the woodsy bits. JoJo’s pocket spoon is a revolution in the making. Go read what JoJo says about it, I don’t need to repeat all that. She started the whole idea of pocket spoons, as I recall… https://pocketspoon.co.uk/
Here, she’s showing (at my request) the 7 blanks she just split out of this one quarter section of black birch. She squeezes out a lot of spoons from a small section of wood.
Hewing the shape with her hatchet.
A new pocket spoon in the making.
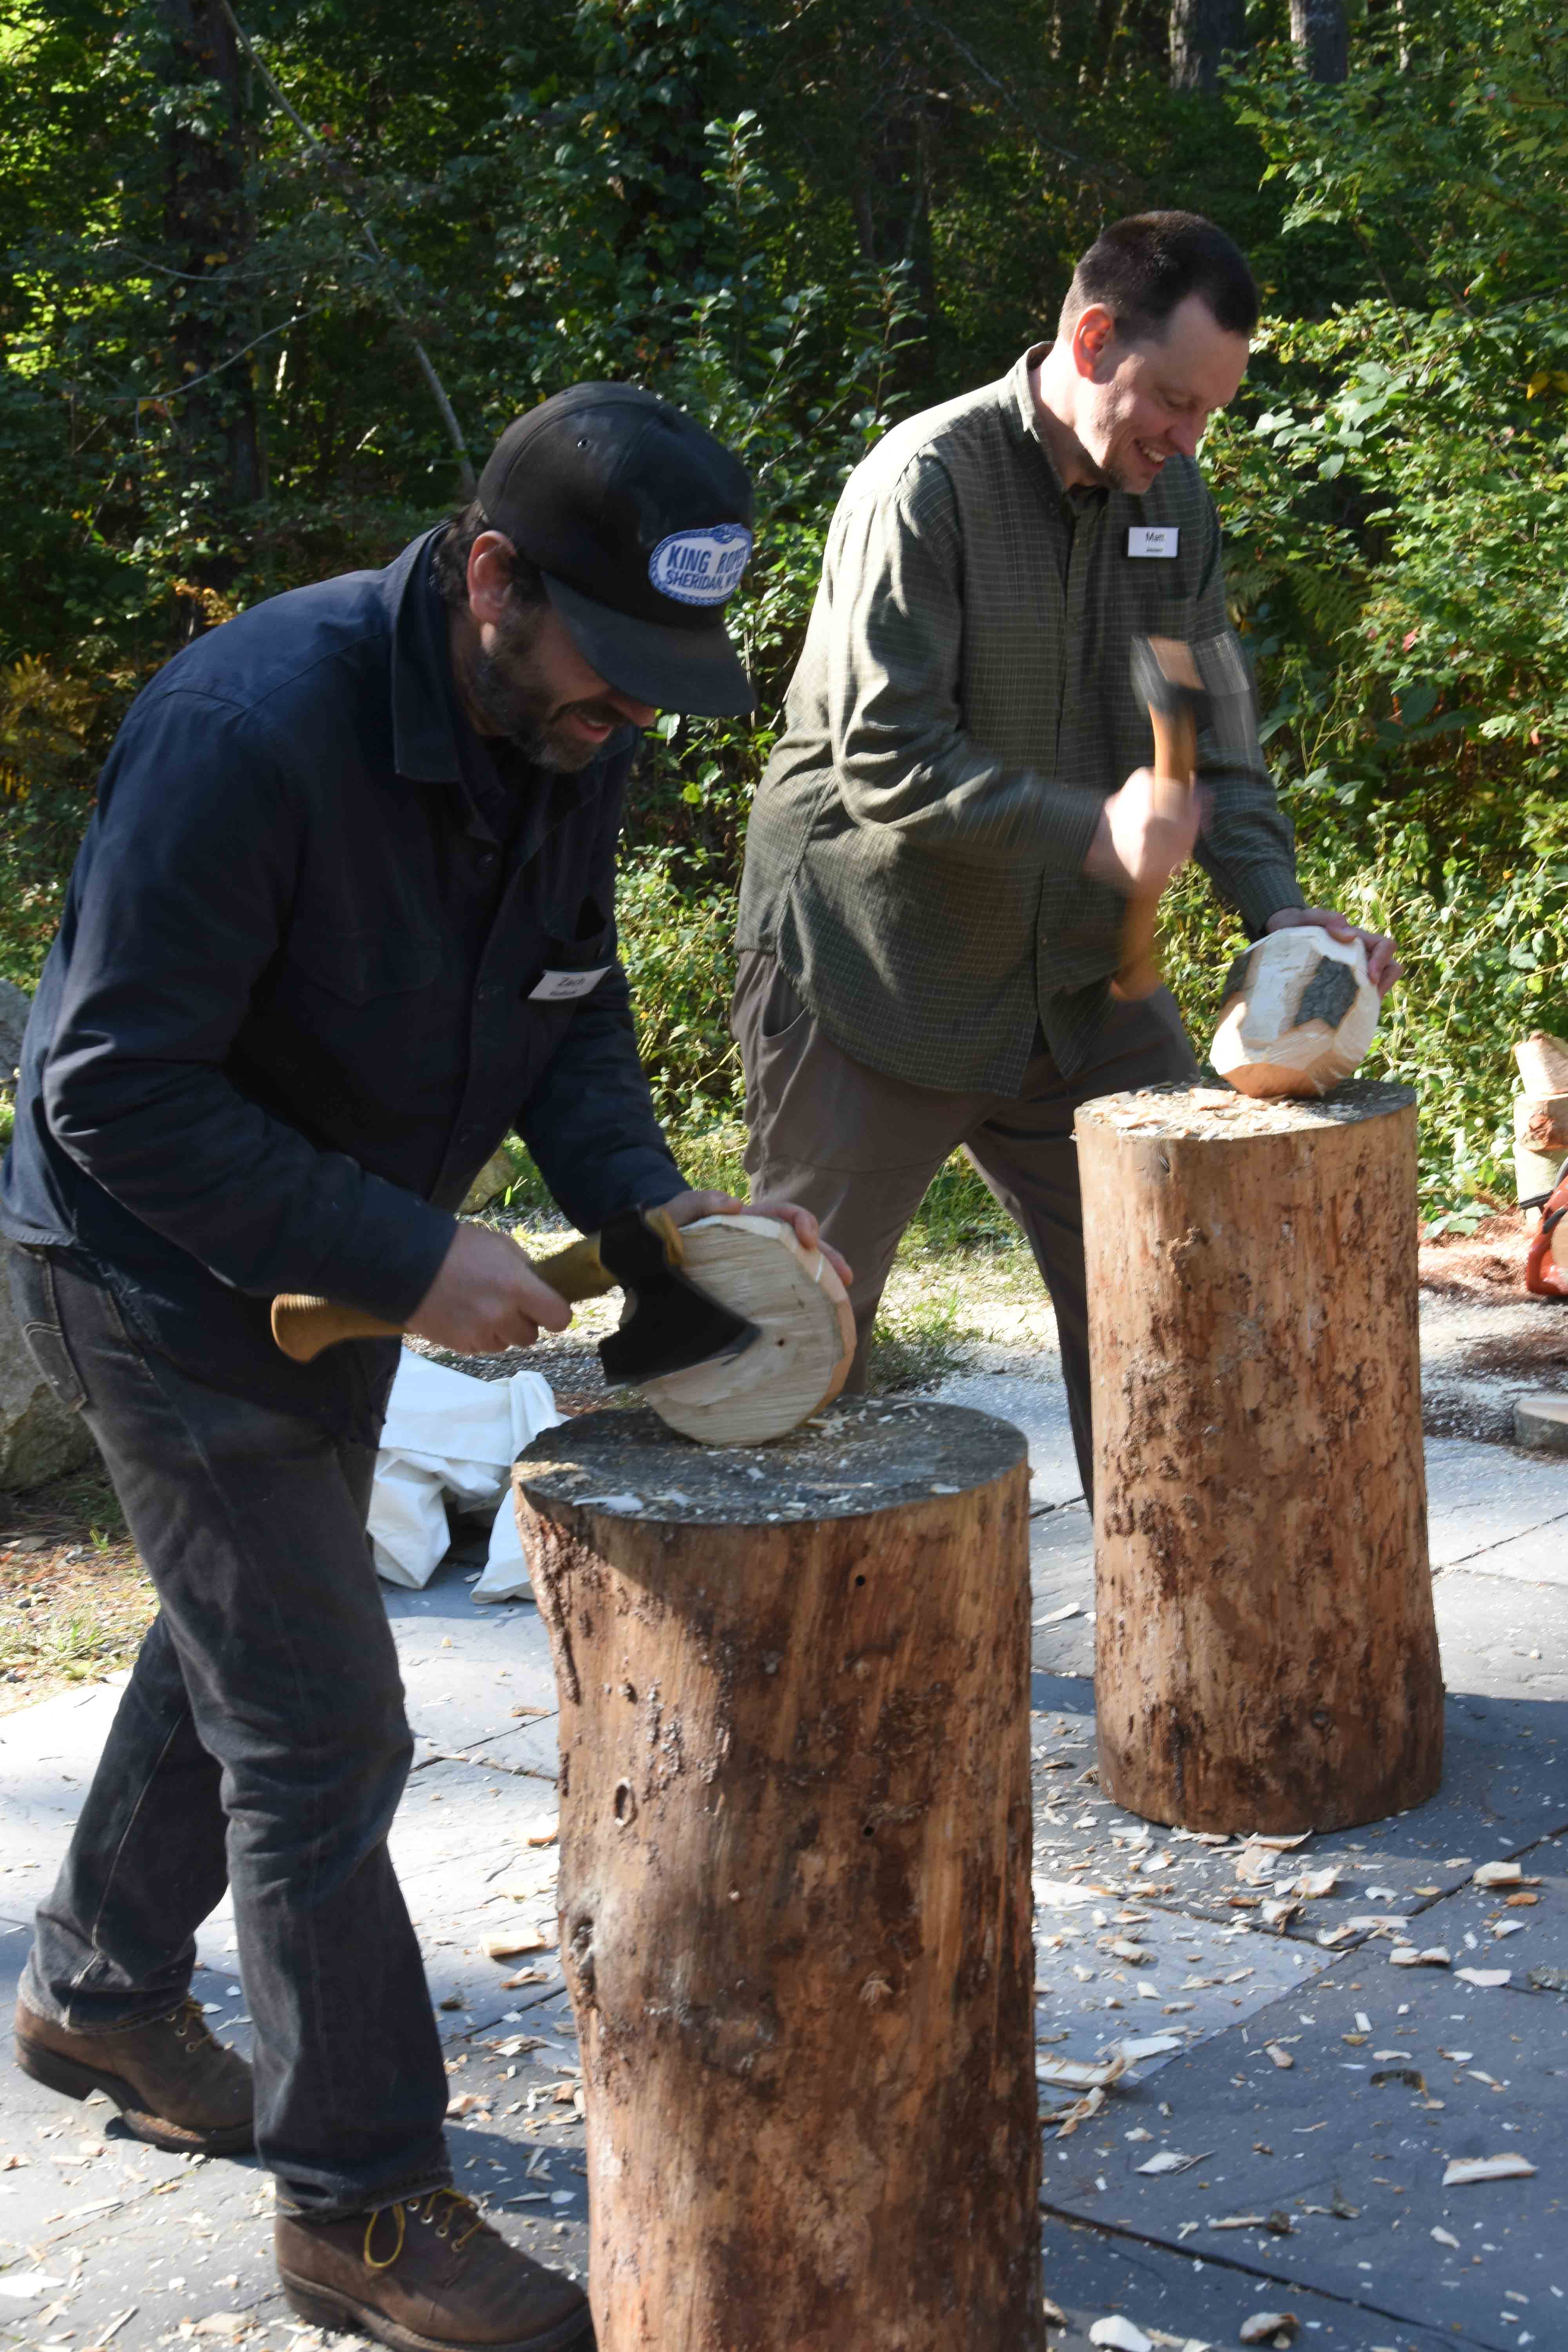
Meanwhile, down at the dance hall, the bowl turners were hewing out blanks
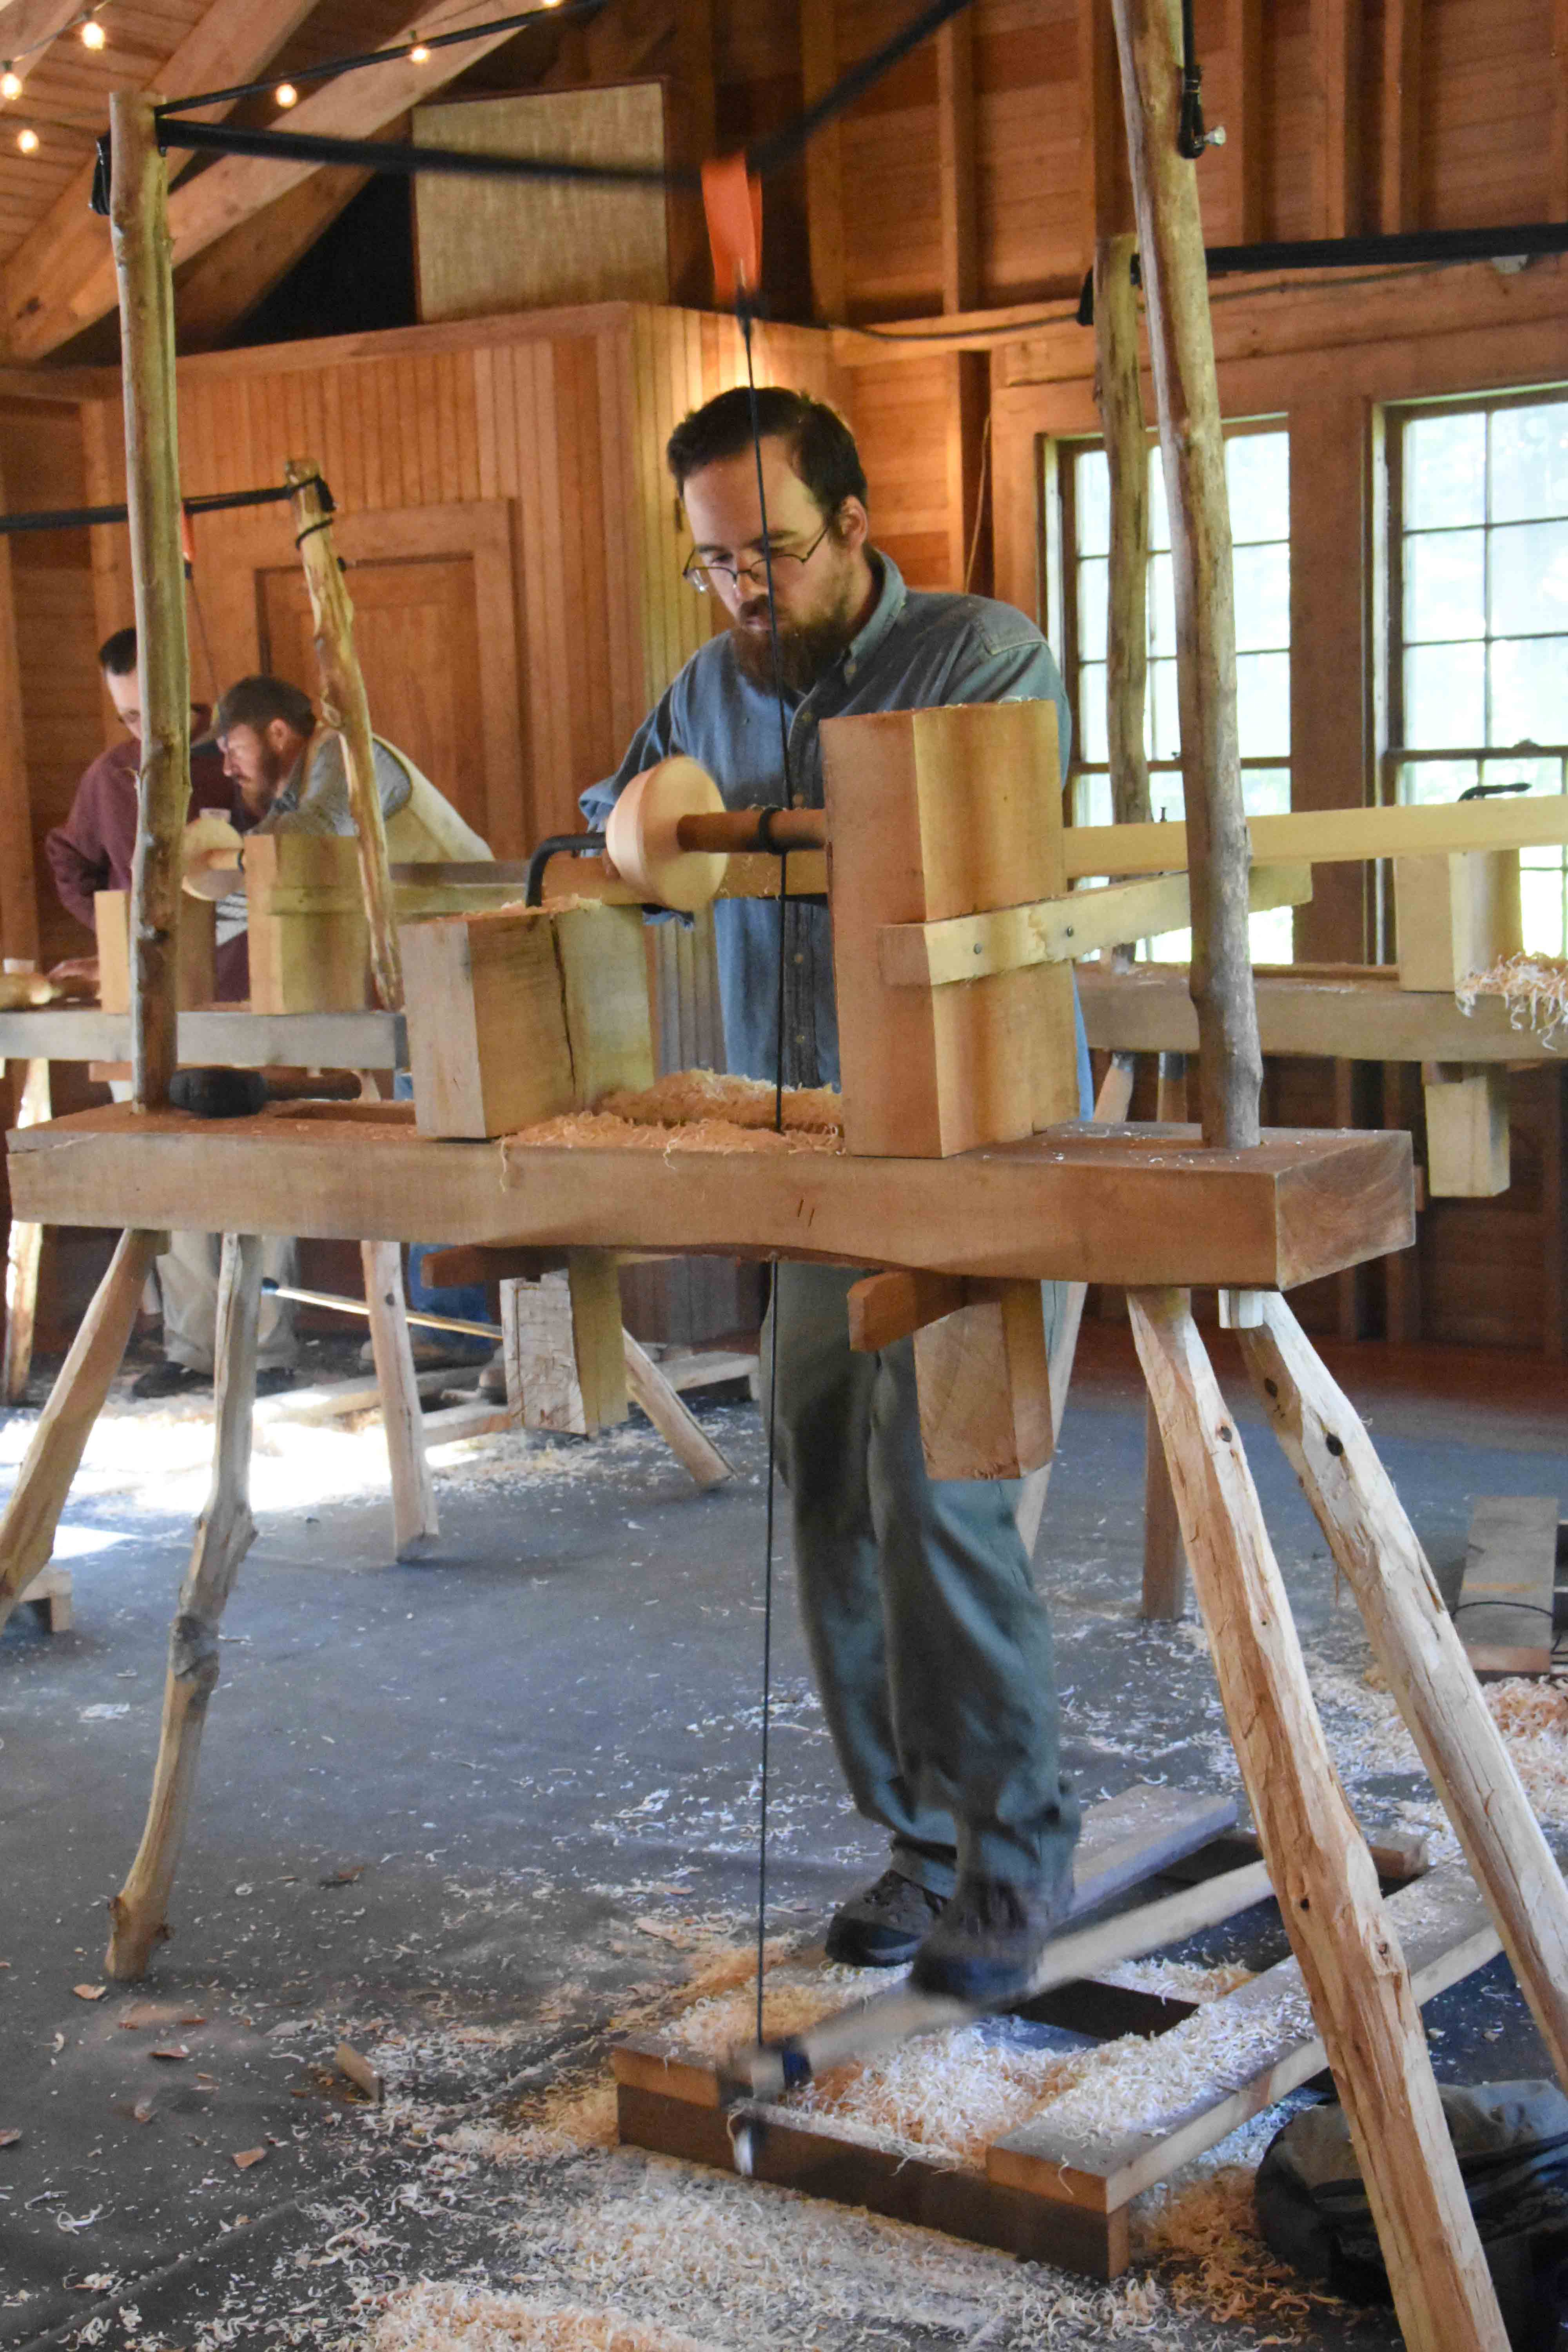
Darrick Sanderson showing them how to rough-turn the outside of the bowl.
A shot showing the hook as Darrick comes up toward the bowl’s rim.
We (well, Pret really – I had nothing to do with it) recently adapted our 8 lathes so they could work without a pole. Two uprights are dropped into mortises in the bed, then heavy-duty bungee strapped between them. The lathes worked very well, and the students worked very hard. Two full days of kicking that treadle is no joke.
The lineup is Pocket Spoons with JoJo Wood and Bowl Turning with Darrick Sanderson. Two great instructors, one weekend, fabulous venue – October 5 & 6, 2019 at Overbrook House, Buzzards Bay, Massachusetts.
JoJo Wood returns for 2 days of spoon carving. JoJo is a great teacher, and has spent a tremendous amount of time perfecting her techniques in carving. Noted for clear, distinct facets and beautiful shapes, her spoons are easily picked out of a crowd. She was here in June to teach two classes and those went over very well. This class will focus on her “pocket spoon” – it’s a social movement – you make great spoons and improve the planet at the same time.
There’s still room in this class, so you can sign up now. October is coming soon. At some point, she’ll get sick of that trans-Atlantic flight and we won’t see her as much. Get it while you can.
Darrick’s class is essentially sold out – (there’s a waiting list) EXCEPT – we’ve kept a spot in both Darrick’s and JoJo’s for a scholarship applicant. Maybe we’ve been too quiet about this, but here’s the story, clipped from our website:
“We get it that registration fees can be a stretch for plenty of people. A community conversation about how to foster broader, more diverse, participation in green woodworking began at Greenwood Fest 2018 and is still ongoing; many present last June made donations to support that goal. Since then we at CRAFT have been trying to figure out the best way to extend the largesse of those generous folks who can afford it to those who cannot.”
Our audience has responded very well to our request for help in offering these scholarships, for which we are grateful.
I interrupted myself today to take care of a long-put-off task. Earlier this year, I took my lathe apart so I could build a trio of over-sized projects; a queen-size bed, a 7-foot high dresser and a large settle. My intention was when I finished those projects, I’d put the lathe back. Sooner or later.
A couple of months went by…til today. I was enjoying having some extra floor space in the shop, but the plan all along was to make a new, shorter bed for it. This one is ash and fits 30″ between the centers, so I can turn joined stool parts, the front stiles of a wainscot chair and any small stuff I might need, like tool handles, etc.
The original bed is stashed up in the loft. It fits 50″ between centers, so takes up considerable room in the end of the shop. I’ll switch them around when I get occasion to turn those giant 17th-century style chairs.
This next photo shows the upright that forms the “headstock” if a lathe like this has one. The bed is fixed to the uprights by large iron bolts with washers & square nuts. All the hardware; these bolts, the centers, and the tool rest brackets were made by Mark Atchison back in 1994 when I was first working at my old shop in the museum.
Here’s the moveable “poppet” with its tool rest bracket inserted through it. You can see the wedge just below the bed that fastens the poppet in place.
The tool rest propped in the brackets.
I have no turner’s work coming up, so for now the lathe is shoved back against the rear wall. It fits 2 JA chairs tucked under it; waiting to be finished. And junk collects on the chair seats, an unfinished basket in this case. The foot treadle is stashed behind the lathe, and the spring pole is up in the peak of the ceiling.
For the time being, there’s easy access to the notebooks and other reference works. Many of you didn’t even know there was a bookcase in the shop probably.
Also important is access to the window looking out over the garden and the river. One day last week we looked out from the house and a great blue heron was under the bird feeders. He spooked and took off, but shortly after that came back & hung around the garden. Wouldn’t want to be a chipmunk that day…
A couple of years ago, Maureen planted milkweed to attract monarch butterflies. Today she found a caterpillar on one of the plants…
I’ve been in the shop most every day lately; though some have been more productive than others. Pret the other day said “Sometimes I can’t tell if it’s a day off, or an off-day.” Sounds about right. I have another square table nearing completion. This one had a slew of turned bits.
two sections of the square table frame
They’re heavy items; posts and stretchers are I think 2 3/4″ square. Top rails are 5″ high…
detail square table
The top is glued-up now; soon I’ll finish planing it and then I can assemble the table. There’s two joined stools that go with it. These are unusual in that the legs are all plumb – no “rake” to the side view. The table and stools are all headed for the Old House in Cutchogue, N.Y. https://www.cutchoguenewsuffolkhistory.org/timeline/the-old-house/
Another project is wrapping up, it’s been around for far too long. These are the head-posts for a bedstead I’m making. They are sawn ash, replacing some oak that wasn’t quite up to speed.
Here’s the footboard. These are actually timed pretty well right now, they’re destined for Arizona. So assembly during the driest part of the year here will work out well. That’s my excuse for going so slowly on this one.
A while back the kids & I helped Maureen set up at a craft sale in Rhode Island. It was great to see all her recent work displayed in one spot. The leftover work is on her etsy site – https://www.etsy.com/shop/MaureensFiberArts
I posted this little box I finished up for Maureen’s birthday on Instagram and it was a hit. Just something different I guess. It’s a real hybrid; Alaska yellow cedar used to make an ancient Scandinavian-style box with drawer. 5″ high, 6″ x 11″
Mine’s not a copy of anything in particular, just based the idea on some old boxes from around Scandinavia. I dovetailed the corners; and put a sliding lock down through the box front into the drawer front. This is because I have a similar box for my spoon carving tools I use with students; and its drawer is not secured. Carry it wrong, and it dumps the drawer out.
The pathetic part is that this box sat 80% done for well over a year, before I dug it out the other day, gave it 3 hours’ worth of work & was done.
For my pole lathe, the 4-foot long rear posts of this chair are the upper limit of what I can reach. Even then, it’s pushing things a bit. To get the roughed-out blank on the lathe, I prepare it by working it as straight and even as I can. In this first photo, I have the split-out billet, having shaved off the bark, I’m using a chalkline to begin layout. I’m aiming for a square about 2 1/2″ by four feet long.
I hew the two radial faces, trying to get them down to the chalkline. The better the hewing, the easier every step after this part.
hewing
Then the same steps on the tangential faces; chalkline, hewing and planing. Depending on my stamina levels, I will plane this square as evenly as I can, or I’ll get it close and figure to finalize it during turning. This one was in-between. Straight is more important than clean. At this next stage, I’ve propped the squared blank up on a joiners’ “saddle” which is a nice name for a block with a notch in it, to prop the squared piece corner-up. Now I can shave off the corners, leaving an octagonal-cross section ready for turning.
corner-up, ready to be an octagon
The main chunk of work is turning the cylinder. Here I’m using a wide deep gouge to get it round and down to size.
Then a nice sharp skew chisel to clean it off.
There’s lots of scribed lines turned on the stiles; and a small bead or two. But the finial is the real test. Here, a narrower gouge starts the cove in the middle of the finial.
A skew chisel begins to form the ball under that cove.
The camera/tripod was in my way at this point, so that’s the last shot I have of turning the finials. here’s the finished results. The top bit gets cut off.
Lots more to look at on this chair; cutting the rectangular mortise and tenon joints; plowing grooves, etc.
I have a project underway that relates back to one of my earliest posts on this blog. I’m making a copy of a seventeenth-century turned chair with a board seat captured in grooves in the seat rails, rather than a woven seat around the seat rails. The chair I’m now building has four legs, back in July 2008 I wrote one of my first blog posts about a three-legged version. https://pfollansbee.wordpress.com/2008/07/05/three-footed-chair/
here’s an earlier version I did of this chair:
My 2007 version of the Bradford chair
Its main feature to my eye is the construction of the seat rails. Because the seat is a panel captured in grooves, the seat rails need to all fall at the same height. With woven seating, the seat rails are staggered in height, so the joints don’t interfere. (usually the side rungs are higher than the front and rear rungs, maybe always) But with the board seat, the joints actually intersect. Often, like the chair I’m working on now, it’s a combination of a rectangular tenon pierced by a round tenon. One thing all this means is the parts are very heavy and thick. Here’s the rectangular tenon test-fit into one of the posts.
test fitting a seat rail into the post
I’ve used the following photo a lot over the years, it shows the round tenon running right through the rectangular one. This is from a 3-legged version, but the effect is mostly the same for 4-legged ones. Easier geometry.
This chair is ash, (Fraxinus, usually around here Fraxinus americana) riven from a straight-grained log, hewn and prepared (either by planing or shaving with a drawknife) then turned on the lathe. The seat rails are 1 3/4” in diameter, the posts are 2 1/8”-2 1/4” thick. That’s heavy stuff. Good straight ash splits evenly and easily, it’s a real treat to use.
The original chair I’m working from is one of two by the same unknown maker, both at Pilgrim Hall Museum in Plymouth Massachusetts. One belonged to Governor William Bradford,
William Bradford’s chair, Pilgrim Hall, photo Gavin Ashworth
the other to the church elder William Brewster.
William Brewster’s chair, Pilgrim Hall, photo Gavin Ashworth
Brewster died in 1644, Bradford in 1657. His inventory included lots if itemized and well-described furniture:
“a Court Cubbard £1-05, winescot bedsteed and settle £1-10,
4 lether Chaires £1-12, 1 great lether Chaire 10s, 2 great wooden Chaires 8s, a winscott Chist & Cubburd £1-05, 2 great Carved Chaires £1-04, a smale carved Chaire 6s, 1 great Chaire and 2 wrought stooles £1, a Carved Chist £1″
Well, we know this chair at Pilgrim Hall is not the “carved” chairs, nor is it leather. So it’s either one of the “great wooden Chaires” or just simply the “great Chaire” that was listed along with the “wrought” stools. Aren’t they all wooden chairs, you ask? Often the adjective describes the seating material – thus these could be referred to in the period as wooden chairs. “Great” is taken to mean either “large” or often, “with arms.” One thing about the Bradford inventory that vexes me is the value assigned to the 2 great wooden chairs – 8 shillings. If the chairs are equals, then 4 shillings isn’t a lot for a chair like this. If the 2 great carved chairs are also equal, they’re worth 12 shillings each. A pretty big difference, I’d guess this chair is as much work as a carved one, maybe more. The great chair listed with the 2 wrought stools is harder to estimate because of the stools. “Wrought” usually means “worked” in some way. In stools and chairs, it’s often considered upholstered.
The Bradford chair is in better condition than the Brewster. It’s missing some height, the bottoms of the posts are right at the stretchers. One thing I like about this wear & tear on this original object is it clearly shows the type of bit used to bore this mortise – a round-bottomed hole like that is the result of using what we now call a spoon-bit.
front post worn or cut down right through the stretcher’s joint
Here’s a spoon bit, showing the rounded tip that makes a hole like the one above:
The upper rear rail is thought to be a replacement, as is the board seat. Brewster’s is missing several spindles, a couple of stretchers, upper rear rail and has a leather seat wrapped around the rails.
I’ll post construction notes and photos as I go. Lots to see in this chair.
For some details about the chairs’ histories, see the page at Pilgrim Hall’s website about their furniture. If you’re near Plymouth, don’t miss the museum. They have great stuff. http://www.pilgrimhall.org/ce_funiture.htm
Since I moved into my new shop a year & a half ago, I have shuffled semi-finished projects in & out of the way as I worked. I have a chest that has no customer; I made it for photos I needed for my book. I kept thinking I’d find a spot for it in the house. Seemed unlikely, meanwhile it fit nicely under the lathe. So, out of sight, out of mind. Until I needed to turn something. In fact, fitting under there it collected lots of stuff inside it, then I even put boards across the top for more storage. Terrible idea.
With a lot of turned components coming up in my work, I had to finally deal with it. Spent several hours shuffling stuff around here & there – fitted the chest (still lid-less, still unsold) into the basement and cleaned up the shop. Now, all I need to do is re-learn turning.
Here’s a view from outside, through the open door. All that open space means I can get at the lathe when I need to. I have plans to make a shorter bed for it, so it takes up less floor space. But for now, I need the full-length for some long turning projects in the near future.
Prior to turning, I chop all the mortises.
Even bore the pin holes.
Mark the centers.
Turn ’em.
on a good day, I can make them look like this:
Here’s the square table frame, test fitted. Like an over-sized joined stool.
After this one, there’s a large turned chair coming up. That calls for ash. This is a five-footer, splits like it’s perforated. The rear posts will be 4′ long, 2 1/4″ in diameter. Whew.
Shaved octagonal with a drawknife, then mark the center and turn it.
The straight clear ash works like a dream. what a wood…
UPDATE – I completely forgot to point out, these photos are from Marie Pelletier, Plymouth CRAFT’s intrepid photographer. Thanks, Marie.
Some might be repeats – I can’t keep track.
home of Swedish cowboy coffee
Tobias Eklund and Pär Brask from Morakniv were there all weekend, offering Swedish cowboy coffee and talking knives…it was great having them with us.
Tobias Ecklund of Morakniv
Pär Brask and Ian discussing knives over coffee
Darrick Sanderson (ol’ #16) brought his own lathe, set up outside the pavillion drawing in the crowds to see what all the commotion was about.
Darrick Sanderson
The lathe pavillion was always jumping. Not sure if this shot is during Robin Wood’s class, or during Darrick’s in the Fest. Rare shot of the floor being cleaned of shavings.
turners trompin’
Tim Manney, helping people get sharp and stay sharp.
Tim Manney sharpening
They were never not carving.
around the woodpile
Spoons!
spoons
There was much fan-bird mania.
fan bird feathers being spread
fan bird
Pete Galbert kindly supplemented our shaving horse throng. These got used in many groups; drawknife work, fan birds, and more.
horses all lined up
Pete Galbert demo’d drawknife stuff for his class.
push & pull
Dave Fisher’s students concentrating hard on letter-carving in basswood.
letter carving
For a minute, I though Joel was being serious here, as he tries the spoon mule. But no, still grinning ear-to-ear.