Anyone need a shaving horse?

For some stupid reason, my friend Ted Curtin wants to move his shaving horse along. So I told him we’d post it here & see if someone wants to come to Plymouth Massachusetts and make it go away.

I know little enough about it. Ted says (& his photo shows) bugs have eaten at the sapwood in the bench. Says it’s red oak. I bet it’s over 30 years old – here’s his sparse text:

Red oak, 5’3″ long, 21.5″ seat height. Three position-head. Even has flamed maple legs!

And the damage –

Leave me a comment or send me an email if you’re game & I’ll put you in touch with Ted.

Ash

the only act of shaving I know

I’ve said it before, ‘ll say it again. I have great friends. Rick gave me an ash log last week – 8’ long. Straight & clear. One of my favorite woods, especially for chairmaking. I’ve spent parts of the last few days beginning to work up the sections into chair parts. Splitting and shaving, then more splitting and shaving. Here’s some sections waiting their turn. They don’t look it here, but the ash bolts are more than 5 feet long. (on the left side of this photo)

ash on the left, some red oak behind

I split and shaved and then bent three sets of rear posts for ladderback chairs (two in this photo). There’s more of that to come.

JA chairs-to-be

I also roughed out a set of turnings for a Windsor chair – 4 legs, 3 stretchers and 2 arm posts. Those I rived, shaved, then turned just in a general way to get them drying a bit. Then I picked through the remnants from those two jobs – to shave what’s left into ladderback rungs and Windsor spindles.

roughed out chair parts

These were all essentially leftovers – after I split out the other chair parts – so today I shaved them into 3/4″ square-sections. Random lengths. The longer stuff will be Windsor spindles. Any that already taper along their length – ditto. The stuff between 14 1/2″- 18″ will mostly be ladderback rungs. Some will be spindles. The shortest stuff there is 11″ – each Windsor arm chair has 4 short spindles. There’s more than a year’s worth for me! And the top of that heap are roughed-out stretchers for one of Curtis Buchanan’s democratic side chairs. I have the seat & legs made – but needed the stretchers. Now – big problem is where to put all this (& more right behind it). Today I committed a hideous sin – stuck them in a temporary place. On the lathe bed.

chairs & chairs

There was very little waste – a few handfuls of firewood so far. These two pieces (below) I rejected because they grew so slowly – there must be more like them, but I haven’t run into it yet. The green arrows show how the most recent growth was slower still. Weak as a kitten – if that’s really an expression.

slow growth & slower still

At the end of the afternoon, I went outside and found one more off-cut. Stupidly, I cut whatever I needed & left this piece at 14″ – 14 1/4″. If it was even 1/2″ longer it would have been perfect for ladderback rungs. As it is, some will make it, but half will be too short. But it split like a dream. I got 14 blanks from it – didn’t lose one. One piece of firewood.

perfect, but short by 1/4″

The picture below shows me splitting off the pointed inner bit. But I got one blank from that pointed side – the wood was so straight it split perfectly. (that’s how I ended up with 14, even though only 13 were marked out.)

2nd split

I’ll shave those next time. Some will make it for ladderbacks – others will be good for something.

next time

My next ladderback is going to have ash posts & hickory rungs. These posts were made long ago – the rungs are in the kiln. But I have to sort out the shop & clean it up before I can make this chair…

next ladderback

Ash – what a wonderful wood, but using it always makes me sad – millions of the trees have been killed off by the invasive Emerald ash borer – (this tree I’m working was dying from other causes if I remember correctly what Rick told me) – I don’t keep on top of that situation – but just now I found some encouraging efforts about identifying resistant ash trees – let’s hope they make it – https://www.monitoringash.org/lingering-ash-surveys/

white ash heartwood & sapwood

some of my Jennie Alexander archives

Jennie Alexander early 1990s

Having spent a chunk of time lately working on the chair-making video, JA has been on (or in) my mind a lot lately. After she died I ended up with lots of photos, notes, drawings, etc – even after we had sent decades’ worth of notebooks to Winterthur Museum’s library. That shaving horse above is an in-between version – here’s the 1970s version below – its origin story is in the 3rd edition of the book. https://lostartpress.com/products/make-a-chair-from-a-tree That first one was beastly heavy. I made one when the book came out. Huge drawknife too. Things change.

JA with 1970s version of the shaving horse

Alexander used to mostly bore her early chairs at a drill press. But for public demos – and maybe the earliest classes – it was done at a knee-high bench with a brace & bit. One of many ways to hold the posts for boring was a 3-peg & wedge arrangement. This is an ancient method – somewhere in the notebooks (I’m not going to look it up now, I’d get lost in there) is an entry of where & when JA got onto this method. Alexander went through many different holding systems, some more Rube-Goldberg-esque than others. But she really wanted to do horizontal boring – feeling it allowed for easier sighting to see if the angle is right. Very soon after she began teaching with Drew Langsner at Country Workshops, that became the standard.

boring at a low bench

It’s funny – the horizontal boring idea came from using the AA Wood hollow auger, a tool that gave JA & friends of hers fits back in the mid-1970s. She soon dumped the hollow auger but kept the notion of boring this way.

horizontal boring

This photo of the chair below is in the 3rd edition of the book – but I don’t think we explained it. In the late 1990s, Alexander was designing a chair to be made in some program in Costa Rica – I forget why the chair was painted this way. There must have been a reason. Maybe because the posts were ash? I used ash a lot in my chairmaking & only heard JA complain about it. Recently I got an email from Larry Barrett, who worked closely w/JA while I was off in carved-oak land – and they made chairs from ash in the first class Larry was involved in. It must have been free is all I can think.

JA’s “CR” chair

Here’s the specs if you’d like to make one – not to scale for some reason.

CR chair #2 by Jennie Alexander

Below is a low bench that was one of JA’s favorite designs – the “captured” stretcher. It’s a variation on the H-stretcher system featured in American Windsor chairs. JA filled notebooks with ideas about how to make the under-structure of a Windsor chair. She only ever made one Windsor chair, in the first class Curtis Buchanan taught at Country Workshops in 1987. But she never stopped thinking about, and monkeying with, the 3-stretchers/4 legs arrangement of the Windsor chair. This bench stemmed from that work. Here, though, the center stretcher has holes bored at each end and the side stretchers slide through it. The side stretchers fit into the legs with a round mortise & tenon – then the legs are fit into tapered holes in the bench.

JA’s best low bench design

Here’s one that still makes me cringe. In this version JA had a large tank made of plywood & fiberglass – tight enough to hold water. In went the oak sections, to be stored so they wouldn’t dry out. And some sat in there so long (years) they got hideously slimy & disgusting. I finally told her I would never reach into that tank again. I’d rather work air-dried oak than deal with that stuff.

JA with green wood storage

Well, now I’ve got to go eat breakfast. I’ll try to shake that memory off my mind. Here’s the link to my video – https://vimeo.com/ondemand/jachairpf

a chairmaking detour

commuting

All of my commute is in this photo, minus about three steps. I have a joined stool cut out, but waiting for the turned parts – some of the wood is still too green for crisp detail at the lathe. So while I wait for that, I thought I’d take a vacation and work on the windsor chairs I’ve been picking away at.

tenoning the legs

These are Curtis Buchanan’s “democratic” chairs (I’m making one side chair, and one arm chair – I hope) – so shaved, not turned. In the photo above, I bored & reamed a test hole, scribbled inside it with a soft pencil and tried the shaved tenon in the hole. Bumps and high spots get smeared with the graphite, to show you where to shave next.

testing depth

Once I had the legs’ tenons ready, I reamed the seat. Here, I’m testing the depth – according to the plans Curtis drew up – that stretcher location should be something like 9 3/4″ above (below, really) the seat. This one is for the arm chair version.

Got ’em where I mostly liked them. Then measured for the stretchers. Because I’ve been fumbling around at these chairs, I hadn’t made the stretchers yet. Here, I’m back on the side chair – making its stretchers out of a mix of dry-ish wood and green wood.

shaving center stretcher

Once I got them where I liked them, I put them in the kiln to dry the tenons, and will go back to finishing the arm chair’s seat while those get to the right moisture content.

I think you can still get the videos that Curtis & Elia Bizzarri did over the past couple of months – http://handtoolwoodworking.com/democratic-chair-online-classes/

One reason to see these versus (or in addition to) the ones Curtis already had on youtube is because he has changed things over several versions of making this chair. I think he said he’s done a dozen of them. I saw some things that were either changed, or more detailed in this set of videos.

AND – then there’s Pete Galbert https://vimeo.com/ondemand/galbertfoundations – I can see I’m down a rabbit hole. Pete’s a great teacher, so I’m planning on getting that video series as well – but right now I have to have breakfast, then go light the fire. Or vice-versa.

the first of the basket-making videos

Daniel & I got the first video in the basket-making series done yesterday. I’ve been working almost exclusively on basket-making for a month & 1/2 or more. I shot lots of videos about it, and we’re going to sift through them and hopefully show how to make two different forms; a rectangular basket with a fixed handle,

and a round-bottom basket with a hinged, or swing, handle.

This first video is just how to split out the “billets” and then shave them all in preparation of pounding the growth rings loose from the section.


Lots to cover, I’m still making them now and shooting more as I go.


Making parts of things

I got a call from my friend Michael Burrey recently. Was going log shopping, did I want anything? Well, I hit the jackpot. Ash, hickory & red oak. I brought the ash and hickory home first, they don’t last as long as red oak in the log. So I’ve been working them into pieces of things – basket & chair parts mostly.

The ash log was first, and I wrote some of that here – https://pfollansbee.wordpress.com/2020/04/30/fraxinus-nostalgia/

I’ll get back to that when I begin making baskets from it soon.

Because I can’t deliver logs down to my shop (there’s no vehicle access) I split both logs at Michael’s yard. Here’s some of the hickory, it split open with ease. They both did actually.

I’ve been able to harvest some of the inner bark from it, I’ve never taken bark strips off split sections before. It’s not my first choice, but better than wasting the bark. Here I have a 7′ long split up on the bench and am shaving down the thickness of the inner bark. It’s been sliced into widths on the log, then thin it down, & peel it up.

Getting under there with a knife & snipping uncooperative inner bark.

The wood is dead-straight and nearly perfect. I’ve been riving & shaving it into chair parts like these rungs:

And I’ve shaved and bent several sets of hickory posts – and some earlier of ash. There’s also some spindle-blanks for another version of Curtis Buchanan’s democratic chair. I bent some crests for those too, but they’re already up in the loft. The glue is to seal the ends so they don’t check. Hickory can be temperamental.

Stuff that was too thin for chair rungs gets saved for basket rims/handles/ears. These are shaved with a slojd knife to thin them out for bending.

And here they are bent & tied. These become “ears” for swing-handle baskets. Hickory is ideal for these, white oak is another wood I’ve used for them.

I don’t often get hickory around here, so I’m making the most of it. Thin stock is riven & shaved, then bent into basket handle blanks. I usually make the basket first, then make handles to fit them. Because the hickory can get pretty difficult to work with it it dries out, I’m splitting and shaving everything I can from it now. Handles on the left (& in back) the ash splints on the right. Older rungs above. I have to make some chairs to make room for more chair parts…

Daniel & I are working on the last two videos in the joined stool series. Should have them in the next couple of days. Back to riving & shaving tomorrow, some axe handle blanks to store for my old age.

Tim Manney’s shaving horse at Plymouth CRAFT

Last weekend Tim Manney came down to Plymouth from Maine to teach 6 Plymouth CRAFT students how to make his shaving horse. Tim;’s version is well-known now; he had an article in Fine Woodworking about it, (issue #262, Jul/Aug 2017) and in the same issue Curtis Buchanan was quoted as saying that he thinks he’s spent over 20,000 hours at a shaving horse, and that Tim’s is the best he’s used.

Tim’s main focus is that the horse can be built with everyday materials; but carefully-selected everyday materials. It’s almost all 2 x 6 or so material, some thinner stuff and a little bit of hard maple. This course was a bit of a departure for Plymouth CRAFT in that some of the work was prepped ahead of time by Tim, and there were even some machines invovled. Mostly a drill-press. Here’s some of the shots I got during the class.

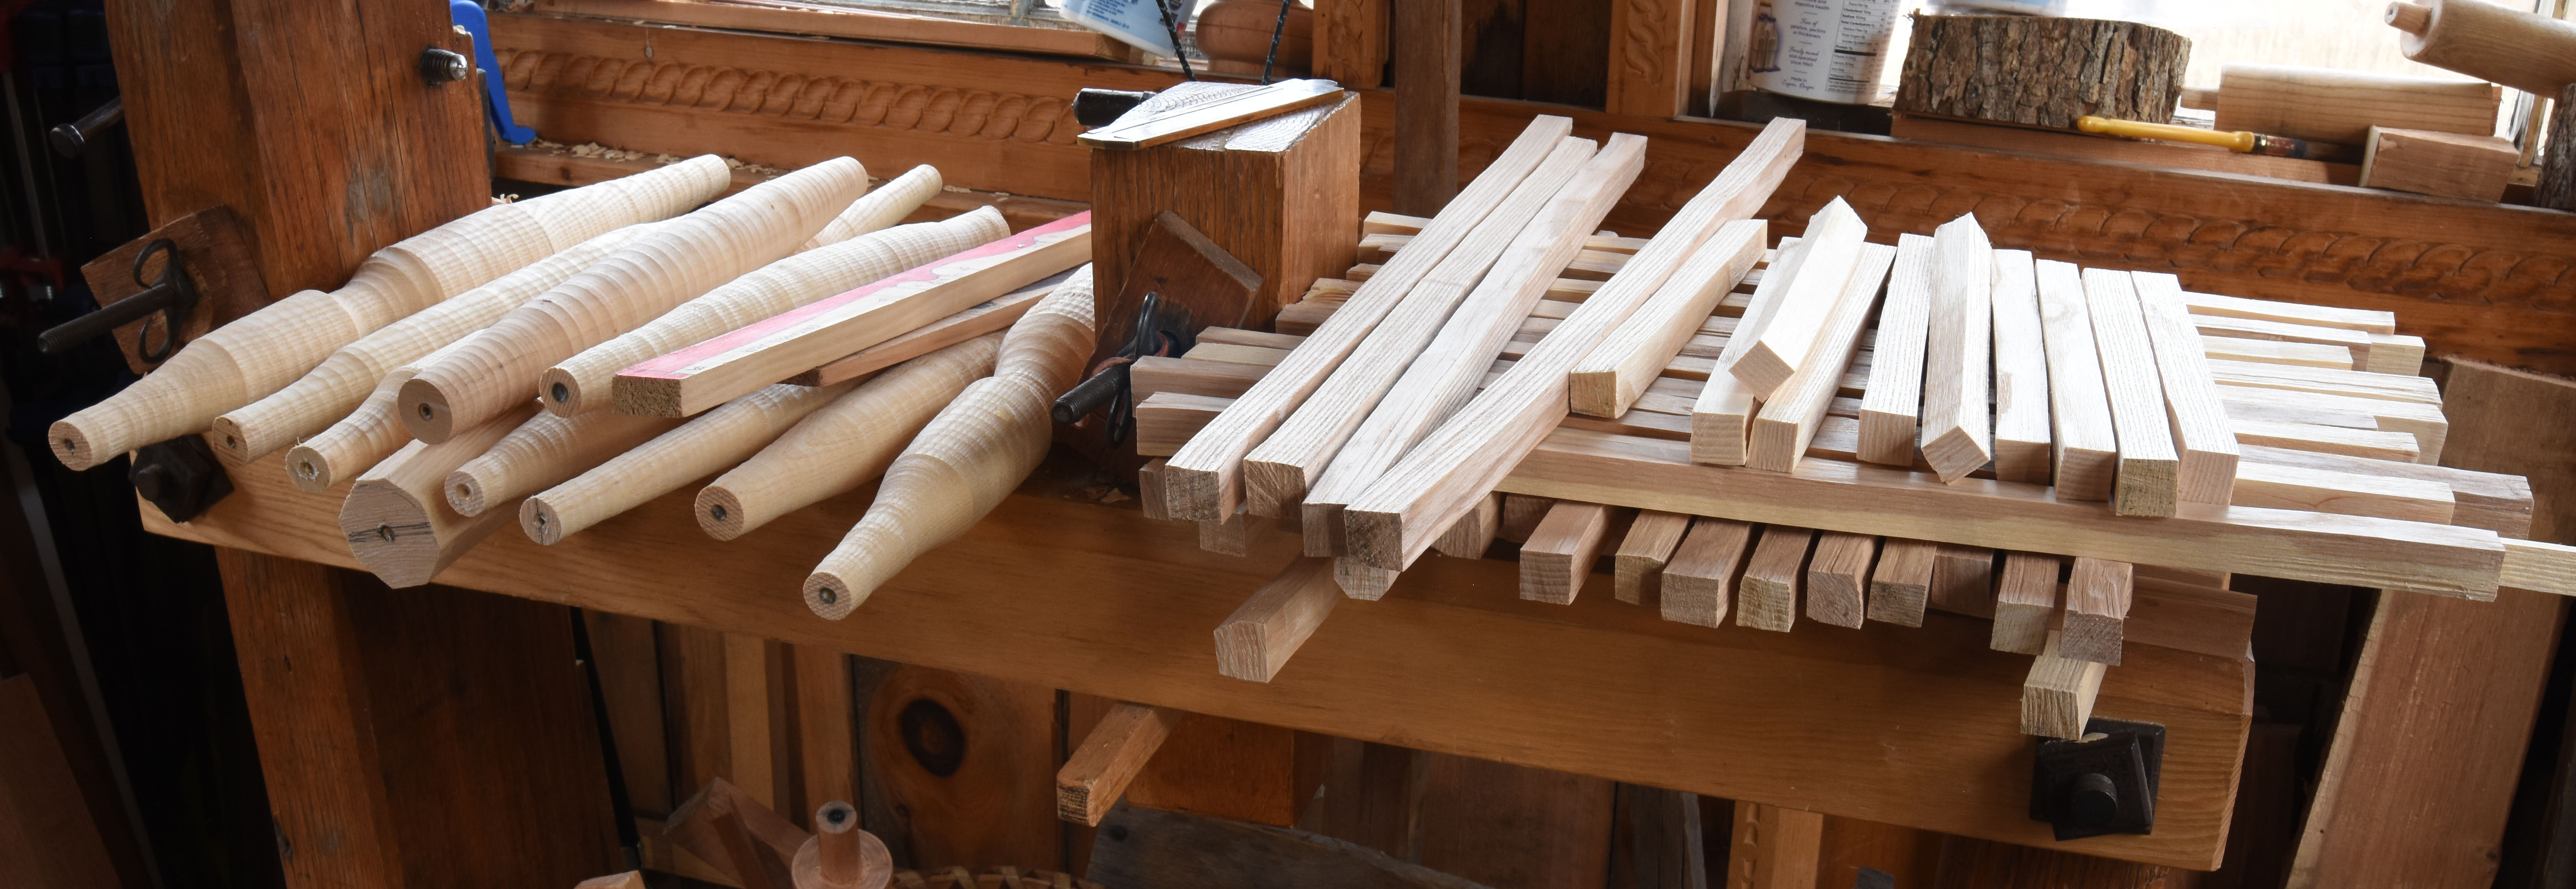
Stacks of parts prepped by Tim.

Jake trimming some of the first glue-ups, the leg-to-rails.

Tim sneaking underneath, showing how to adjust the leg assembly prior to clamping the glue-up.

Tim marching down the line, checking on progress.

Winding sticks helping to line up the front & rear legs.

This was our first time running this class. We kept class size small. That gets a lot of attention, and lots of detail. Here David and Andy work together to line up the clamps on Andy’s horse. Craig must be on deck.

Half of the dumbhead assembly set up in place – to check its placement and glue-up.

This is the next step – the full dumbhead base now. It gets wedged below the “bed” of the horse.

Tim demonstrating layout for the wedge mortise.

Craig cleaning up the mortise with a chisel.

David has a small smirk on his face, as his horse is coming together.

Diane was amazing – absolute new woodworker, dove in the deep end. Now she’ll be off to a great start.

Not quite done, but nearly so. This one still needs the work surface under the head.

We got done in time to bring in some green wood & distribute some drawknives so everyone could test-drive their creation under Tim’s direction. Paula Marcoux & I shot photos of the group as they worked their horses for the first time.

Tim has measured plans available for his shaving horse, and we’ll get him back sometime to do this class again. First he has to recover. Here’s his shaving horse plans web-page https://www.timmanney.com/work/shavinghorseplans 

Plymouth CRAFT’s website – so you can sign up for the newsletter for future workshops – https://www.plymouthcraft.org/


The Slöjd Tradition with Jögge Sundqvist 

Well, this has nothing to do with me, other than I was there to watch it happen. Now I get to see it again, from the comfort of my own home.

Here’s the blurb:

The Slöjd Tradition

with Jögge Sundqvist 

Learn some of the methods and techniques behind Slöjd, the self sufficient tradition from Sweden that emphasizes hand work and handicraft. Jögge Sundqvist walks you through the process of making a spatula and a cheese board from green wood. He also demonstrates different types of letter carving and decorative carving.

Jögge Sundqvist is a Swedish woodworker and carver who started learning knife and axe work at the age of four, at the side of his father, Wille Sundqvist. Jögge works in the Slöjd fine craft tradition making stools, chairs, knives, spoons, and sculptures painted with artists’ oil color. Jögge is also a teacher, writer, and gives lectures about Slöjd tradition and techniques.

And the preview:

https://www.lie-nielsen.com/product/whats-new/slojd-tradition-streaming?node=4128


Plymouth CRAFT workshop in October

With Greenwood Fest taking center stage in the Plymouth CRAFT calendar, there is an understandable quiet period in the summer, just after the Fest. But now autumn is here, and we’re back at it. Along with Pret Woodburn and Rick McKee, I’ll be teaching a 2-day class; Riving & Hurdlemaking Weekend in late October; https://www.plymouthcraft.org/riving-hurdlemaking-weekend

An alternative name for this class could be froe, hatchet and drawknife. But even that leaves bits out. Here’s Rick using the riving brake to shave pieces with the drawknife…

This class is an excellent introduction to the ancient method of riving your work-pieces directly from a log, and using simple edge tools to produce your stock for a project. In our case, it’s a garden fence called a “hurdle.” When I first started green woodworking, these were the methods I learned to make ladderback chairs. The 2-day format precludes us making a chair, hence the hurdles.

The workshop takes place outside of Pinecones, part of the Pinewoods Dance Camp where we hold our Greenwood Fest in the spring. The link above tells the details, you can opt to stay at Pinewoods in one of the cabins – it’s a great setting.

We’ll cover the structure of the wood, why we split it this way & that. How to shave it, hew it – the proper shapes of the various tools and equipment like shaving horses, riving brakes, etc. Lots to cover, and a real eye-opener to many who think wood comes from the store or lumberyard.

Here’s a group shot with the nearly-finished hurdles…


There’s other classes coming up in the fall and into the winter. Spoon carving, German holiday baking & more. https://www.plymouthcraft.org/


Shaving horse book available through Plymouth CRAFT

UPDATE: SUNDAY JULY 2

Plymouth CRAFT only had 6 copies of the Shaving Horse book by Sean Hellman – so if you want to order that, go directly to Sean’s site: http://www.seanhellman.com/product/shavehorse_book/

there are other tidbits left at Plymouth CRAFT, shirts, hats, a few copies of Woodworking in Estonia – https://www.plymouthcraft.org/online-store

proceeds help keep Plymouth CRAFT running, and that means Greenwood Fest too!

—————————-

Shaving horses are in the wind it seems. On the wind, maybe. That’s how Jennie Alexander used to refer to her book Make a Chair from a Tree. “The chair was in the wind…” meaning if she didn’t write the book, someone was going to.

The wind is carrying shaving horse ideas a bit lately. A year or so ago, I shot a video with Lie-Nielsen on making my (simple) shaving horse. To be released sometime in the semi-near future.

An old one of me & Daniel shaving white cedar

Recently, Tim Manney had an excellent shaving horse article in Fine Woodworking, accompanied by Curtis Buchanan’s piece on how to use one. It makes me want to build a new shaving horse!  Tim’s also selling detailed plans for building his, http://timmanneychairmaker.blogspot.com/2017/05/shaving-horse-plans.html


Sean Hellman, a green woodworker over in the UK, has a new book out about shaving horses, Shaving Horses, Lap Shaves and other Woodland Vices: A Book of Plans and Techniques for the Green Woodworker.

Sean’s book – It’s 130 pages, showing a multitude of different shaving horse designs; the dumbhead style, English style, spoon mules, and methods of use, some riving brakes, and other “woodland vices.” Large format, 8 1/4” x 11 3/4”.

Here’s the link to Plymouth CRAFT’s shop, selling a few odds and ends leftover from the Fest. https://www.plymouthcraft.org/online-store