Basket making video Handles & Rims; drawings next

OK – a few things. A couple of chairs & boxes are left, those things are selling in dribs & drabs. I can always make more, too… https://pfollansbee.wordpress.com/ladderback-chairs-oak-boxes-for-sale/

Daniel & I finally sat down & finished the next basket video; Handles & Rims.

I’m sorry it’s taking so long with this set of videos. When I shoot them, I’m both cameraman and subject. On something at the bench, that’s not difficult to do; but with the baskets, I’m always picking them up, shifting them this way & that…so there’s a lot of editing involved. Sometimes, I just don’t have the shot we need to get the point across – and it’s too late to go back & shoot more right now. So caveat emptor.

There’s still a couple of baskets left for sale too. Email me if you are interested, and I’ll send photos & specs.

The drawings of carving patterns arrived yesterday.

Now to sort them, roll them into mailing tubes and set up the page for it. There will be a blog post and a video very soon showing what these are, and what they aren’t. I’ll get on it right away. I have no idea how to gauge how these will sell, so I started with 50 sets…means there’s maybe 46 or so to sell…but I can get more if we need them.

next basket-making video

This one took some effort. It had been a while since I looked at the video footage I had of the next step in basket-making. And there were some holes in the sequence. So this one might be a bit choppy, maybe too long in some places and too short in others, but such as it is, here’s the last steps in weaving the basket.

That means next time it’s handles & rims…


the first of the basket-making videos

Daniel & I got the first video in the basket-making series done yesterday. I’ve been working almost exclusively on basket-making for a month & 1/2 or more. I shot lots of videos about it, and we’re going to sift through them and hopefully show how to make two different forms; a rectangular basket with a fixed handle,

and a round-bottom basket with a hinged, or swing, handle.

This first video is just how to split out the “billets” and then shave them all in preparation of pounding the growth rings loose from the section.


Lots to cover, I’m still making them now and shooting more as I go.


Basket tour pt 2

This is the bedlam that basket-making creates.

Baskets to the left:

Baskets to the right:

I grabbed this laundry basket and brought it out to the shop to measure the handles so I can copy them. I made this one in 1988.

The handles are white oak, the basket is ash. Lashing around the rims is hickory bark. That might be the 2nd lashing, it looks newer than the basket, but I forget if I re-did it.


It once had a braided foot running around the bottom, When that wore out, I put white oak and hickory bark “skids” on it. These save the wear & tear on the basket’s bottom.

I bought two baskets on ebay, so I could study them in detail. When I’m done I’ll sell them on to the next person, I don’t need to be collecting baskets. This one’s a real beauty, just as simple as can be. White oak throughout. Round bottom, eight uprights, seven of which are split in half to give an odd number of uprights. That way the weaving winds around and around alternating over one/under one as it goes. It’s about 10″ in diameter, and 5″+ up to the rim.

It’s in great shape, nothing missing, no major cracks that I can see yet.

The outside of the bottom:

The handle isn’t notched for the rim. It is woven into the body, and then it pokes out, gets split in half. One half weaves down the bottom, one half turns up & weaves in on itself.

The other is a rib-style basket, usually associated with Appalachia. All white oak as well.

It’s quite small, I forgot to measure it but it fits inside the other one. Just…

I made a few baskets of this form back in the 1980s, but haven’t made one since. I got fixated on New England/New York style baskets, and stuck with those. This is a fine example of that type of basket, very “workmanlike” – not a precious piece of weaving (neither of these two).


If anyone wants to buy the old ones, let me know. I paid $94 total for both & shipping. I’ll sell them for $35 each plus shipping. I’ll have some of my own baskets for sale in a week or two. They’ll be way more than that!

Basket tour part 1


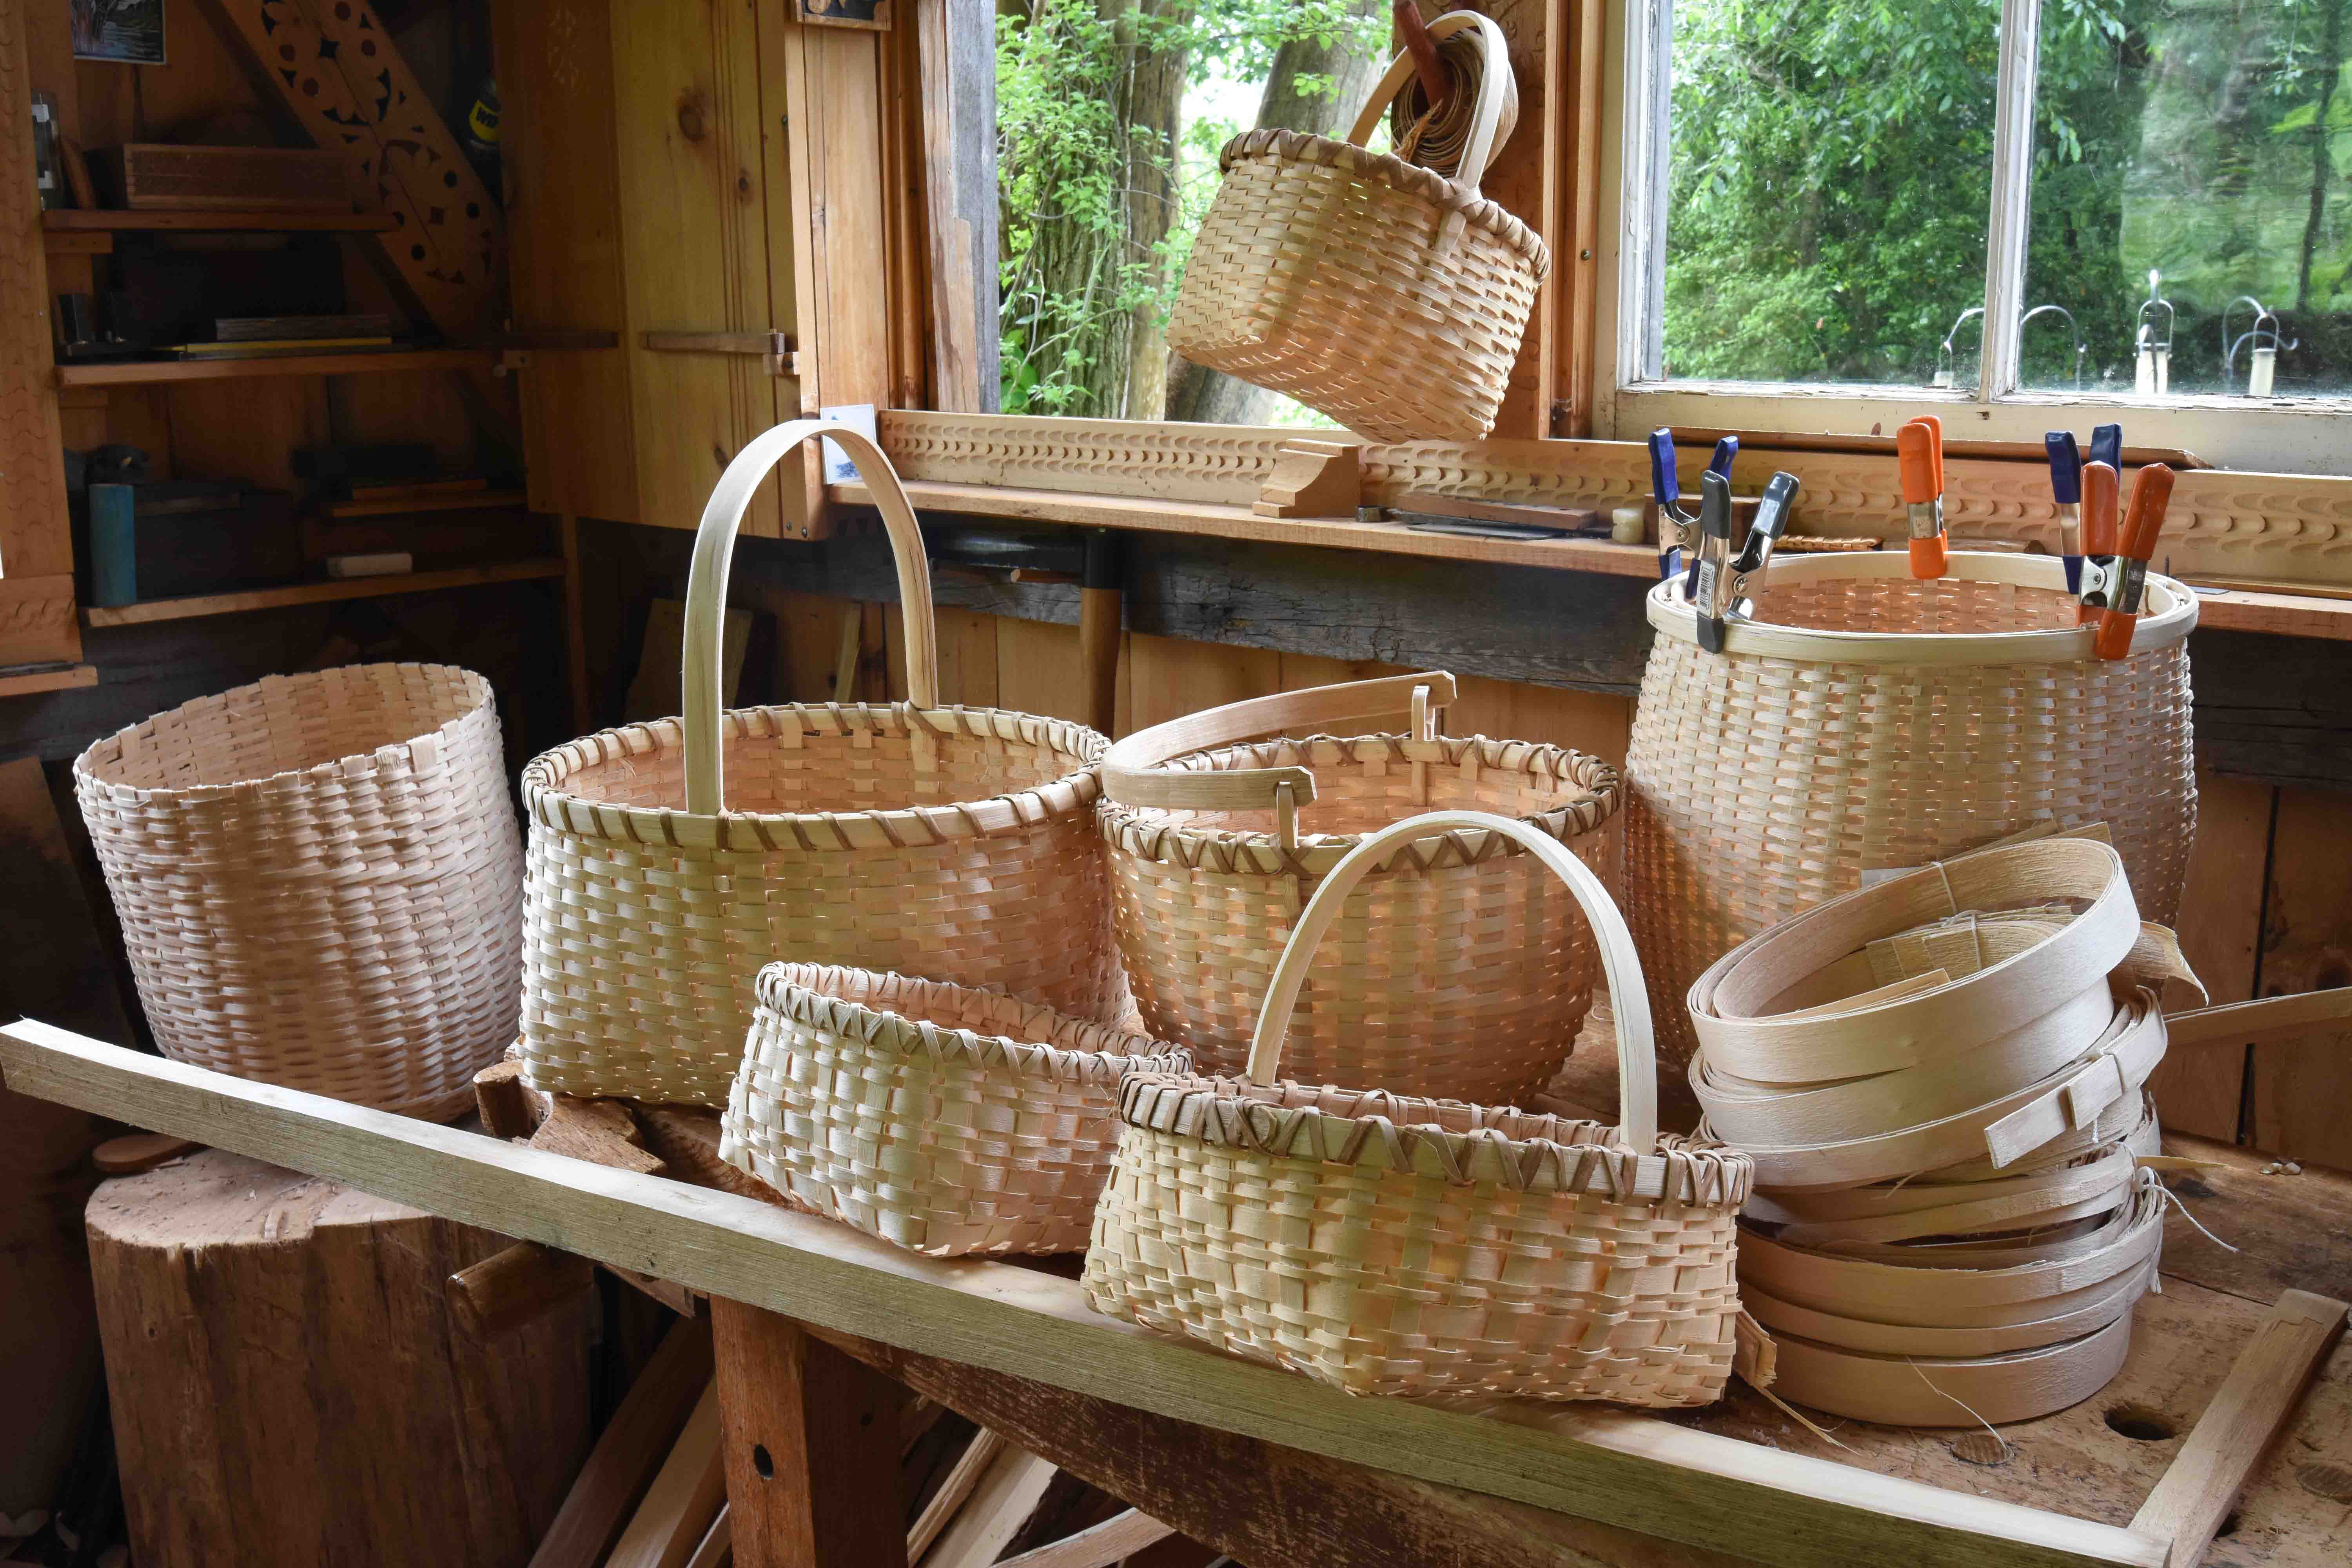
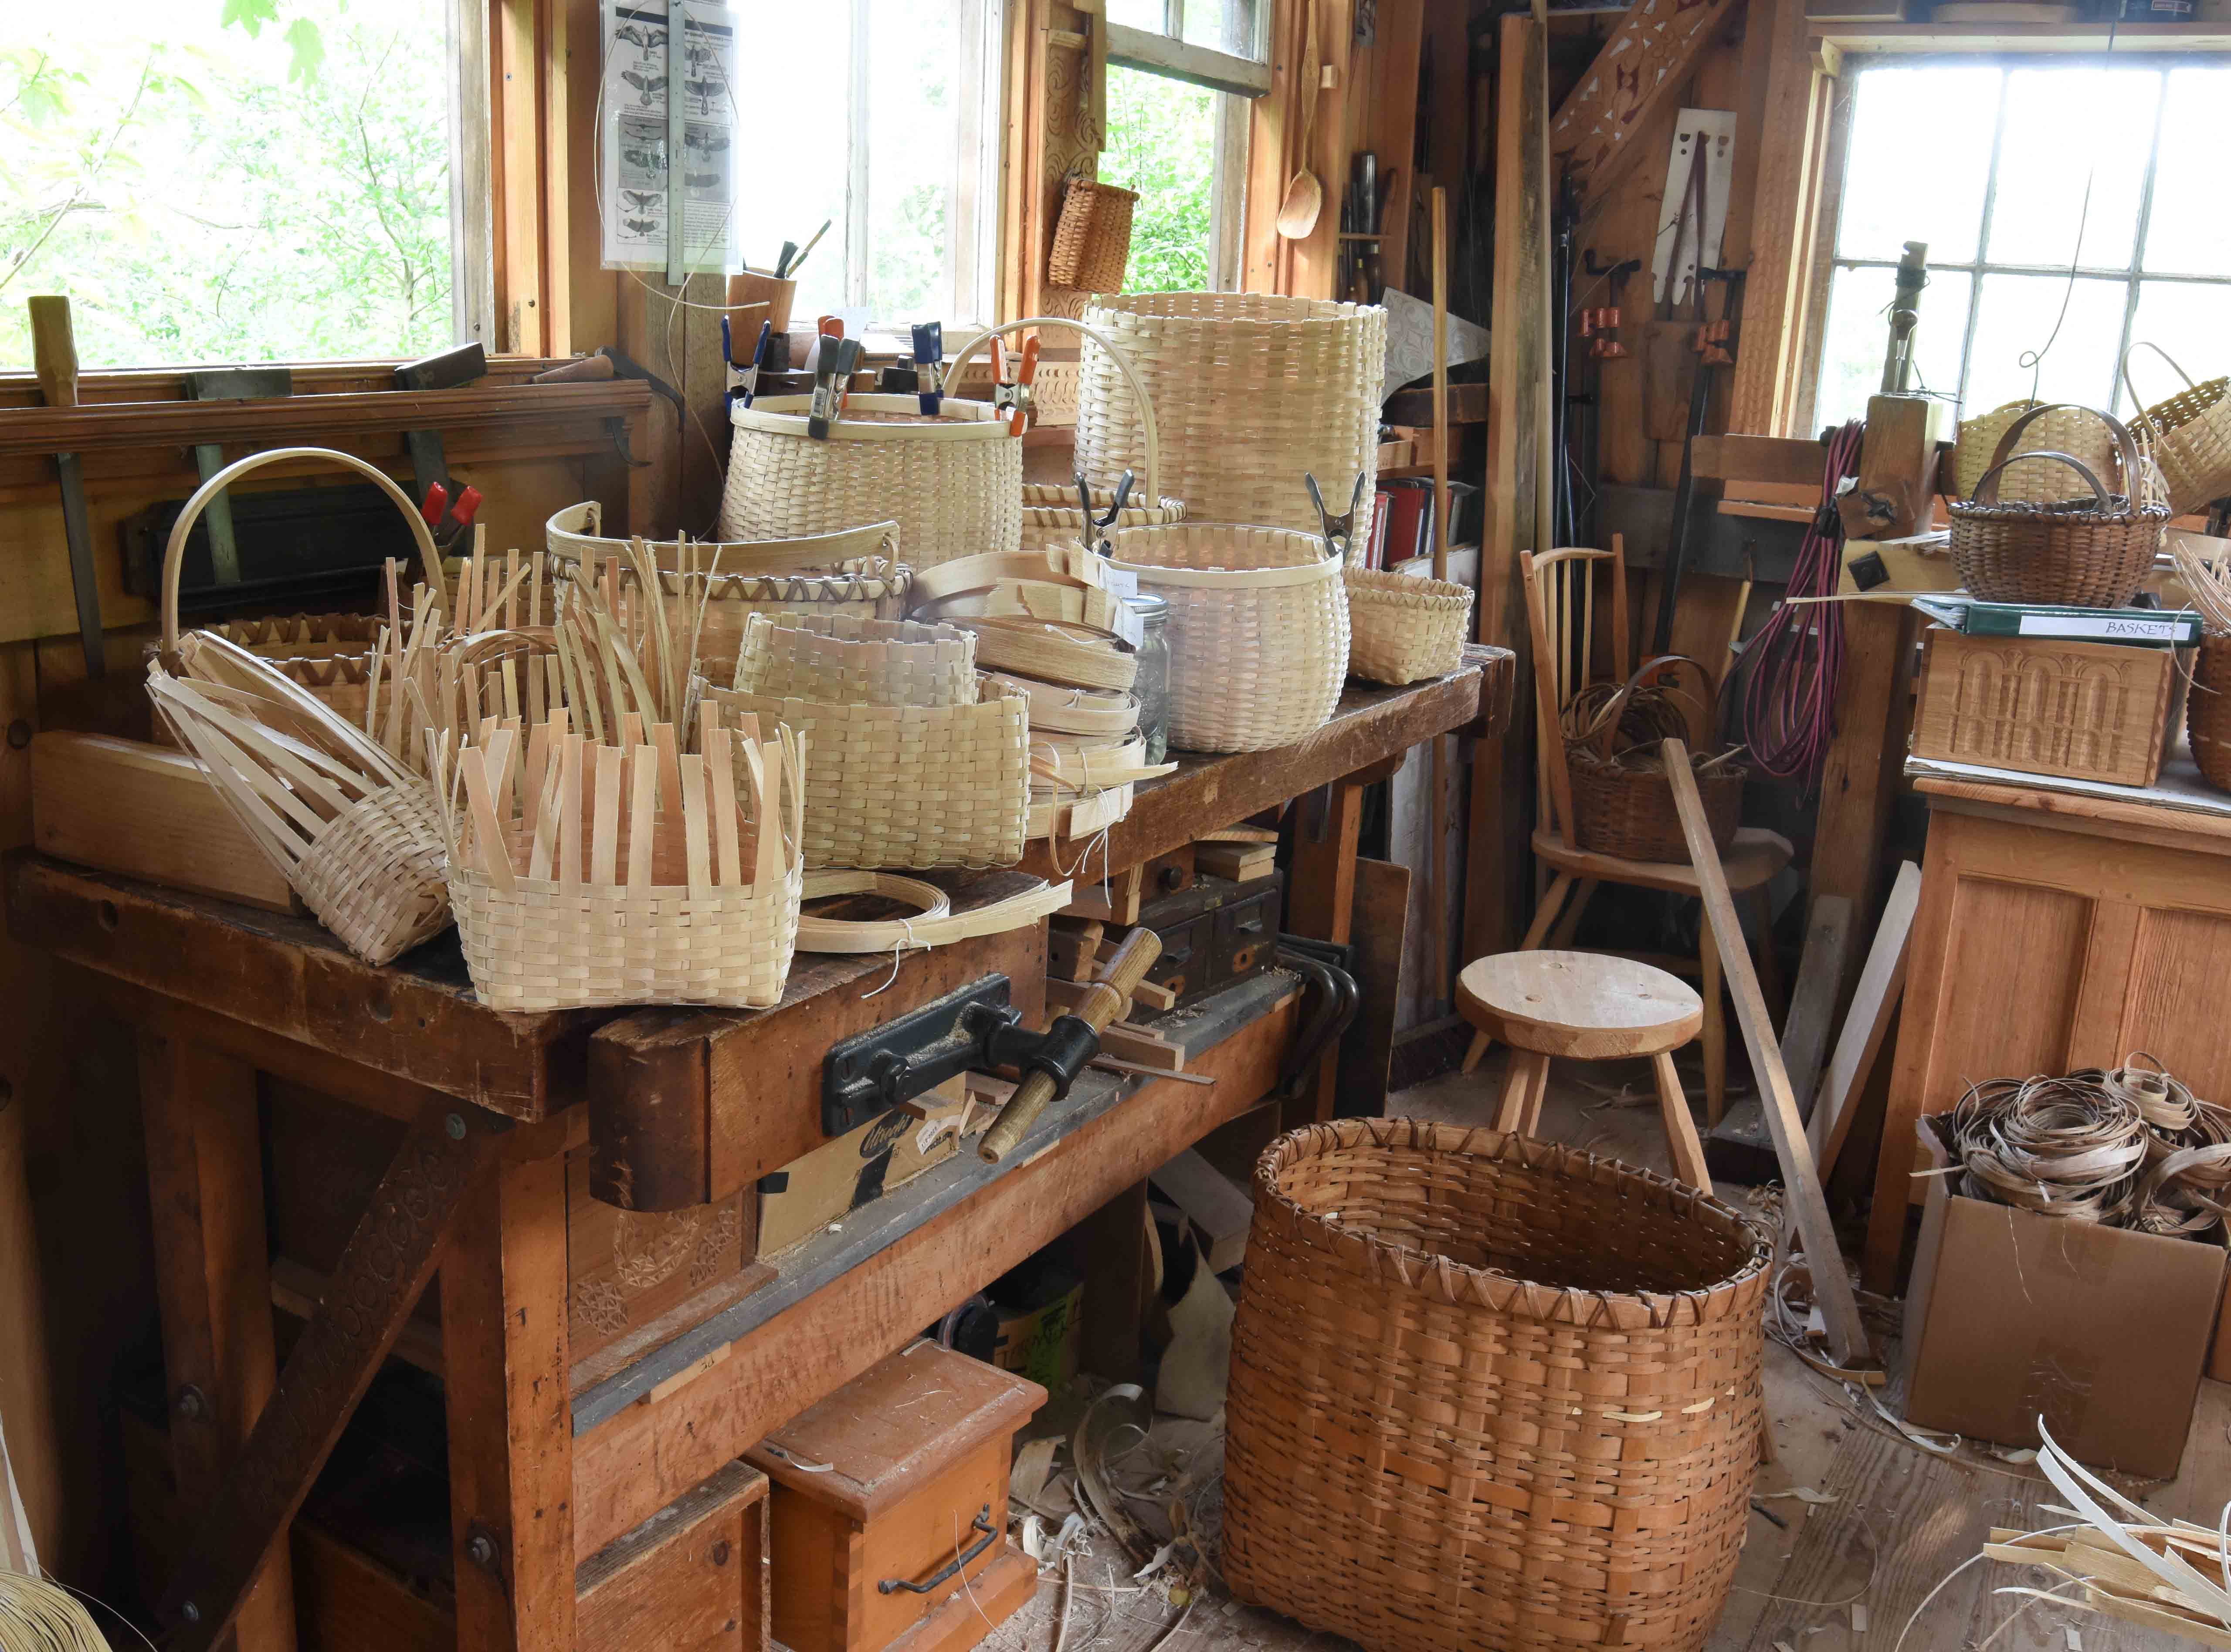
The past two weeks or so I’ve been pounding ash splints for making baskets. I’ve started weaving a few of them, and have lots more coming up. Baskets used to be almost a weekly thing for me, back in the 1980s and early 1990s, before oak furniture took over my thoughts. But I always come back to them, they’re so much fun to make and even better – to have around.

While getting ready to plunge deeply into them in the next couple of weeks, I’ve been studying some that I have hanging around here. Unlike the baskets I’m starting these days, all these are white oak baskets. You split white oak growth rings apart, instead of pounding like you do ash.

First, some I got when we cleaned up Jennie Alexander’s house after her death. JA loved baskets, and collected lots of them, but especially white oak baskets. I brought home a couple. This one is by a Maryland basketmaker JA knew, James McCrobie.

Here is Mr. McCrobie, as Alexander referred to him, shaving oak at a fair in Maryland.

The bottom of this basket:

And the inside view:


This one’s special because it’s by our great friend Louise Langsner, for Alexander. Way back when Louise used to make white oak baskets. Later, she began growing willow & using that to weave baskets. This white oak basket has hickory bark lashing on the rims.

The bottom:

The inside:

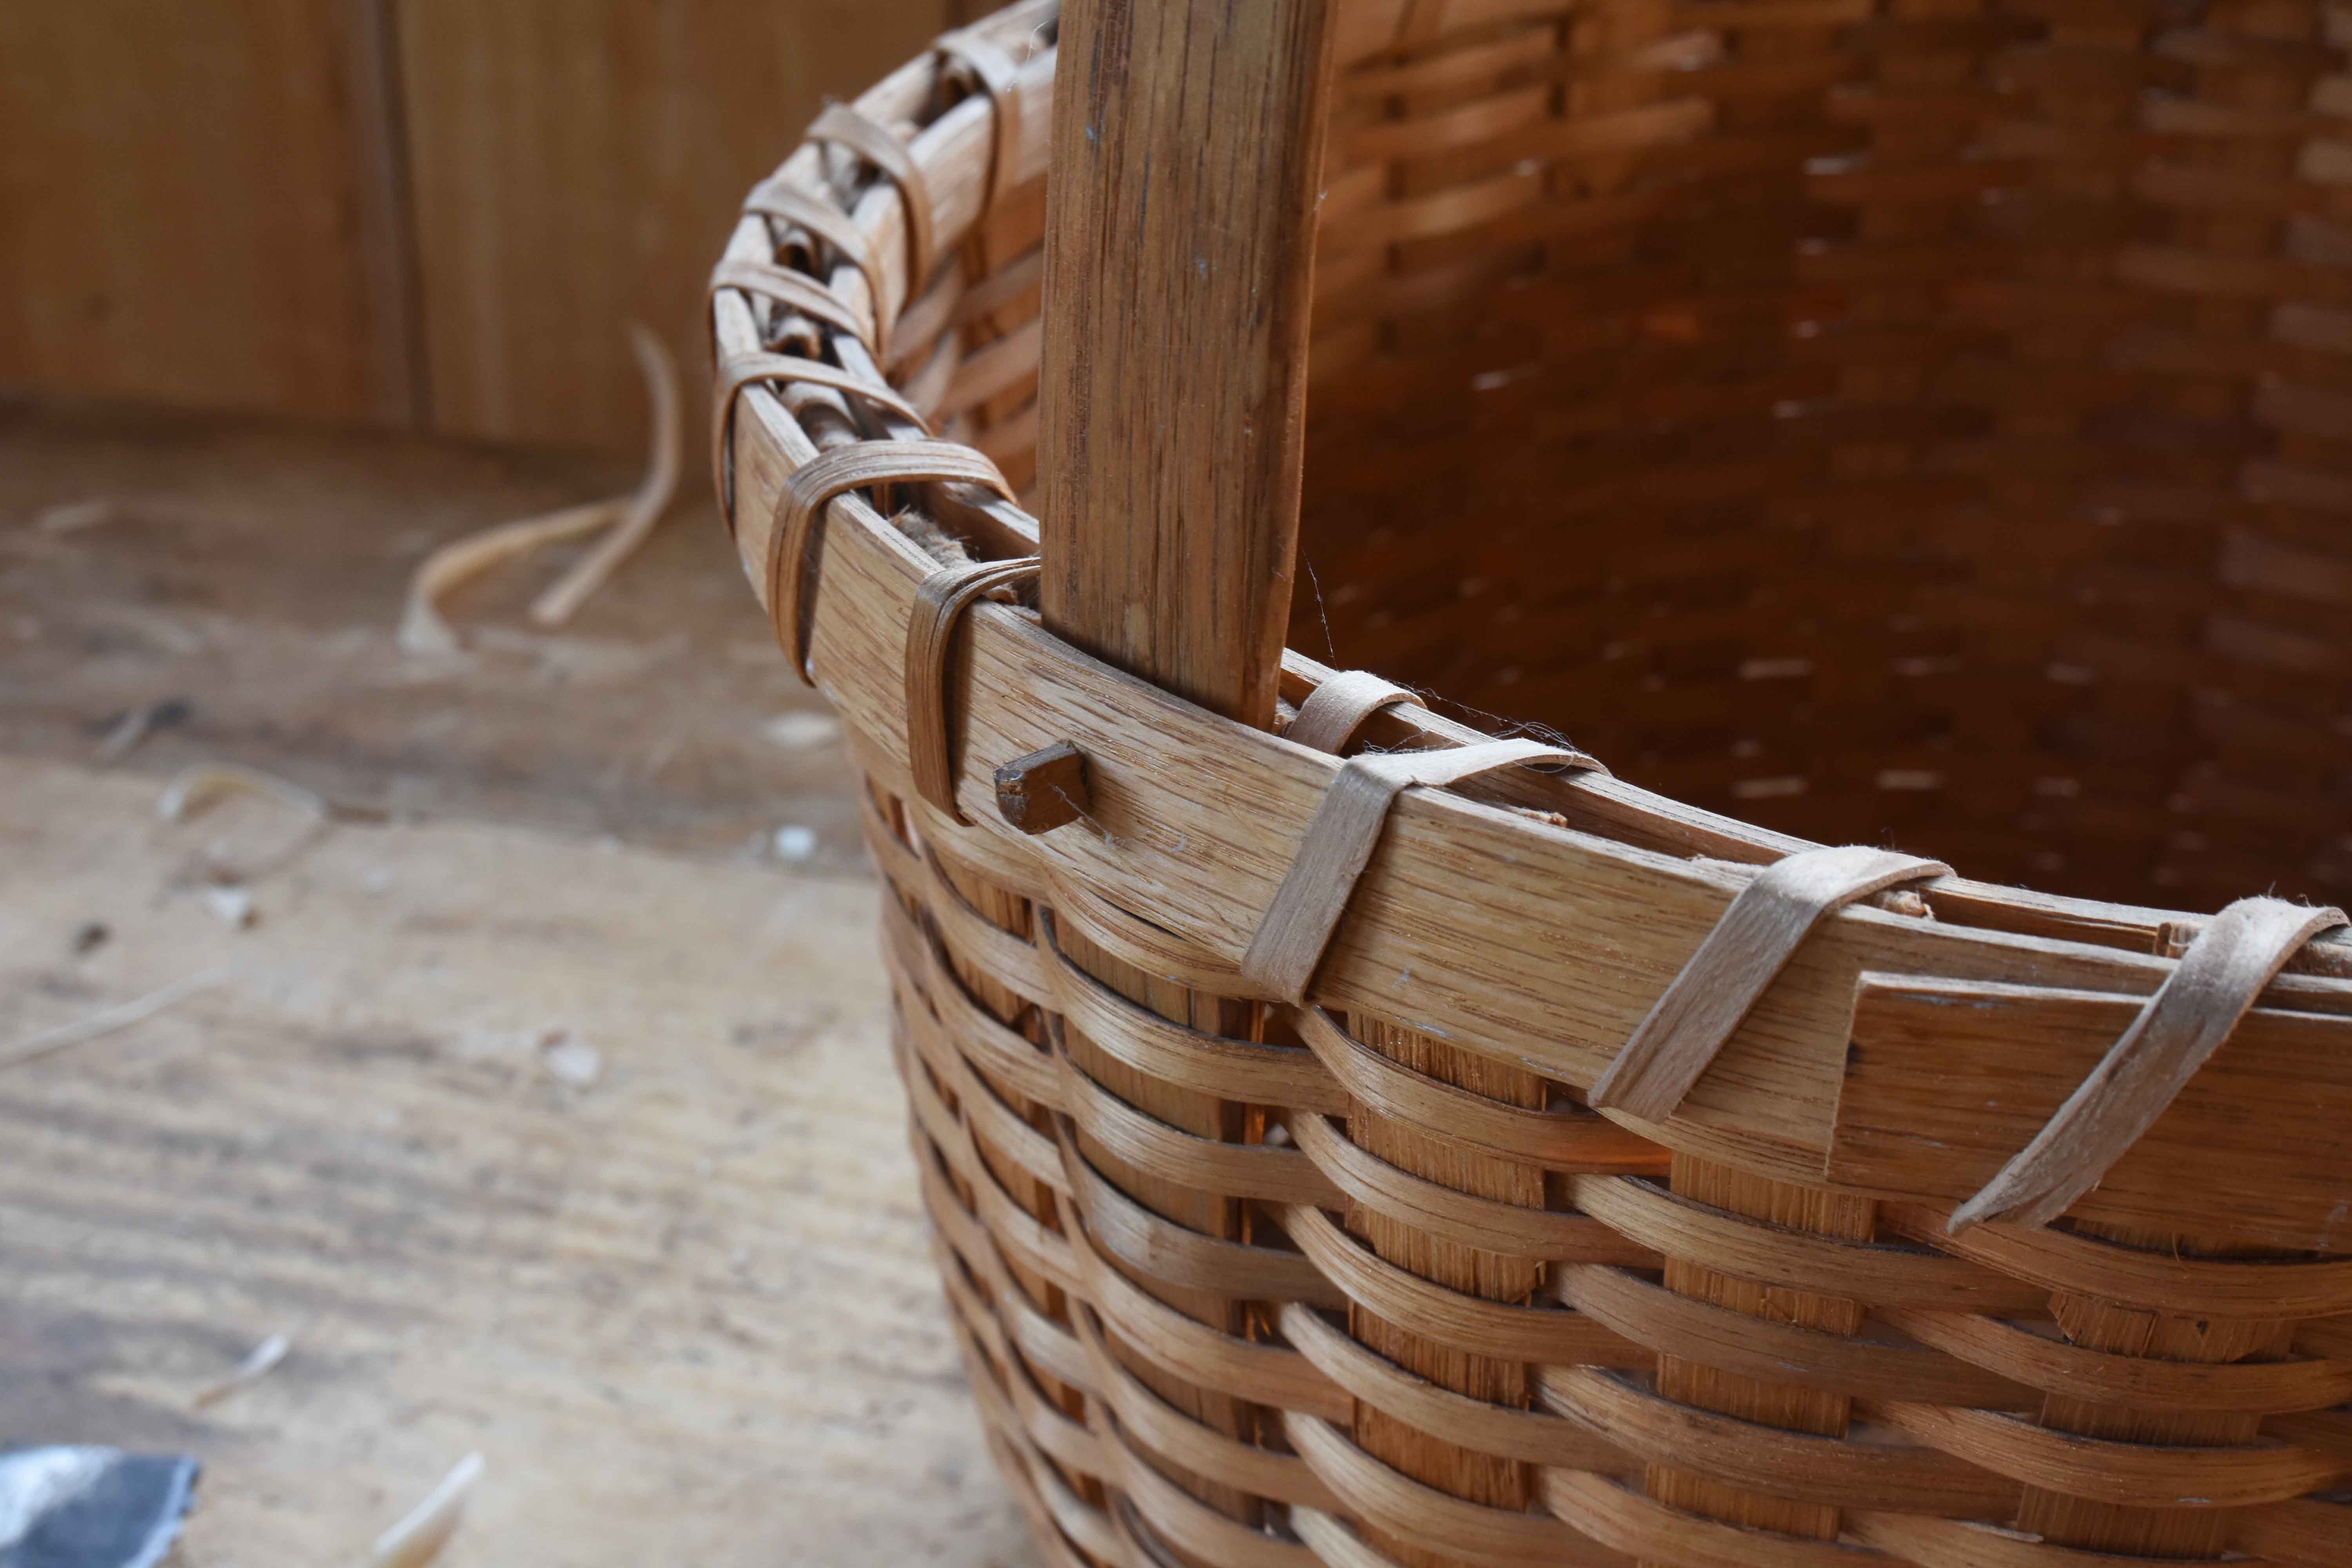
Louise used to peg the handles to the rims. I learned that technique there at County Workshops about 1986 or so. I had read it before that in Drew’s book County Woodcraft. Watch Lost Art Press for an updated version of that classic book (I’ll post about it when it happens too…) – in it is a chapter by Louise about making her oak baskets.

Here’s my first oak basket from that class – the instructor was Darry Wood.

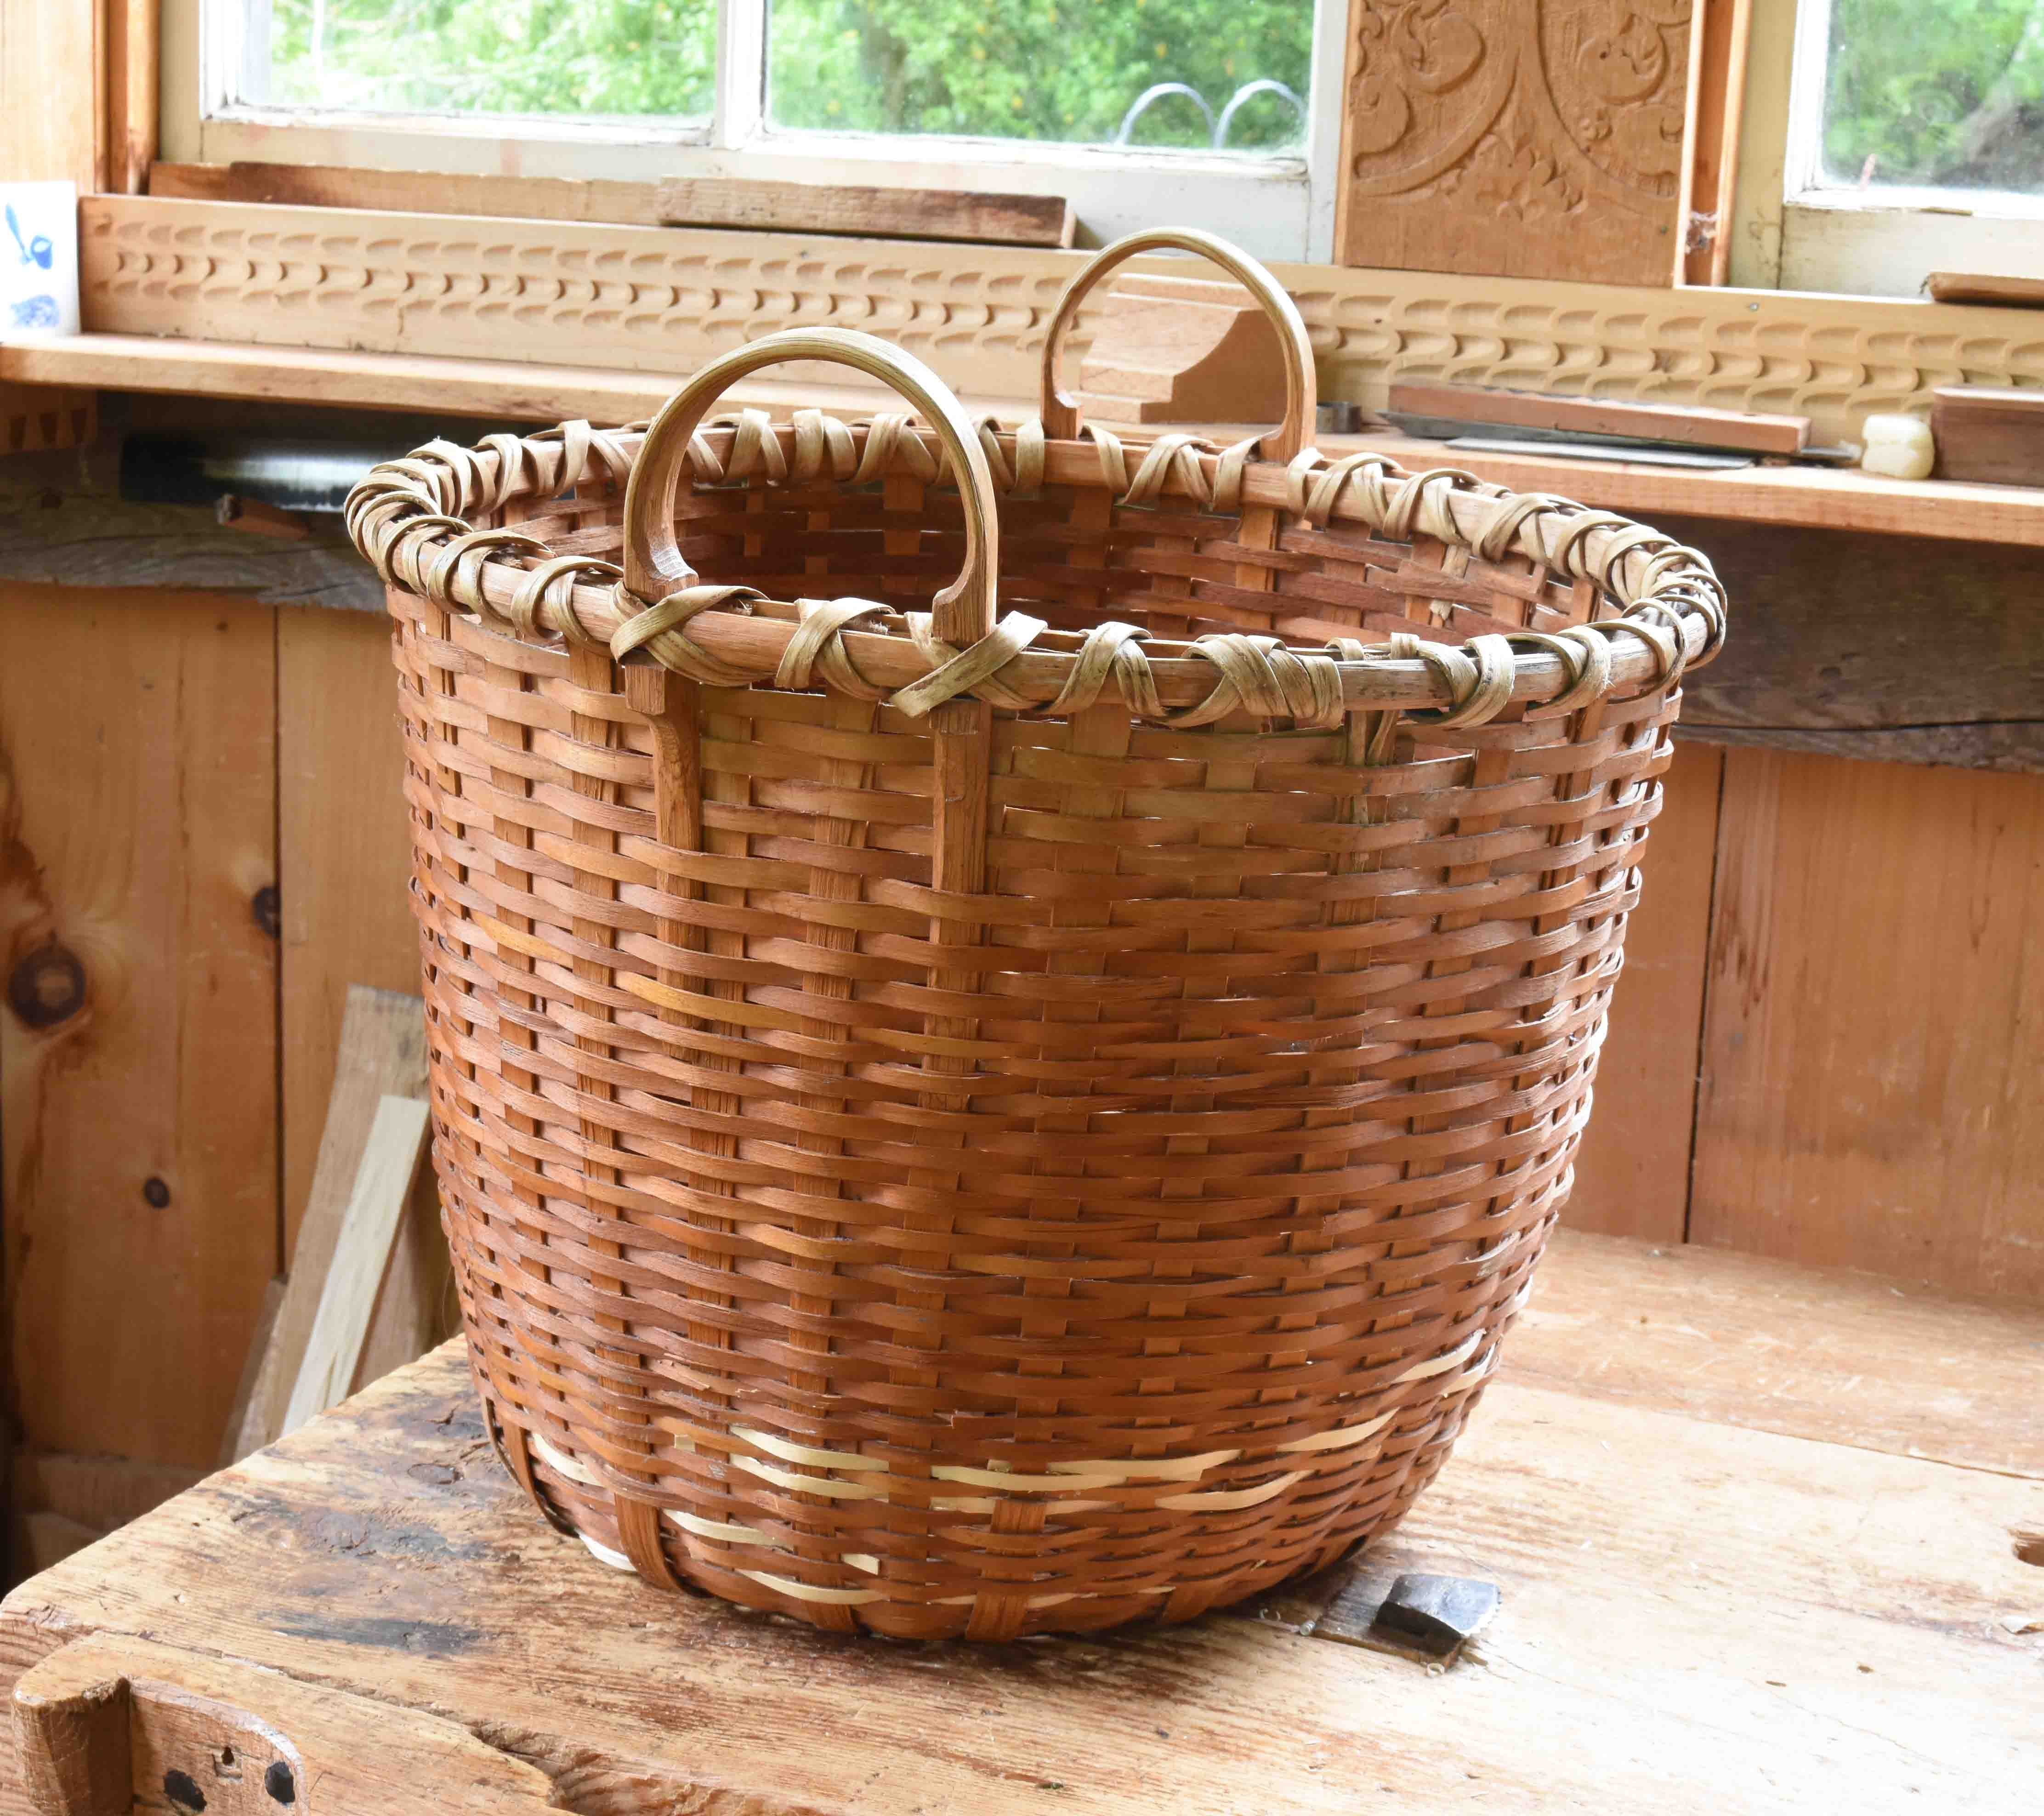
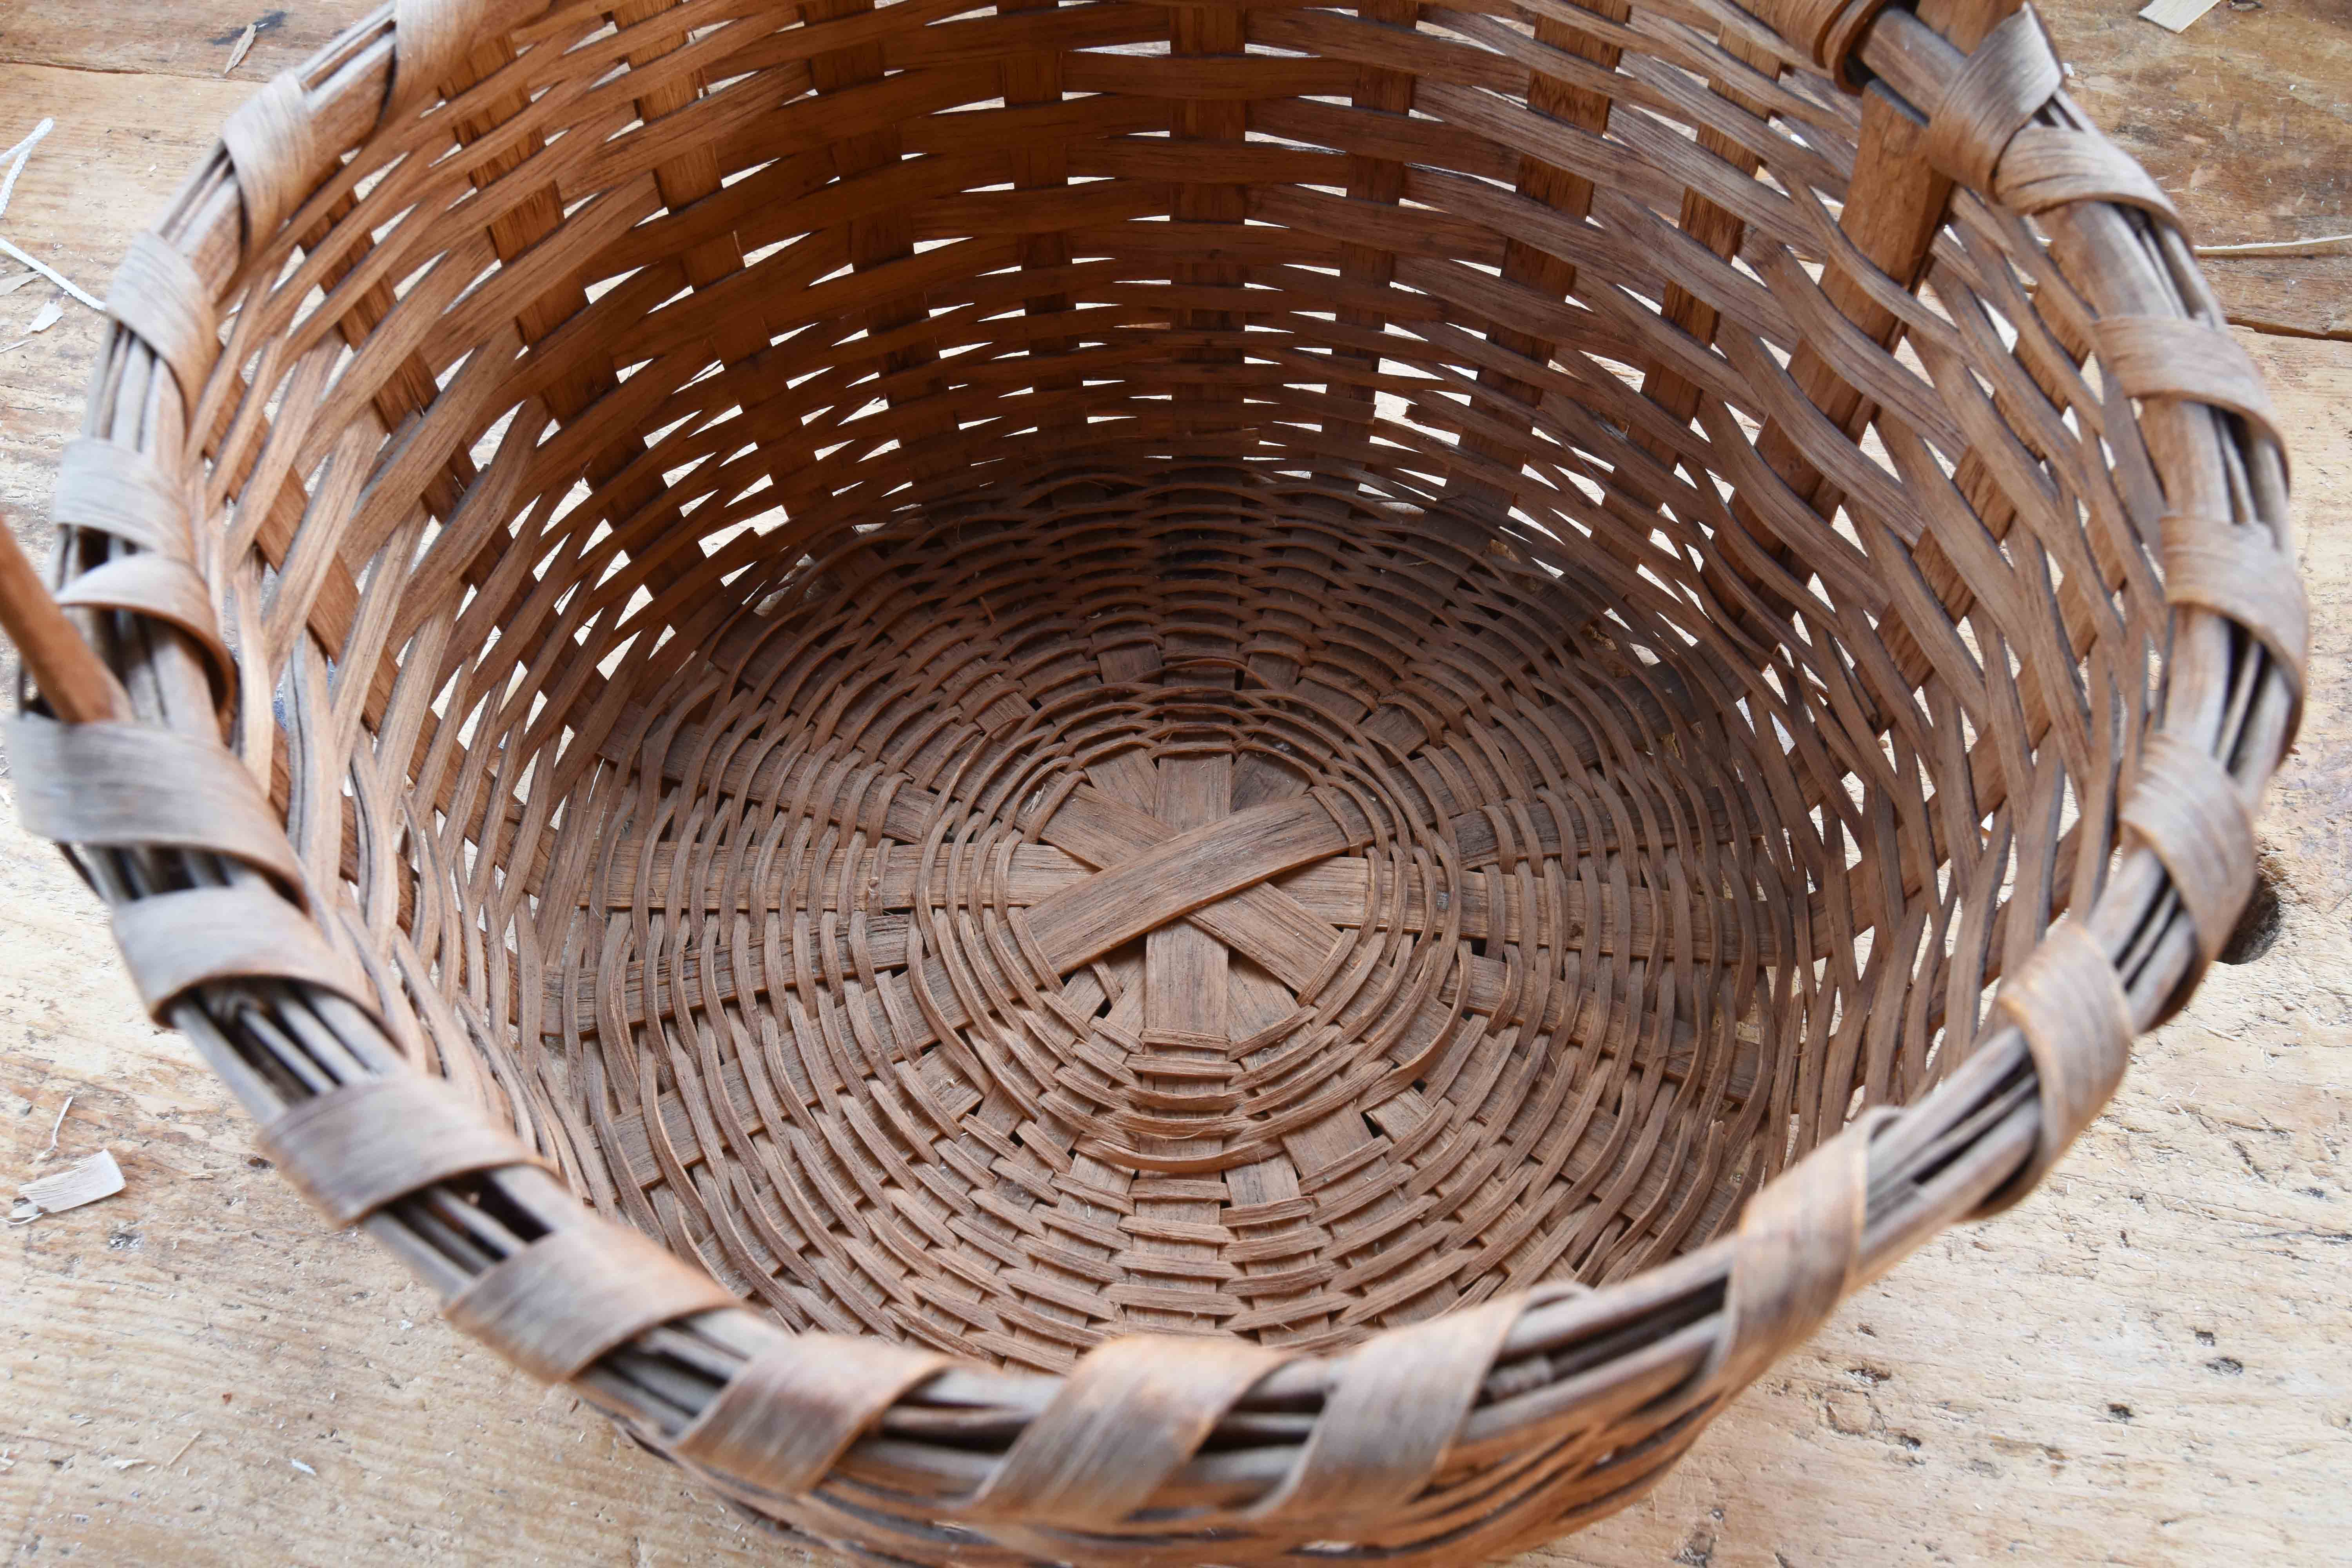
In 1989 I made this round bottom white oak basket for Alexander. It came back to me after her death:

Inside:

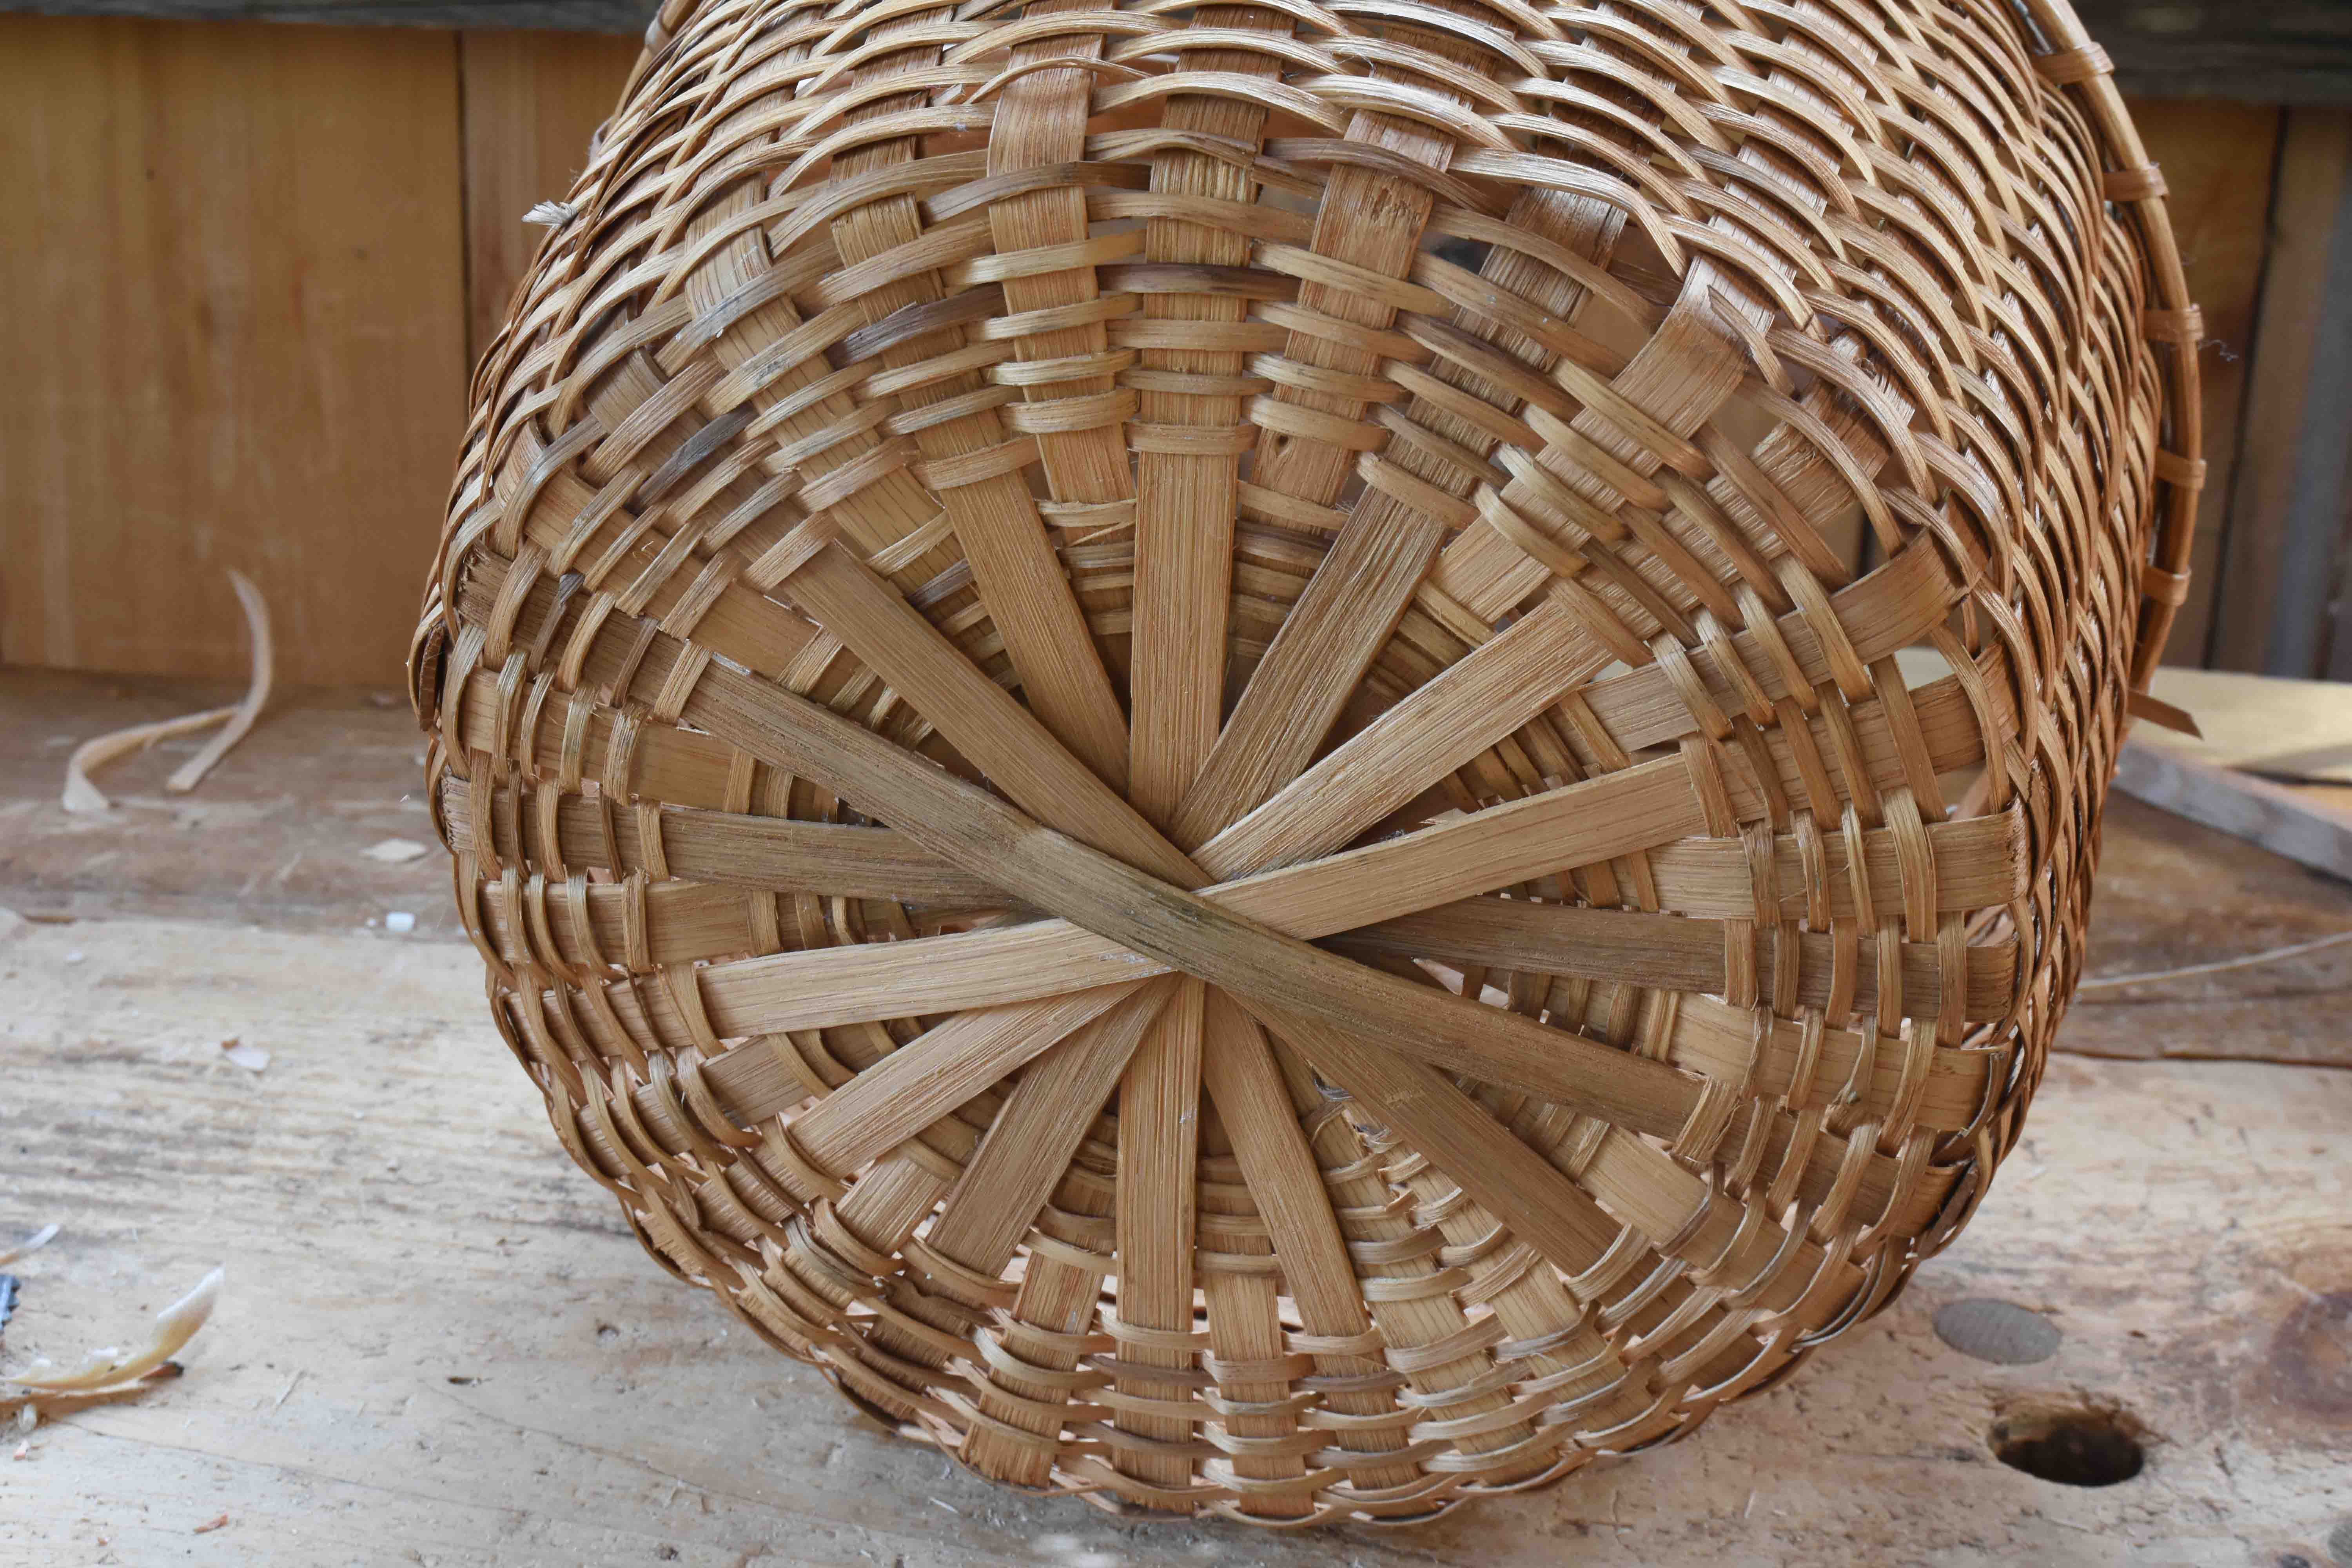
Bottom, with hickory bark reinforcements

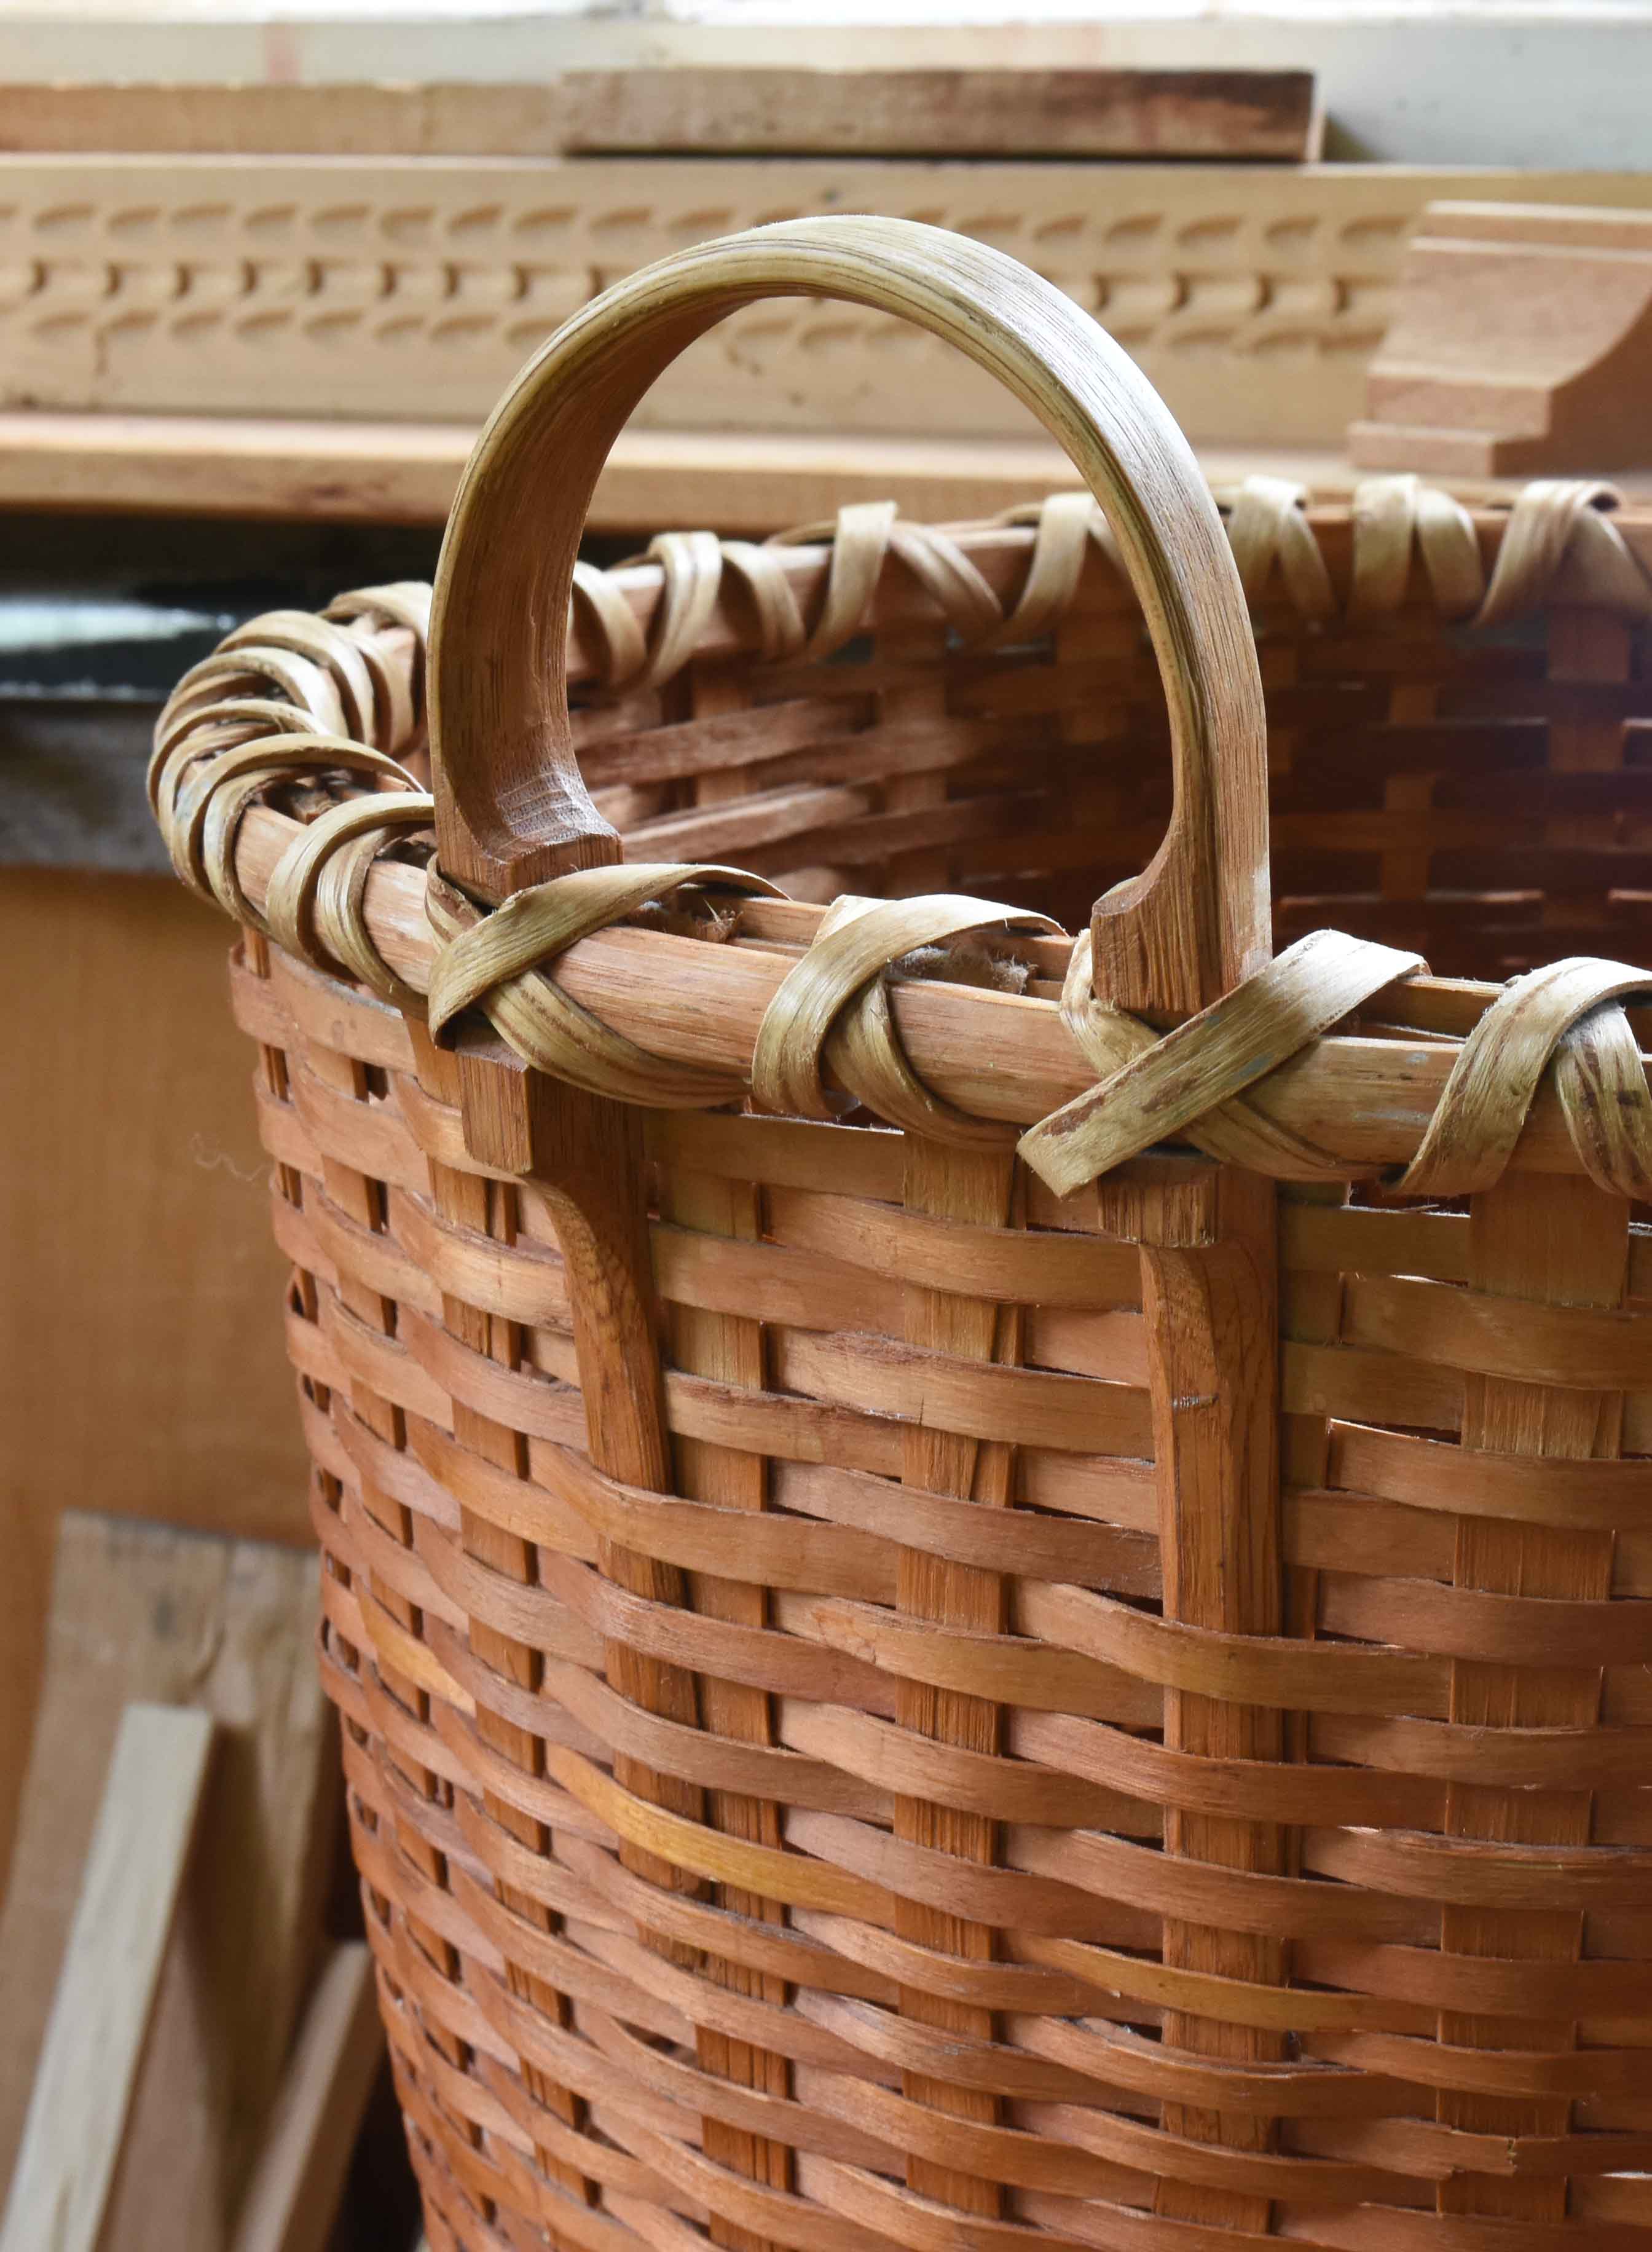
The hickory handle has a double notch, the lashing is hickory bark.

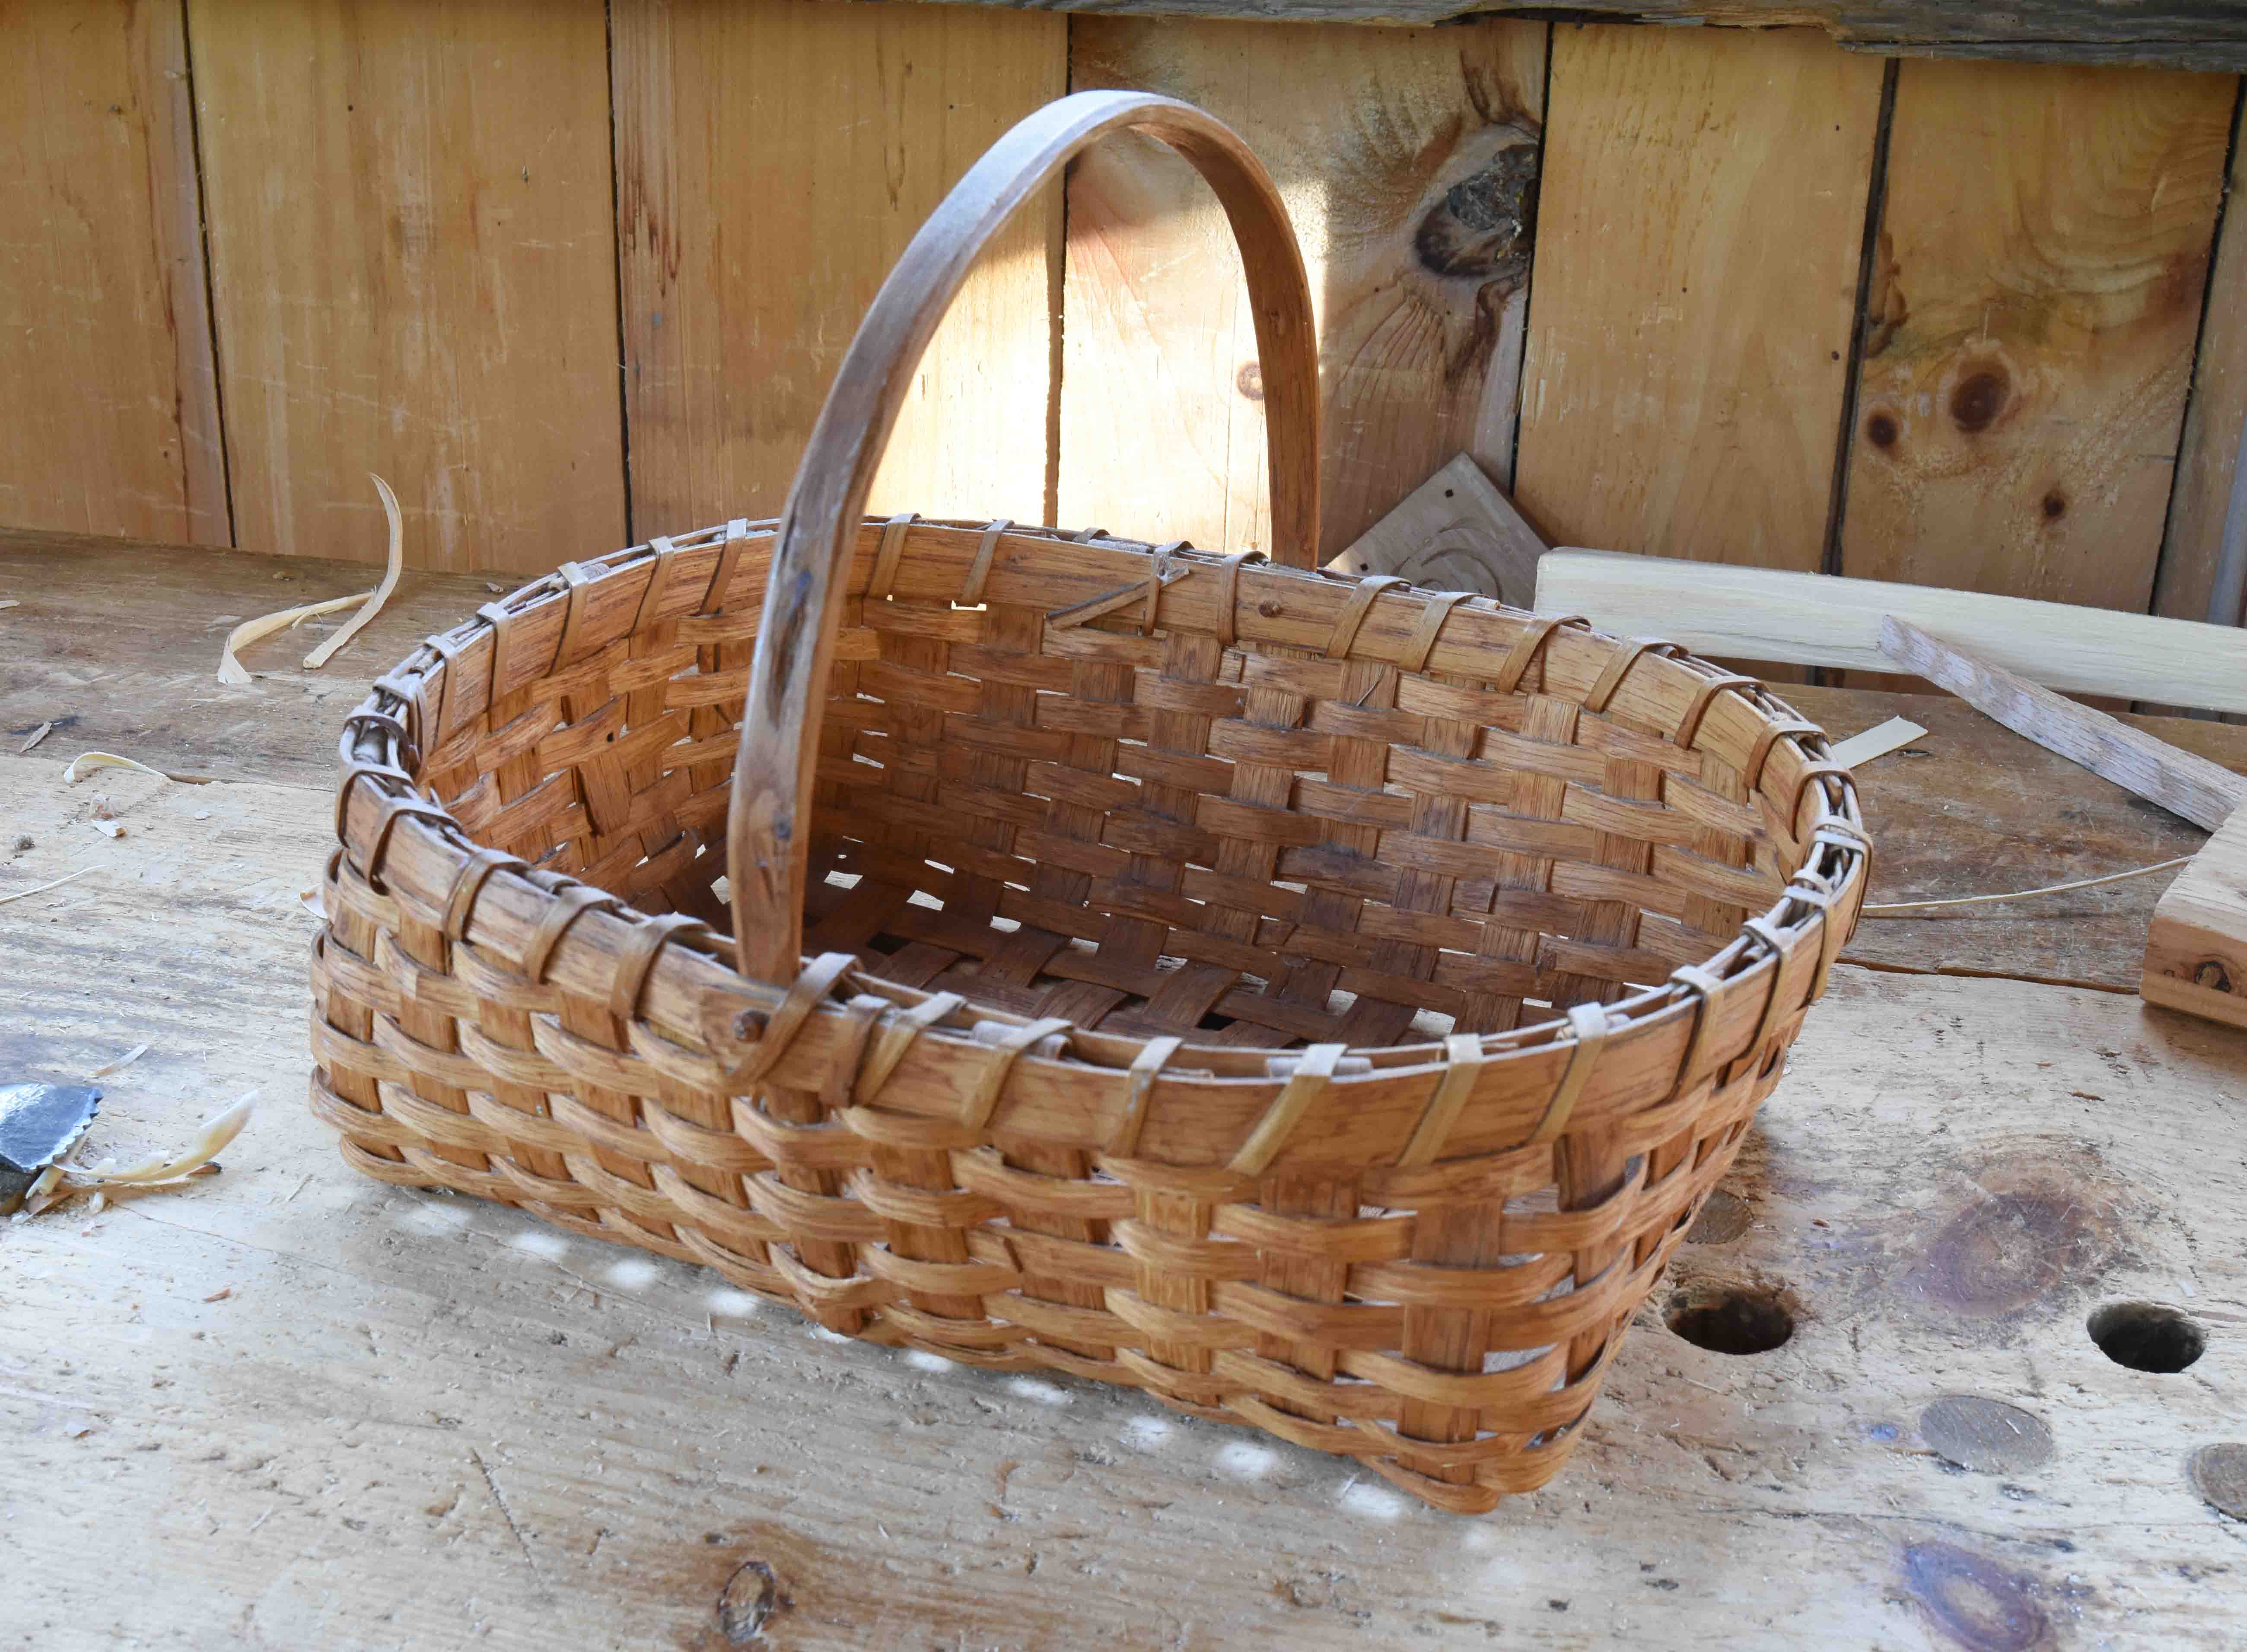
This one’s mine too, from 1988, I probably made it at Langsner’s – that spring & summer I was the intern there. White oak, hickory handle

I’ve used this basket a lot. Usually it holds all my spoon-carving gear, mostly tools & spoons-in-progress. The bottom features two “skids” shaved hickory bent up into the body. These reduce wear & tear on the bottoms.

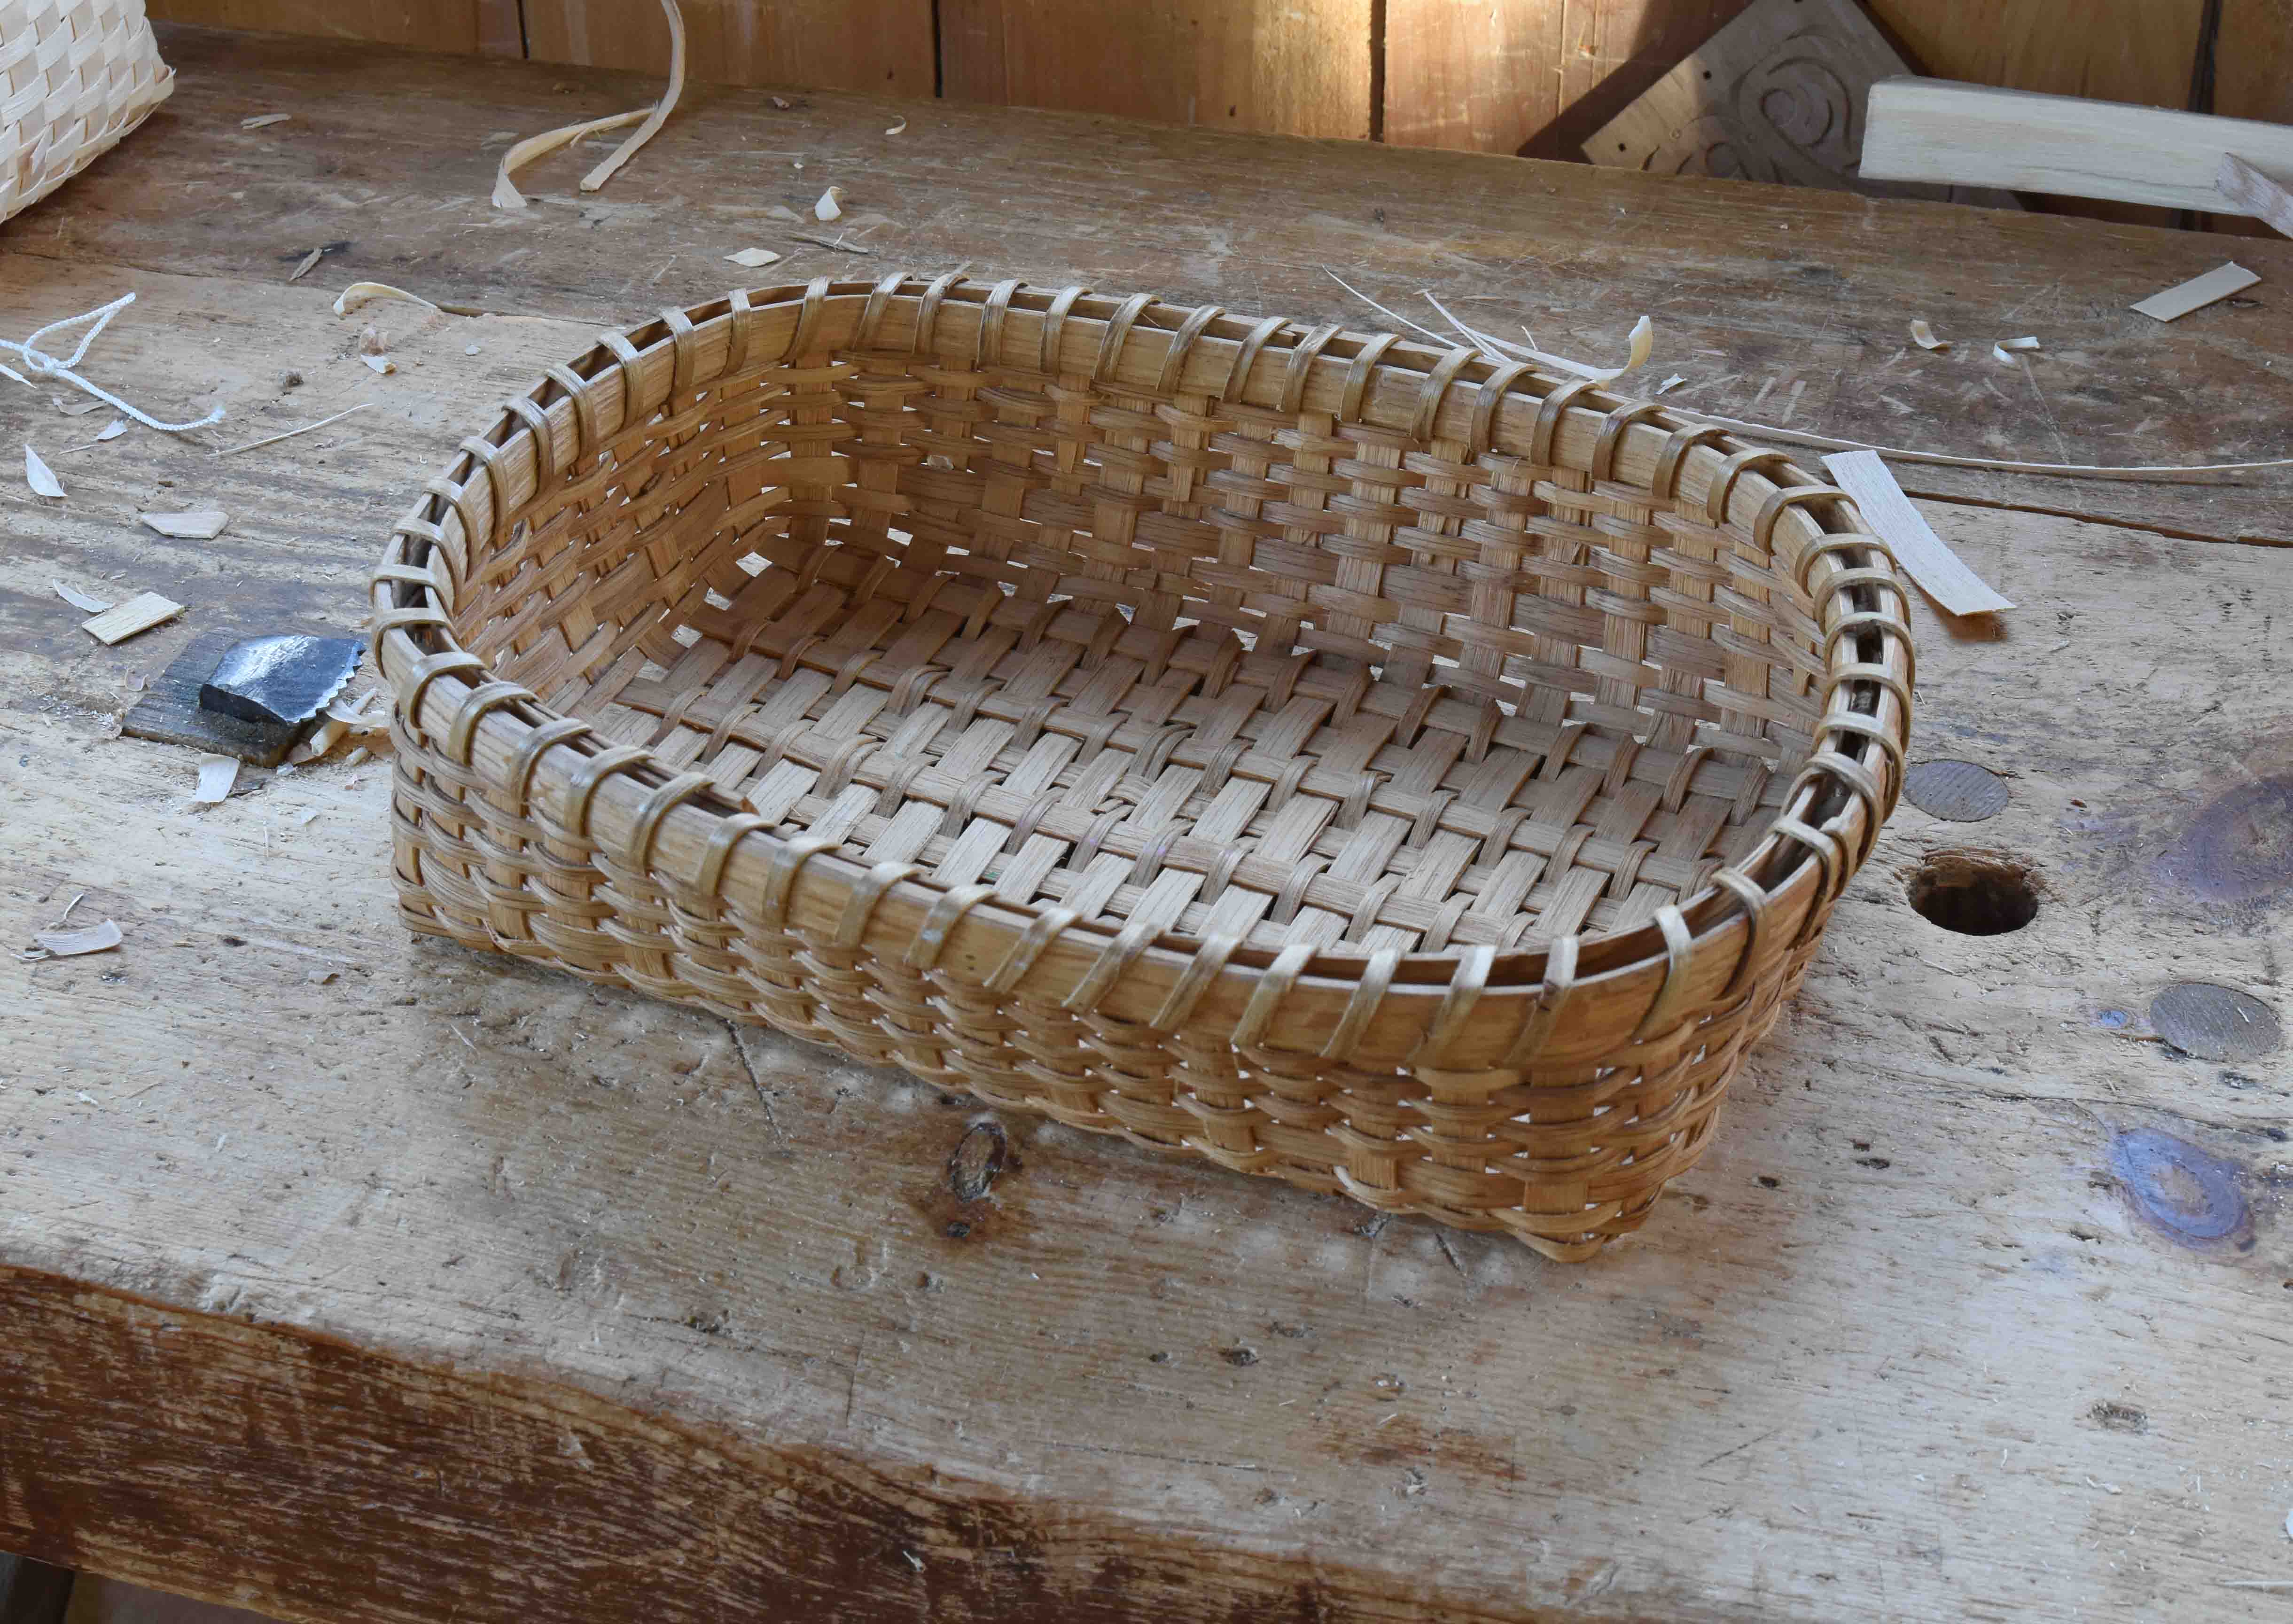
One more white oak by me – this one’s from 1990. I’m working (again!) to re-learn how I weave those “filled” bottoms. So I swiped this one back from my wife, emptied it, and will this time keep track of what I did to weave it.

But it’s all ash here now. I haven’t made a white oak basket since this one probably…here’s a real favorite, but very small basket in ash with hickory rims & handle, hickory bark lashing. It’s about 6″ x 8 1/2″ and the basket is 3″ high. I wish I could make them this good all the time. Better go practice…

These new ones still have potential…

here’s the last time I re-learned the filled bottoms. https://pfollansbee.wordpress.com/2015/11/01/another-basket-underway/ 

The Road to Hell…

This clean-up is harder than I thought. It takes longer, anyway. There’s a pile of baskets, the best of which are here – some finished, some nearly so. All of these were sitting up in the loft for a year-plus. But at least now they can get used.

Here’s the ones for today’s work – I have some last bits of hickory to split, shave & bend for handles & rims.

Two stools – the one on the right is brand-new, just finished last week, maybe it was the week before.

The joined stool is #3 of a pair. I made parts for three when I was making them for the Cutchogue Old House project. Then realized the order only called for two. So this stool, all turned & joinery cut, went up into the loft. I brought it down when I was prepping for my Winterthur demo last month, did some quick carvings on the rails, then pinned it. Today I plan on making the seat board, pinning that & tomorrow painting it red.

Birch bark canisters.

Ugh. I am very taken with this work, but have only spent a little time with it. Last fall Plymouth CRAFT hosted a class by Jarrod Dahl – and I learned a lot from those sessions. This one I had cut the finger joints some time ago, made a bottom, but ran out of bark so couldn’t make the bands that usually go around the upper & lower ends. I decided last week to forget them, and made a top for it, and fitted it with a basket handle. A little chip carving finished it off. 6 1/2″ diameter, 9″ high. 

While moving some large books around in the house, I found a small sheet of birch bark that I had flattened & forgot about. It turned red – I don’t know if that was from the book, the paper between it & the book or what.


 But I made a small canister from it, and had some short pieces to make the bands. Now a handle & it will be done.

Some post & rung work:

The ladderback chair I started during Plymouth CRAFT’s first chair class early in May. It came home in pieces, but I figured I better build it now or just burn it. Assembled it yesterday. Slats are next. The stool parts beside it are overflow from the finished stool above. So I’ll finish both of these up, then they are slated to get rush seats instead of hickory bark.

In my cleaning, I keep running into bits of wood stored around – “Oh, that’s going to by X, Y or Z someday.” This one is mahogany – a wood I have never used. I think Bob Van Dyke gave it to me. One little piece, what could I make from one piece? One of Roy’s sliding lid boxes. 

I’m not going to spoil it for those that don’t know these little puzzles. You can watch him make one here – https://www.pbs.org/video/dovetailed-grease-pot-bmswsp/

And look – one more. This carved box only needs a lid and some paint to call it done. OK, I know what I have to do now, better get away from this desk and do it.


jumping once again on the Bowl Lathe bandwagon

 I took a break from basket making last week to finally build myself a dedicated lathe for turning bowls. Mine is based on the ones we used when I was a student this spring in Robin Wood’s bowl-turning course at North House Folk School in Grand Marais, MN. https://pfollansbee.wordpress.com/2014/06/05/bowl-class-tip-of-the-iceberg/

I think I first saw this style of lathe in the book Wood and Woodworking in Anglo-Scandinavian and Medieval York, by Carole A. Morris (York Archeaological Trust/Council for British Archeaology, 2000), then in the work done by Robin Wood and others…

First off, I jobbed out the long slot cut in the 3″ thick beech plank. I traded Michael Burrey some carving work for his labor – I coulda done it, if I wanted to…

bench slot


Then came boring the hole for the legs. Legs like these angle out in two directions; to the side, and to the end. I mark out two angled lines off a centerline to help me sight one angle for these legs. Then use an adjustable bevel aligned on this line to get the other. This is based on the ideas I learned from Curtis Buchanan and Drew Langsner in making windsor chairs. (Drew is teaching a session at Woodworking in America that covers in detail this notion – setting the geometry to get these angles right. http://www.woodworkinginamerica.com/ehome/woodworkinginamerica.com/WIA2014/?&& )

In a case like a bench, or this lathe – I’m not too concerned about these being “just exactly perfect.” 

auger


This spiral auger is probably a nineteenth century one; it’s about 1 1/4″ or so…some now call it a T-auger, but it’s really just an auger. The ones that fit in braces are auger bits.

twist


A detail showing the bevel to help line things up. 

auger detail


Here’s a bird’s eye view – showing how the auger aligns with the scribed line on the bench. So you sight that, centered on the line, then the bevel takes care of the 2nd angle. 

sight


Here’s the two poppets set into the slot. One taller than the other, these could have been longer still, but I worked with what I had. These are oak cutoffs from timber work. 

big poppet little poppet


Now wedge from below. I just eyeballed the angled mortise, then made wedges to fit. 

wedges

wedge detail


The shorter poppet gets a bent pike inserted in the top. Then I slid this over to the taller poppet, to mark where I’ll bore for the straight pike. 

bent pike detail


Jumped ahead a step or two – here’s the tool rest arrangement. The tool rest support is just wedged into a slot cut in the outside face of the taller poppet. The too rest is pivoted into the top of the smaller poppet. Simple. 

tool rest


a 14′ sapling, lashed at its bottom end to a small tree on the bank above me, then resting in the cruck of two 2x4s – Now, the transition from the relatively still craft of basketmaking, to the aerobic craft of bowl turning. I need some practice. 

practice

bowl