A disclaimer – Another non-woodworking post. First off, thank you to all who left comments about my recent also-non-woodworking post about my father Moe. I appreciate the support. I tend to shy away from writing much personal stuff here (or anywhere on the web.) But indulge me one more time, today’s a significant day in our household. Our kids turn 18 today.
Inspecting the goods. Rose, 3 years old.
My wife Maureen and I got a late start – we were married in 2003, I was 45, she was 39. So we knew there was a clock that was ticking. But we decided to roll the dice – and got more than lucky when the time came. In the early spring of 2005 we knew she was pregnant – I remember a doctor telling us about something the size of a kernel of rice. So I took to writing letters to our would-be child, Colonel Rice. Telling him or her all about the wonderful things we’d do once they were out here with us. But then early on, we found out we were luckier than we thought – there were 2 of them! So Colonel Rice wouldn’t do any longer. I took to calling them Spike & Trixie. Maureen wasn’t so keen on my naming choices. So we opted for Rose and Daniel somewhere along the line.
planting an English oak, 2009
I remember hitting on the name Rose very easily – by practice-yelling upstairs “Rose Follansbee, you come down here this instant!” Rolled right off the tongue. Daniel’s name was longer in coming. My brother Steve offered me $100 if I named one of the children Stephen – but I held out for more and it didn’t come. All in all, the story of naming him becomes too long – Maureen has 5 brothers – so lots of names were out of the running. At the time I was doing a lot of research about London joiners – reading lists and lists of names. Tossed a lot out (Epiphanas? Theophilus?) and came up with Daniel. As an added bonus, a friend who was a great inspiration in my woodworking was named Daniel – our son is not specifically named for him, but it’s a nice connection – for me anyway.
Daniel at the shaving horse, 2010
We had time for all that – Maureen was on bed rest for 11 weeks. We had been to England that summer and I think she went to bed (doctor’s orders) shortly after that. 11 weeks! What patience. I don’t remember her complaining at all.
England, summer 2005. Folding portable stool in hand…
And last night I was thinking about the hours we spent in the hospital waiting for them to arrive. The doctor came in and explained that things were fine, but we’d been there a long time and could opt for a C-section – “talk it over” she said & left the room. I looked at Maureen and asked “what do you want to do?” – I got the answer, opened the door and yelled down the hall “It came up tails, get your knife!” And one person’s main task was to figure out how to seal up my beard in the OR. (Two face masks, one wrapped left and one wrapped right is the answer).
I used to put them on the blog from time to time when they were small, but after a while they stopped letting me aim cameras at them like they used to. So picking more recent pictures is harder. I’m sure most parents feel about their kids the way we feel about ours. Mixtures of wonder and amazement. And perplexed. Optimistic and afraid. Still surprised from time to time. Lately I’m reveling in getting to see the good people they are becoming. I couldn’t be happier, my life is complete because of them.
Daniel, seeming to say “are we done here?”
Rose w catalpa flowers
Happy birthday kids – we’re so glad you’re here.
—————
Some woodsy stuff next time. And there’s usually a post every 3 days or so on the substack blog – or you can look back on this blog, all the way to 2008. New blog is here: https://peterfollansbeejoinerswork.substack.com/
Every year about this time I point to Maureen’s Etsy shop – all the time I’m farting around in the shop, she’s in here running the household and knitting (& more) up a storm – she was just in the shop the other day to photograph some things against the door. How this isn’t covered in wood chips is beyond me.
mohair scarf
This one she kept in the house –
gray shawl
And there’s paper work too – not paper work like that stuff we all dread – notecards, bookmarks and prints done with a process called eco-printing. She takes leaves, flowers and other bits collected on walks and prints them onto paper.
eco-printing
She sent me a blurb – “A sample of some of my latest hand work and botanical eco prints. Photos- Merino wool shawl, mohair knit scarf and botanical print journal and card sets. Posted on the site are various other knitted and silk scarves, shawls as well as botanical prints in mats, ready to frame.
I will also have a restock during the first week of December.
The only woodworking announcement I have right now is a chairmaking class I’m teaching with Joel Paul up at Pete Galbert’s next spring. April 8-13, 2024 – making the Jennie Alexander chair.
Joel and I have done it a couple of times and it’s great fun. We’ll guide you through splitting the parts, shaving them and working all the steps all the way up to assembling the chair and installing the slats. Seat weaving is usually a demonstration – some have time, others do the seat at home…
slat demo
There’s only a few slots so if you’re inclined get a hold of Galbert.
I haven’t really worked out a teaching schedule for next year. It’s not going to be more than 3 or 4 classes. If that. One tentatively at Lost Art Press, I haven’t figured out the time for that yet. I’ll get a hold of Megan. If it happens, it’ll be the 2nd half of the year. Bench work, carving oak.
November 15, 1923. One hundred years ago today my father was born. Warren Harriman Follansbee – though I only ever heard two people call him Warren – his mother and one of our neighbors.
my grandmother Hazel Polhamus Carpenter Follansbee w Warren at 6 months old, 1924
Everyone else only ever called him “Moe” and so that’s who he was.
“Warren taken in So. Boston 7th grade” c. 1936/7
Grew up poor in Boston. One sister, my aunt Doris. Moe was bright, did well in school – but was not going anywhere past high school. There was a legend that he wanted to try out for professional baseball – but he also told lots of tales – so I can’t swear to that. One story I heard enough to believe was that his father, Edgar Harriman Follansbee, said to him the day after he graduated high school in 1942 “I got an interview for you at the Christian Science Monitor newspaper…” which Moe declined. He left the house, went in town and got a job at A.J. Wilkinson Hardware – Boston’s oldest hardware store. And that was the only job Moe ever had. Worked there until the week of his death at age 51 in 1975. (below: a plane I collected long after Moe’s death – with the imprint of AJ Wilkinson)
small smooth plane; A.J. Wilkinson & Co. Boston
I only got snippets of stories of his youth – often revolving around how the family made do on so little, or exploits about games in the streets of South Boston – baseball being a lifelong passion. He always said he invented halfball, he kept saying so even after we knew it wasn’t true. There was lots of bravado – but my guess is it was a cover. He boasted about all the girls he had clamoring for him – apparently he used to tell many of them “I’ll come pick you up tonight…” only to somehow get out of it.
Then he told Mary E. Fiske he was coming to pick her up one night…and she shrugged it off, knowing his track record. But somehow her friends convinced her that this time he meant it. And so he did. So one job – one woman.
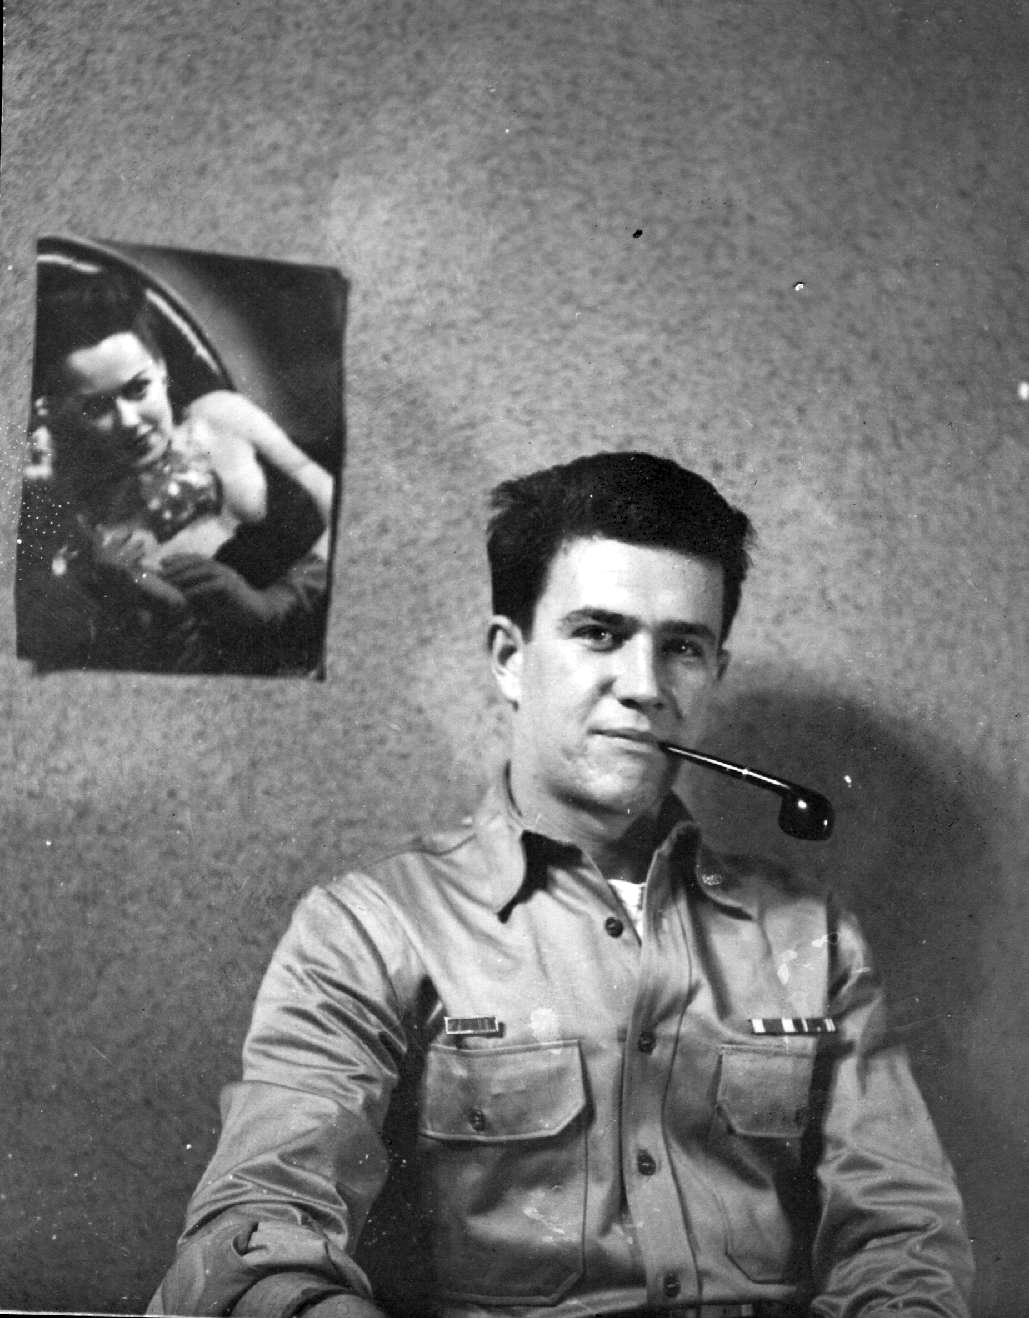
Moe, 1943
Moe went in the Army in 1943, served until 1945 – in his words, which I just read for the first time today thanks to my sister Susan: “My journeys carry me at government expense to many of our United States and then to England, Africa, Italy, France, Germany, Belgium and Holland. These two and a half years have a settling effect on a young man and when I return home, I am content to travel no more.”
As Steve Goodman’s song My Old Man says “after they dropped the bomb, he came home and married mom…” – well, not quite. Moe came home after VE day – got home mid-summer. He was not in combat but in supply. He could type – which pinned him to desks much of the time. For which I’m glad…because he wrote…and wrote and wrote. My mother saved all his letters – neatly bundled and arranged chronologically. I spent years transcribing them. 120,000 words. Each letter signed “All my love always, Moe”
some of Moe’s letters
Here’s one dated Aug 22, 1943, written on a roll of adding machine tape. Over 3,000 words. Written 7 years before Kerouac put his 120′ roll of paper into his typewriter for a draft of On the Road.
a letter written on an adding machine roll
I’m the youngest of five, born in 1957. Between the five of us we have collected memories of some of his exploits. Most of the things I remember about him revolve around us, his family. We lived in the suburbs of Boston, on the south shore. Suburbs, but no car. Neither of my parents drove. That changed near the end of his life, Moe suggested to my mother that she get her license, “you’ll need it…” he said. Their not-driving was really economical, it seems to me, though I never knew or thought that when I was a kid. They just didn’t drive. But I’m sure it was just that they couldn’t afford a car and all the expenses that go with it. So on rare occasions when we got a ride to school in the rain with a neighbor – I always thought it was a big deal. Even now, there’s times we’ll remember some activity or other happening across town or even out of town – and one of us will ask “How did we get there?” And sometimes we don’t have an answer. Other times we’ll know it was aunt so-and-so, etc.
My sisters and brother got cars as their turns came. But in those early years, it was walk to the bus, the bus to the subway and on into Boston. Other times my father got rides into work with neighbors. And when he wasn’t working, he was working around the house. I remember him painting neighbor’s houses – one time he did that in exchange for a week’s use of a cottage near a pond in Plymouth. Not on a pond, near one. I was probably 9 going on 10 – and felt like we were so far away. I now know it’s a 30 to 35 mile drive. Must have been the furthest I had ever travelled at that point. And for a good while.
He was a woodworker, but I never knew that phrase or thought in those terms. He just made stuff in the basement – the “cellar” in our local speech. As in “Moe’s down cellar…” – I remember sitting on the steps watching him at his tablesaw, the loudest, screaming-est machine. Completely covered in dust, smoking a cigar. No such thing as dust collection in the 1960s. Plywood too. So dust from adhesives. I used to sit there with my fingers plugging my ears, but couldn’t take my eyes off him. I was very young, an early memory. I have no idea where he got the ideas, plans or anything of that kind. There was no trove or stash of magazines and books pertaining to his “craft” – no one probably thought of it as such. But he made lots of things we used around the house.
I was probably 10-12 years old when I started taking art lessons in Quincy Massachusetts. I’d take the bus from Weymouth Landing and then walk a mile or so to the art center. He made me a plywood and formica carrying case – all partitioned off inside to house pencils, charcoal, pastels and I forget-what else. Plastic suitcase handle, brass hinges and clasps. And using adhesive letters meant for a mail box – “Peter the Pen” plastered across the lid. Except – it was all too big and heavy. So he re-made the entire thing, only a smaller version.
We had a blackboard on the wall beside the kitchen phone. Neighbors would come and borrow tools and Moe would say “Let me put your name on the shit list.” But he would always help them with what they were doing. I assume he learned a lot of it from his father Edgar. I never knew my grandfather. But Moe used to tell us Edgar could do all the work around a house – electrical work, plumbing, woodwork. Used to draw too. Shell-shocked from WWI, I think his only son going off to WWII was too much for him, he & my grandmother split up then, while Moe was in Europe. He was alcoholic and abusive – today we’d maybe recognize his problems as stemming from his time in the war…but not then. Or not treated as such anyway. Moe never saw him again, though Edgar lived another 17 years.
Recently I was at my nephew’s house and turned a corner and there was Moe’s “credenza” -it used to sit beside his chair, with his pipes stored in racks on the insides of the doors. Part of his later period. Tablesaw, router and drill press – I forget what else. I inherited all that stuff when I was 17. My older brother already had what he needed in that vein. I was an art student, so started out learning to make picture frames. I made a couple while Moe was still alive – I remember showing them to him, when he was too sick to go down cellar any longer.
detail snapshot of Moe’s credenza, probably late 1960s/early 1970s
Moe had a typewriter in a desk in the cellar (away from the tools, on the kid’s “side” of the cellar.) The desk had a handle that you’d grab and lift up and the top would pivot and bring up the typewriter. I don’t know what he had it for by that point, but I do remember him always telling us “you should learn how to type…”
When he died I was 17. I floundered for many years after that, but didn’t recognize it as floundering until I was done with it. Dropped out of college after one year & a week. Mostly just stayed high for a decade. But eventually found out woodworking was what I could do. So among the many things he never lived to see was my work. And probably for a time that bothered me, til I finally just accepted that things happen this way or that way for a reason. Or maybe not for a reason, but they just happen in the sequence they do and we just cope with it & get on with our lives. But one thing I accomplished that really struck me emotionally was my first published article in Chipstone’s American Furniture in 1996. A couple of years of research and writing, (during which I learned to type!) – I felt like that article made up for my floundering years and I remember giving a copy to my mother and all I could say was if only he could see this…
Now all these articles, books, all this furniture, have piled up here and there. More importantly my family – my wife and two kids. Stuff he missed. But they get the stories. I tell them over and over. This is one.
——–
I wrote some about my father here on this blog ten years ago – 2013. One of my most popular posts – about baseball.
I finished the large cupboard I’ve been working on most of the year and switched right over to carving some pieces for boxes and a table. Above is a yellow cedar box that sat around here half-done for ages & ages. It went through some wrinkles but finished up pretty nicely.
Once I had that wrapped up, I brought down some oak leftover from the cupboard and continued with more strapwork patterns like I used on the box. Each time I carve this sort of pattern it’s a bit different than last time. This week’s version features dished volutes in the arches – below I’ve struck around the volute to set it off.
starting to remove some background to check progress
Then comes dishing it out, twisting myself into a pretzel to try to get a smooth curve
cutting down to the incised marks
Once I get that hollow begun, then I go over it again to try to make the whole thing hollow right out to its rim, except under the arches at the top.
over & over
This board is about 7″ high x 24″ wide/long. Will become the front of a box next month. It’s all done now, but I didn’t get any photos today…
outlined – so half the battle
While I was tinkering away at some carving – I found out that the links here to my pages of carving patterns and the plans for the joined chest were not exactly functional. I knew they were dicey, but couldn’t bring myself to deal with them. I went in now and think I have them back up & running. So if anyone is looking for those things – there’s a link at the blog’s header or right here https://pfollansbee.wordpress.com/carving-drawings-plans/
That page should tell you what you need to know about them – but if you have questions, fire away. Here’s one of the strapwork patterns, included in set #2.
PF: I haven’t been keeping up with this (my old) blog lately, I’ve been posting on my new (as of June 2023) Substack blog. Some of the posts there are available to all readers – most are for paid subscribers. This post is copied from one I did there today, free to all subscribers so people can get a sample of what to expect. I’ve been trying to post there twice a week. Sometimes I make it, sometimes I don’t. https://peterfollansbeejoinerswork.substack.com/
——————
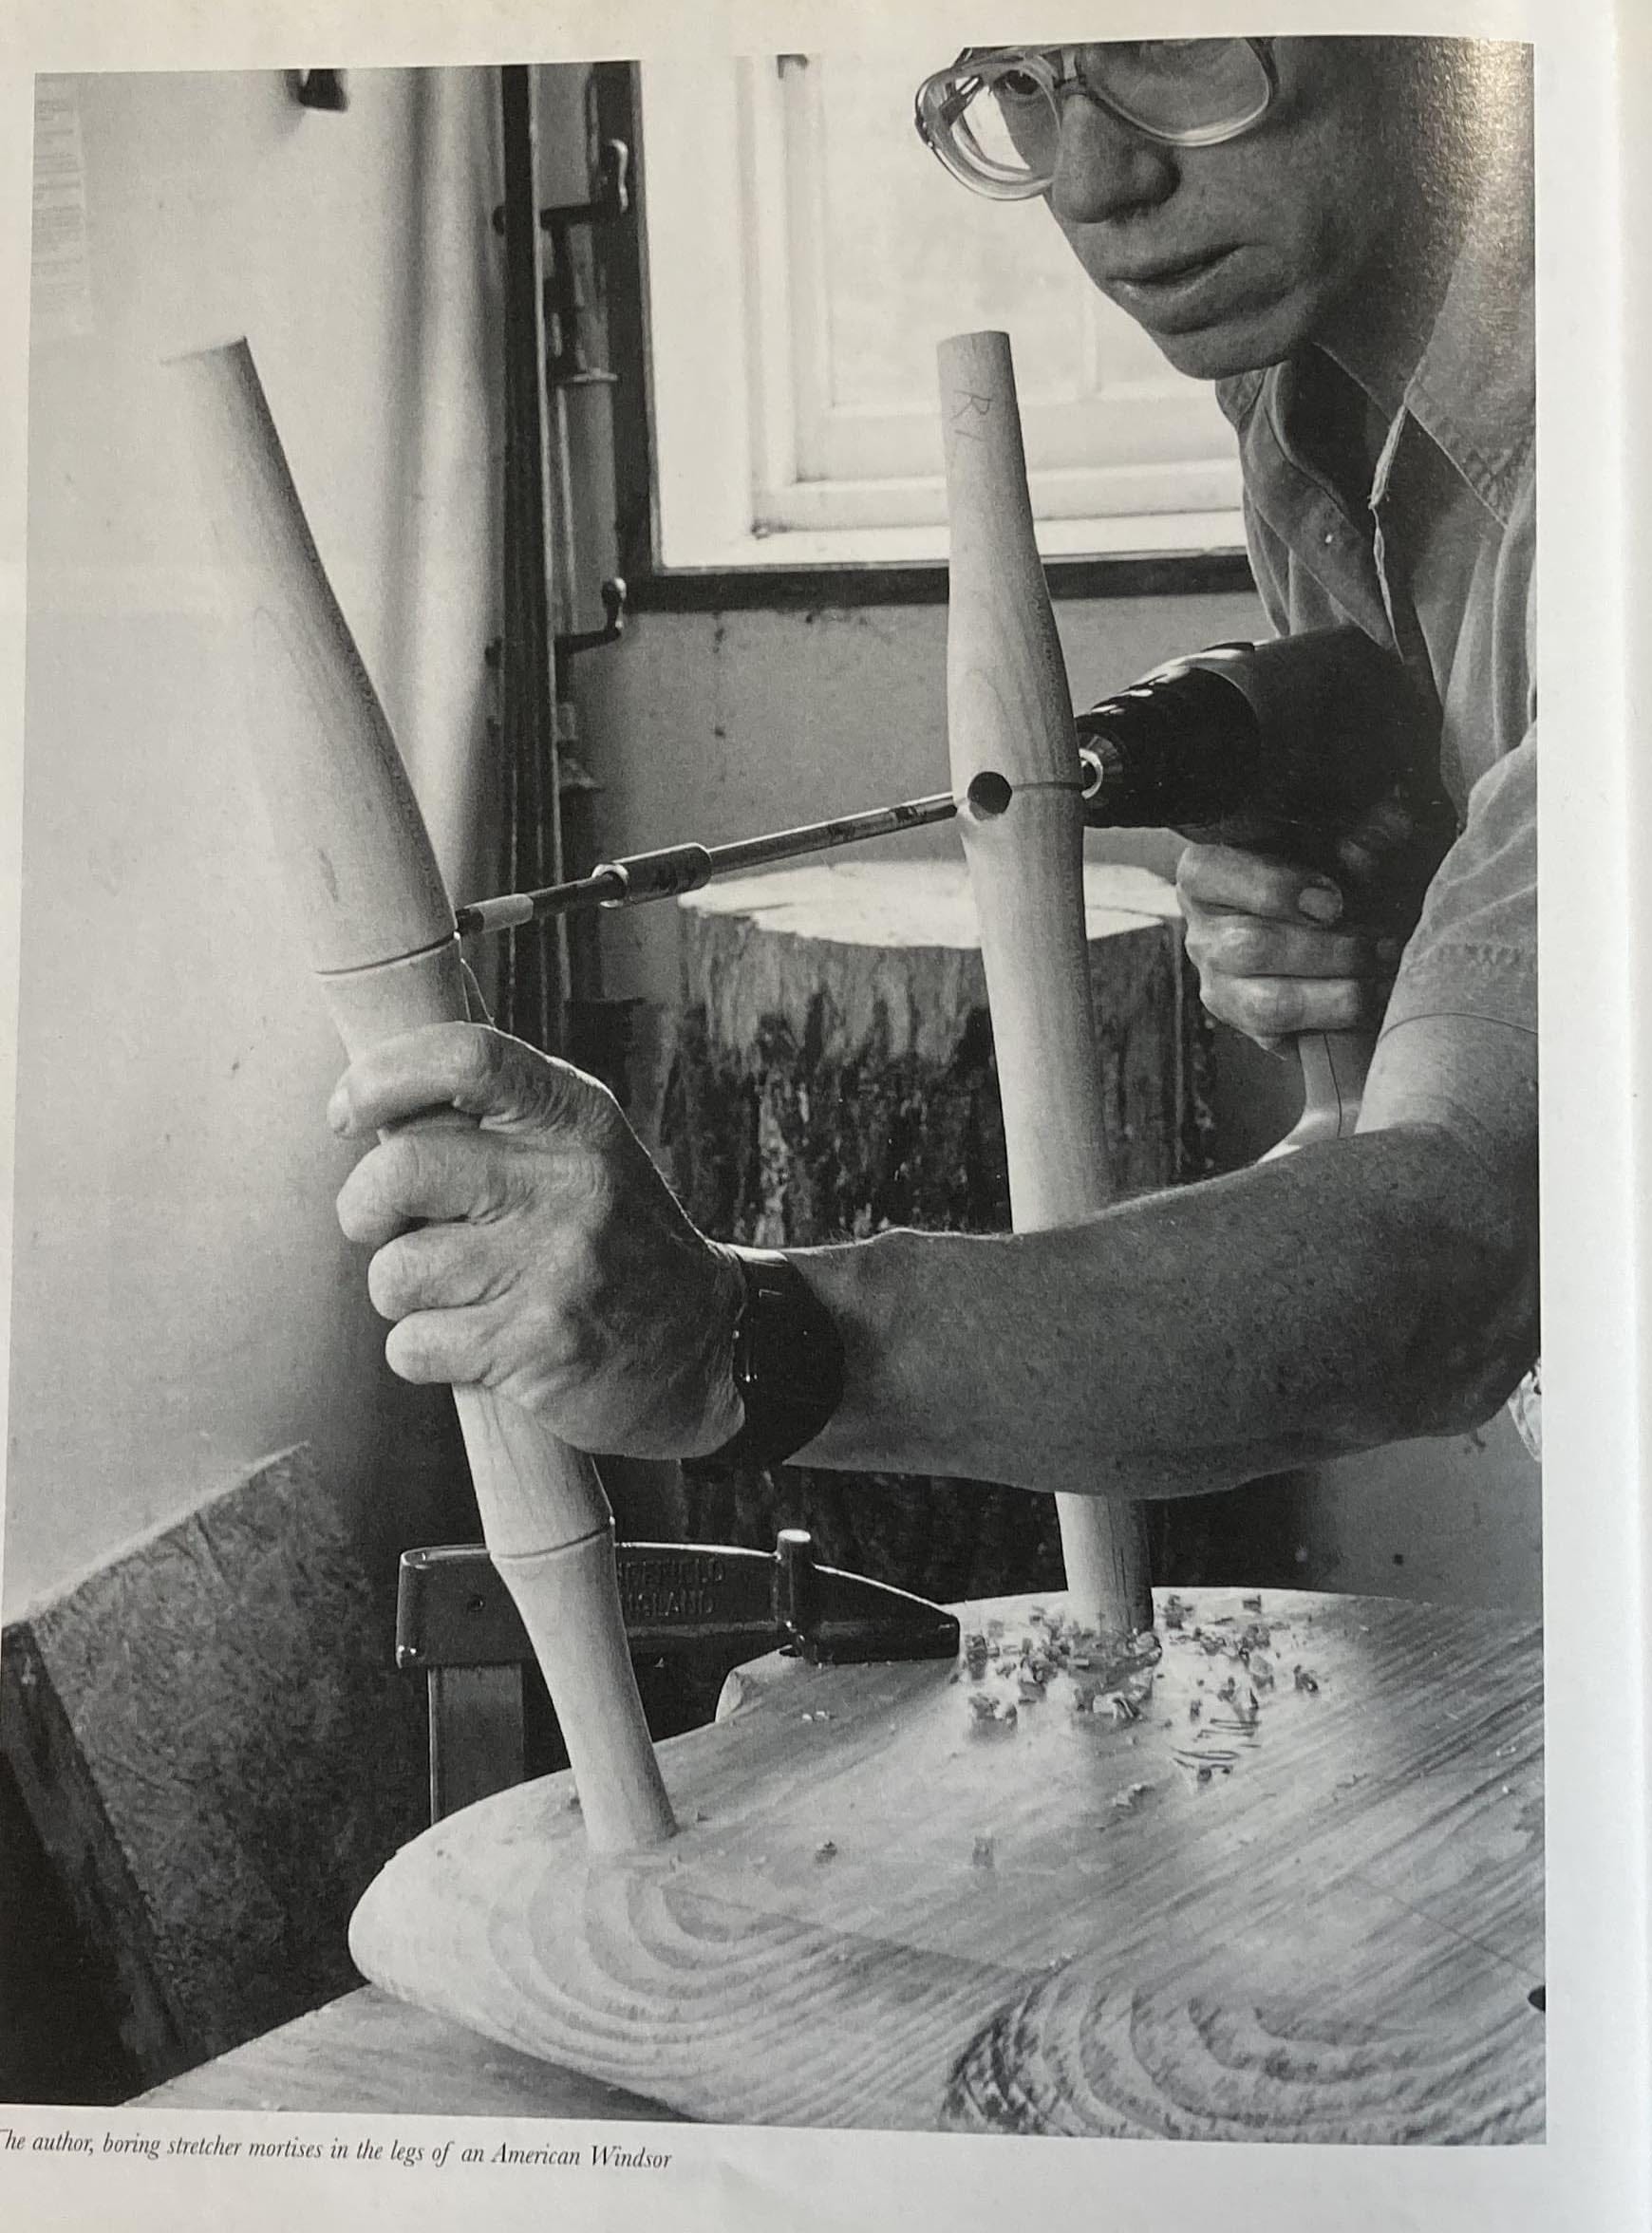
Here’s another look into some of the research and ideas for the Craft Genealogy book I’m working on – about the people who I learned woodworking from. This one is about Windsor chairmaking, specifically about boring the legs for the stretchers.
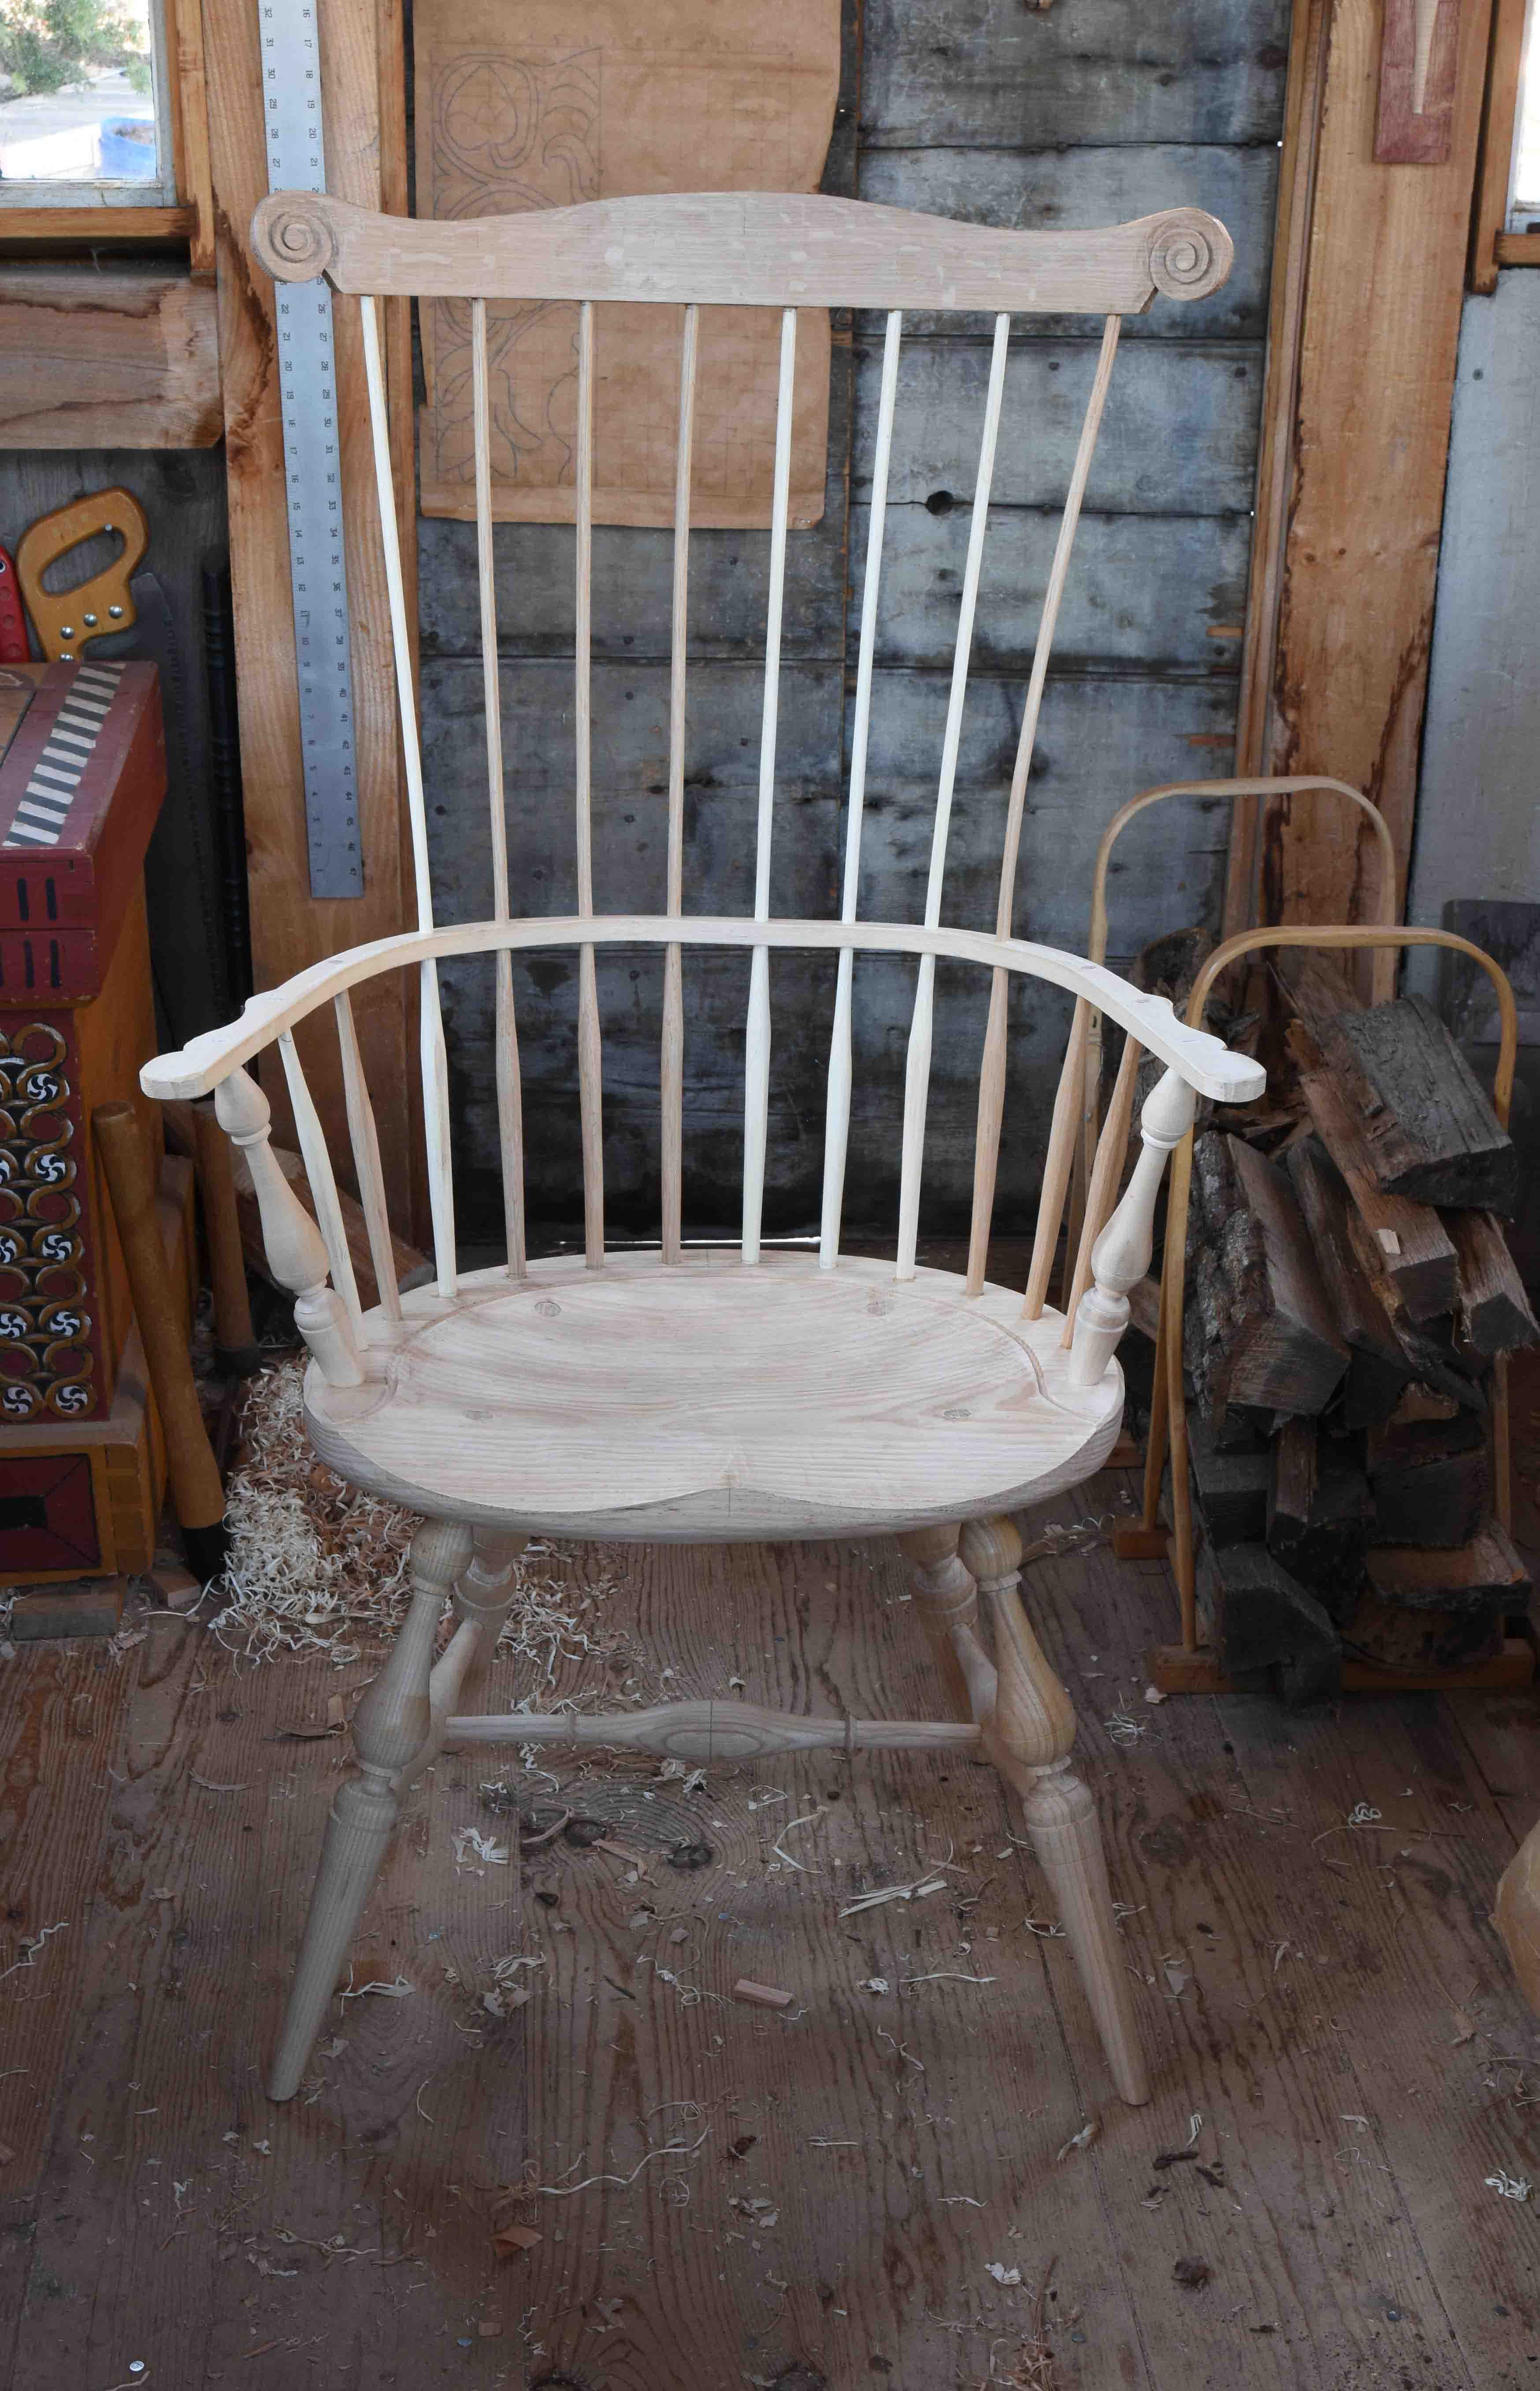
Comb back arm chair, PF Jan 2023
Windsor chairs are a favorite of mine – that’s what’s at our kitchen table; 2 of mine, 2 of Curtis Buchanan’s. Jennie Alexander had a lot of them in her house, but would always scoff at them – she felt her ladderback supported your back better. Yet she had chairs by Dave Sawyer, Curtis Buchanan, Drew Langsner, me – maybe one or two more, I forget.
When Alexander died in 2018 I was corresponding with several people who over the years were connected to JA one way or another. One of them was Rich Starr, author of Woodworking with Kids (Taunton Press, 1982; republished later as Woodworking with Your Kids). In those 2018 emails, Rich and I found out we had another mutual friend in Daniel O’Hagan – he met O’Hagan before any of the rest of us, JA, Drew Langsner, Dave Sawyer. Pieces of my puzzle were starting to fall into place. I first heard of Rich like I did so many other woodworkers – through the pages of Fine Woodworking Magazine. I worked with Starr and JA on an eventually-abandoned video project about making the JA chair. I was the off-screen prep-chairmaker, feeding parts to Alexander. That week Jennie was hobbled by lower back pain and was miserable. Hence it got scrapped and re-done a couple of years later.
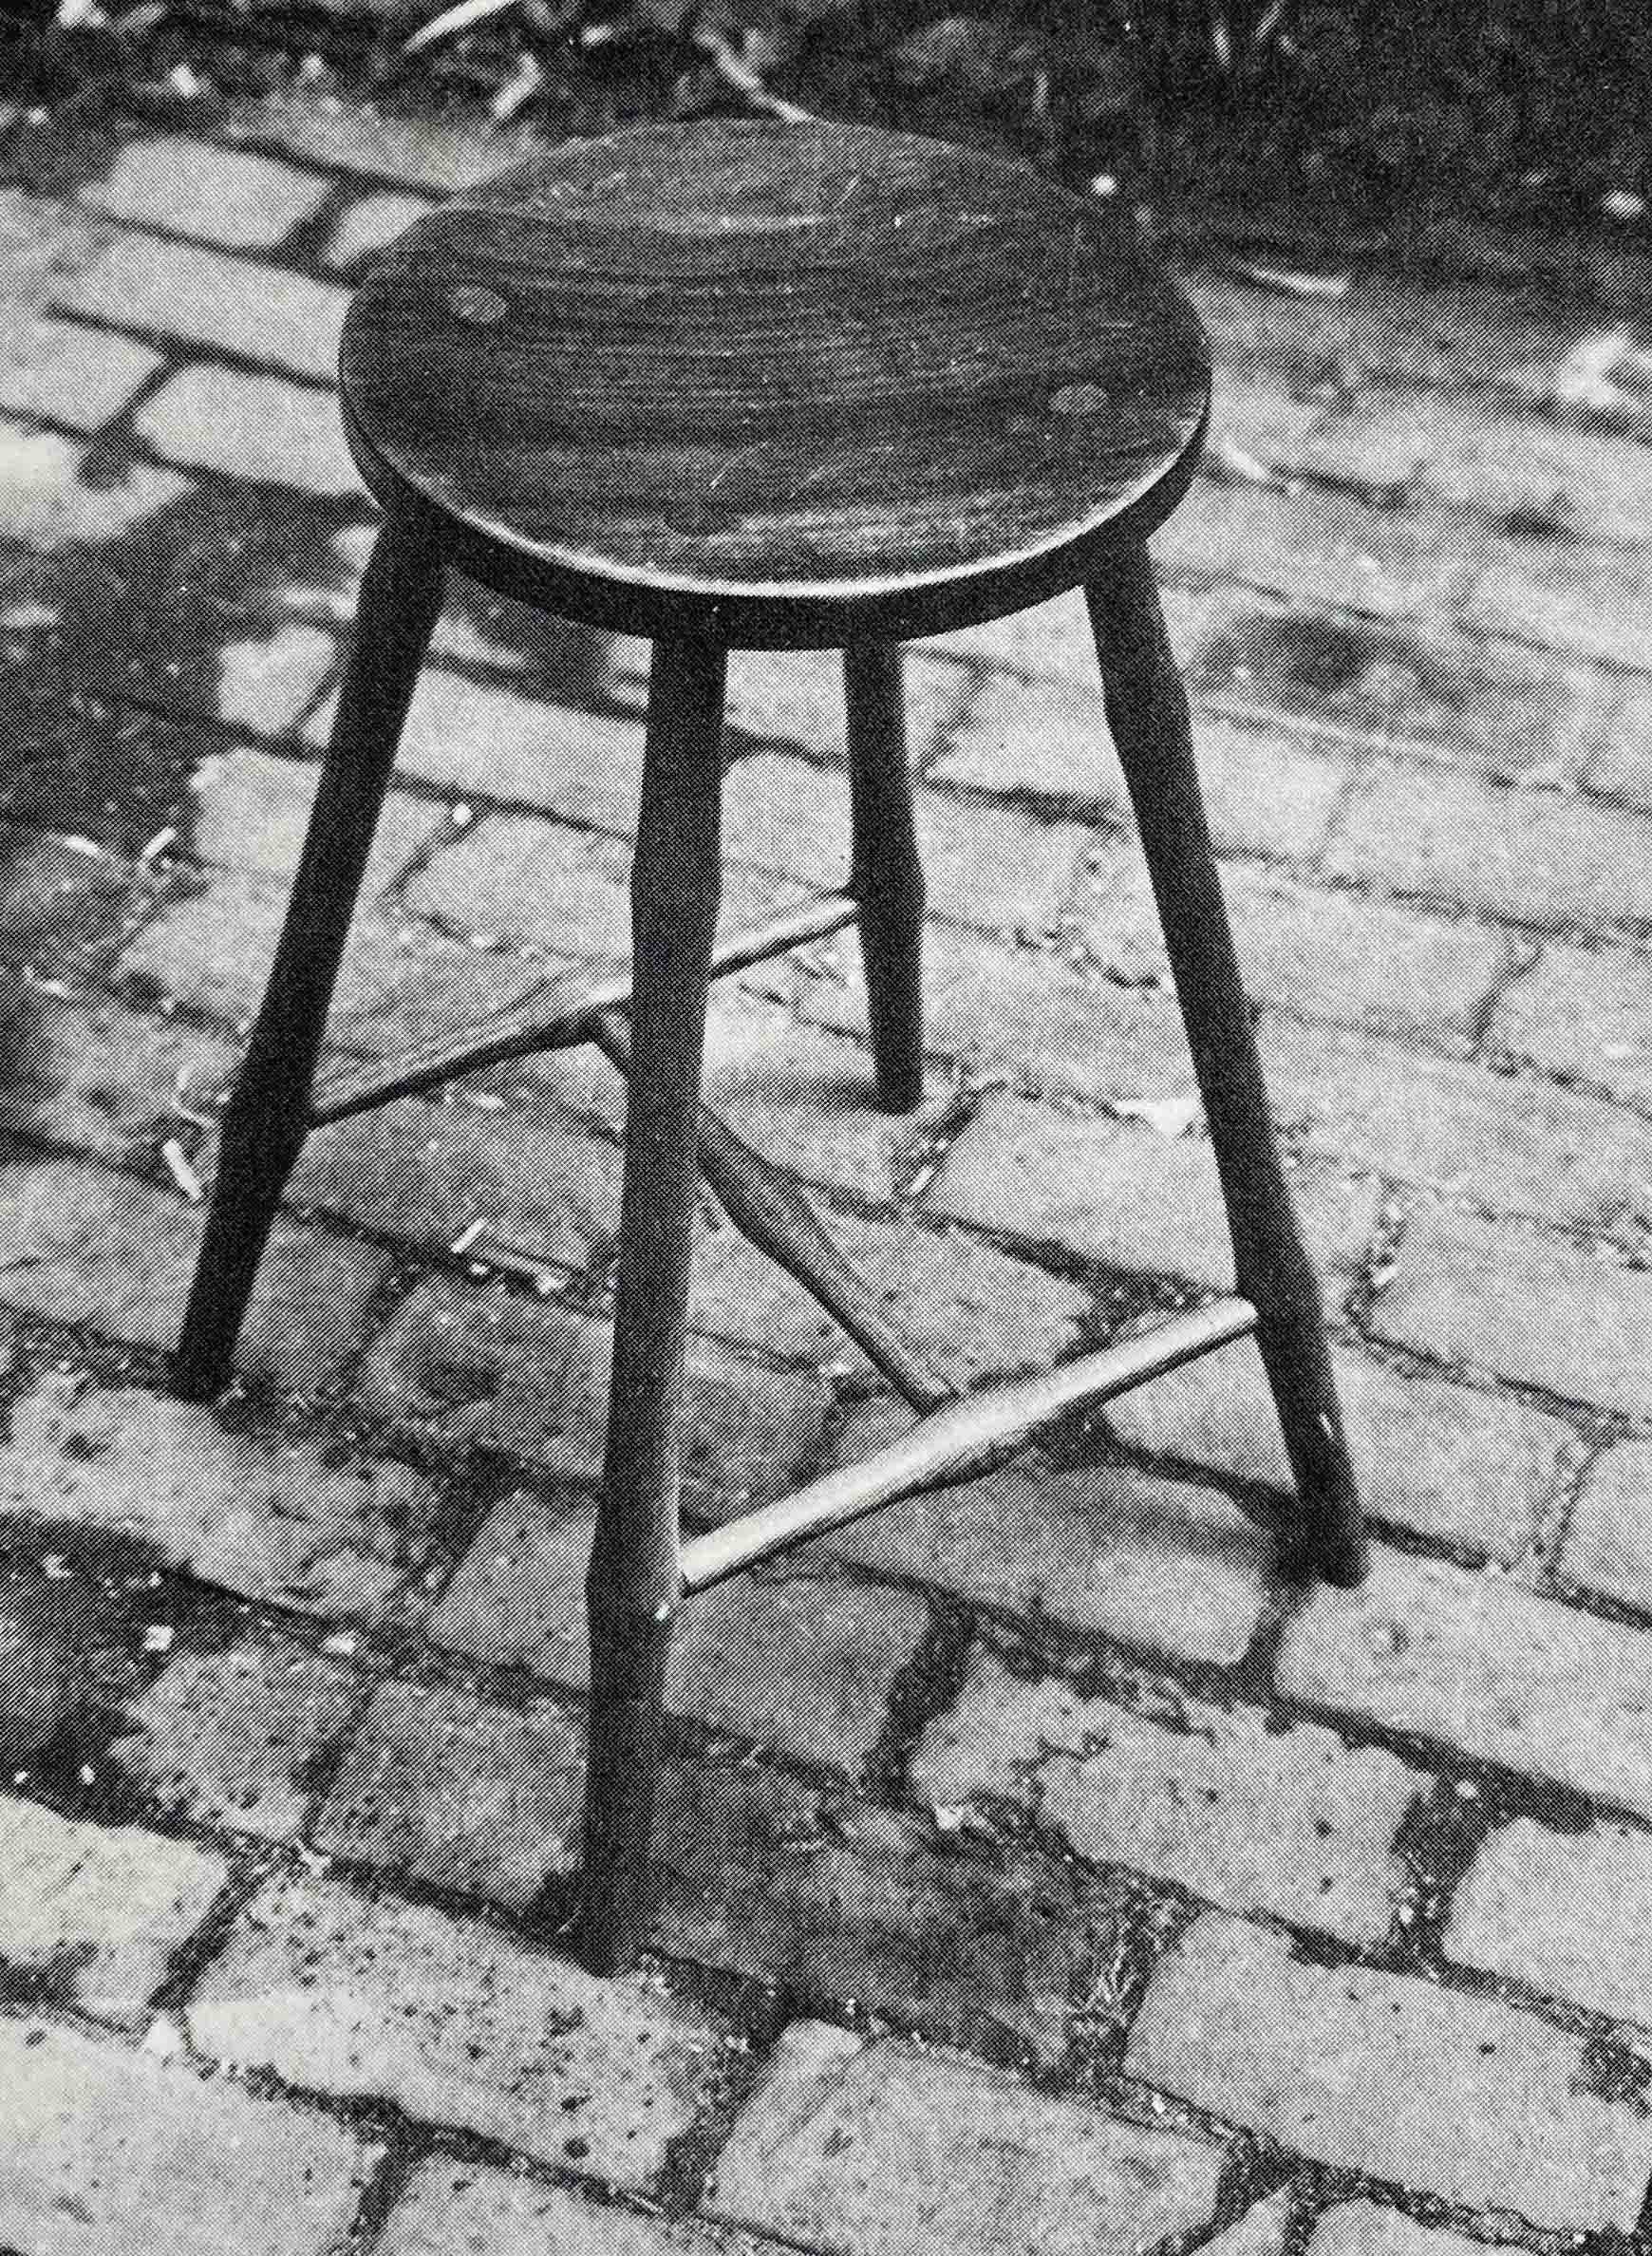
I have a full notebook from Alexander about making the understructure of a Windsor chair – all theory, rarely if ever applied. She was fascinated by the the H-stretcher system, not the box stretcher. So two side stretchers and a medial or center stretcher. In the late 1970s she and Starr batted back and forth various ways to set the legs and stretchers up for boring. JA was keen on making the understructure and then boring the seat – the opposite of how most sane chairmakers do it. I doubt she ever did it – I know she made two round-topped Windsor stools and the bowback side chair when she & I were in Curtis’ first class in 1987. Otherwise, she used the same undercarriage format on some benches. Whether she bored & assembled those then bored the plank seat I don’t know. I do know she filled pages in notebooks with theories about how it could be done.
Windsor stool, Jennie Alexander, c. 1974
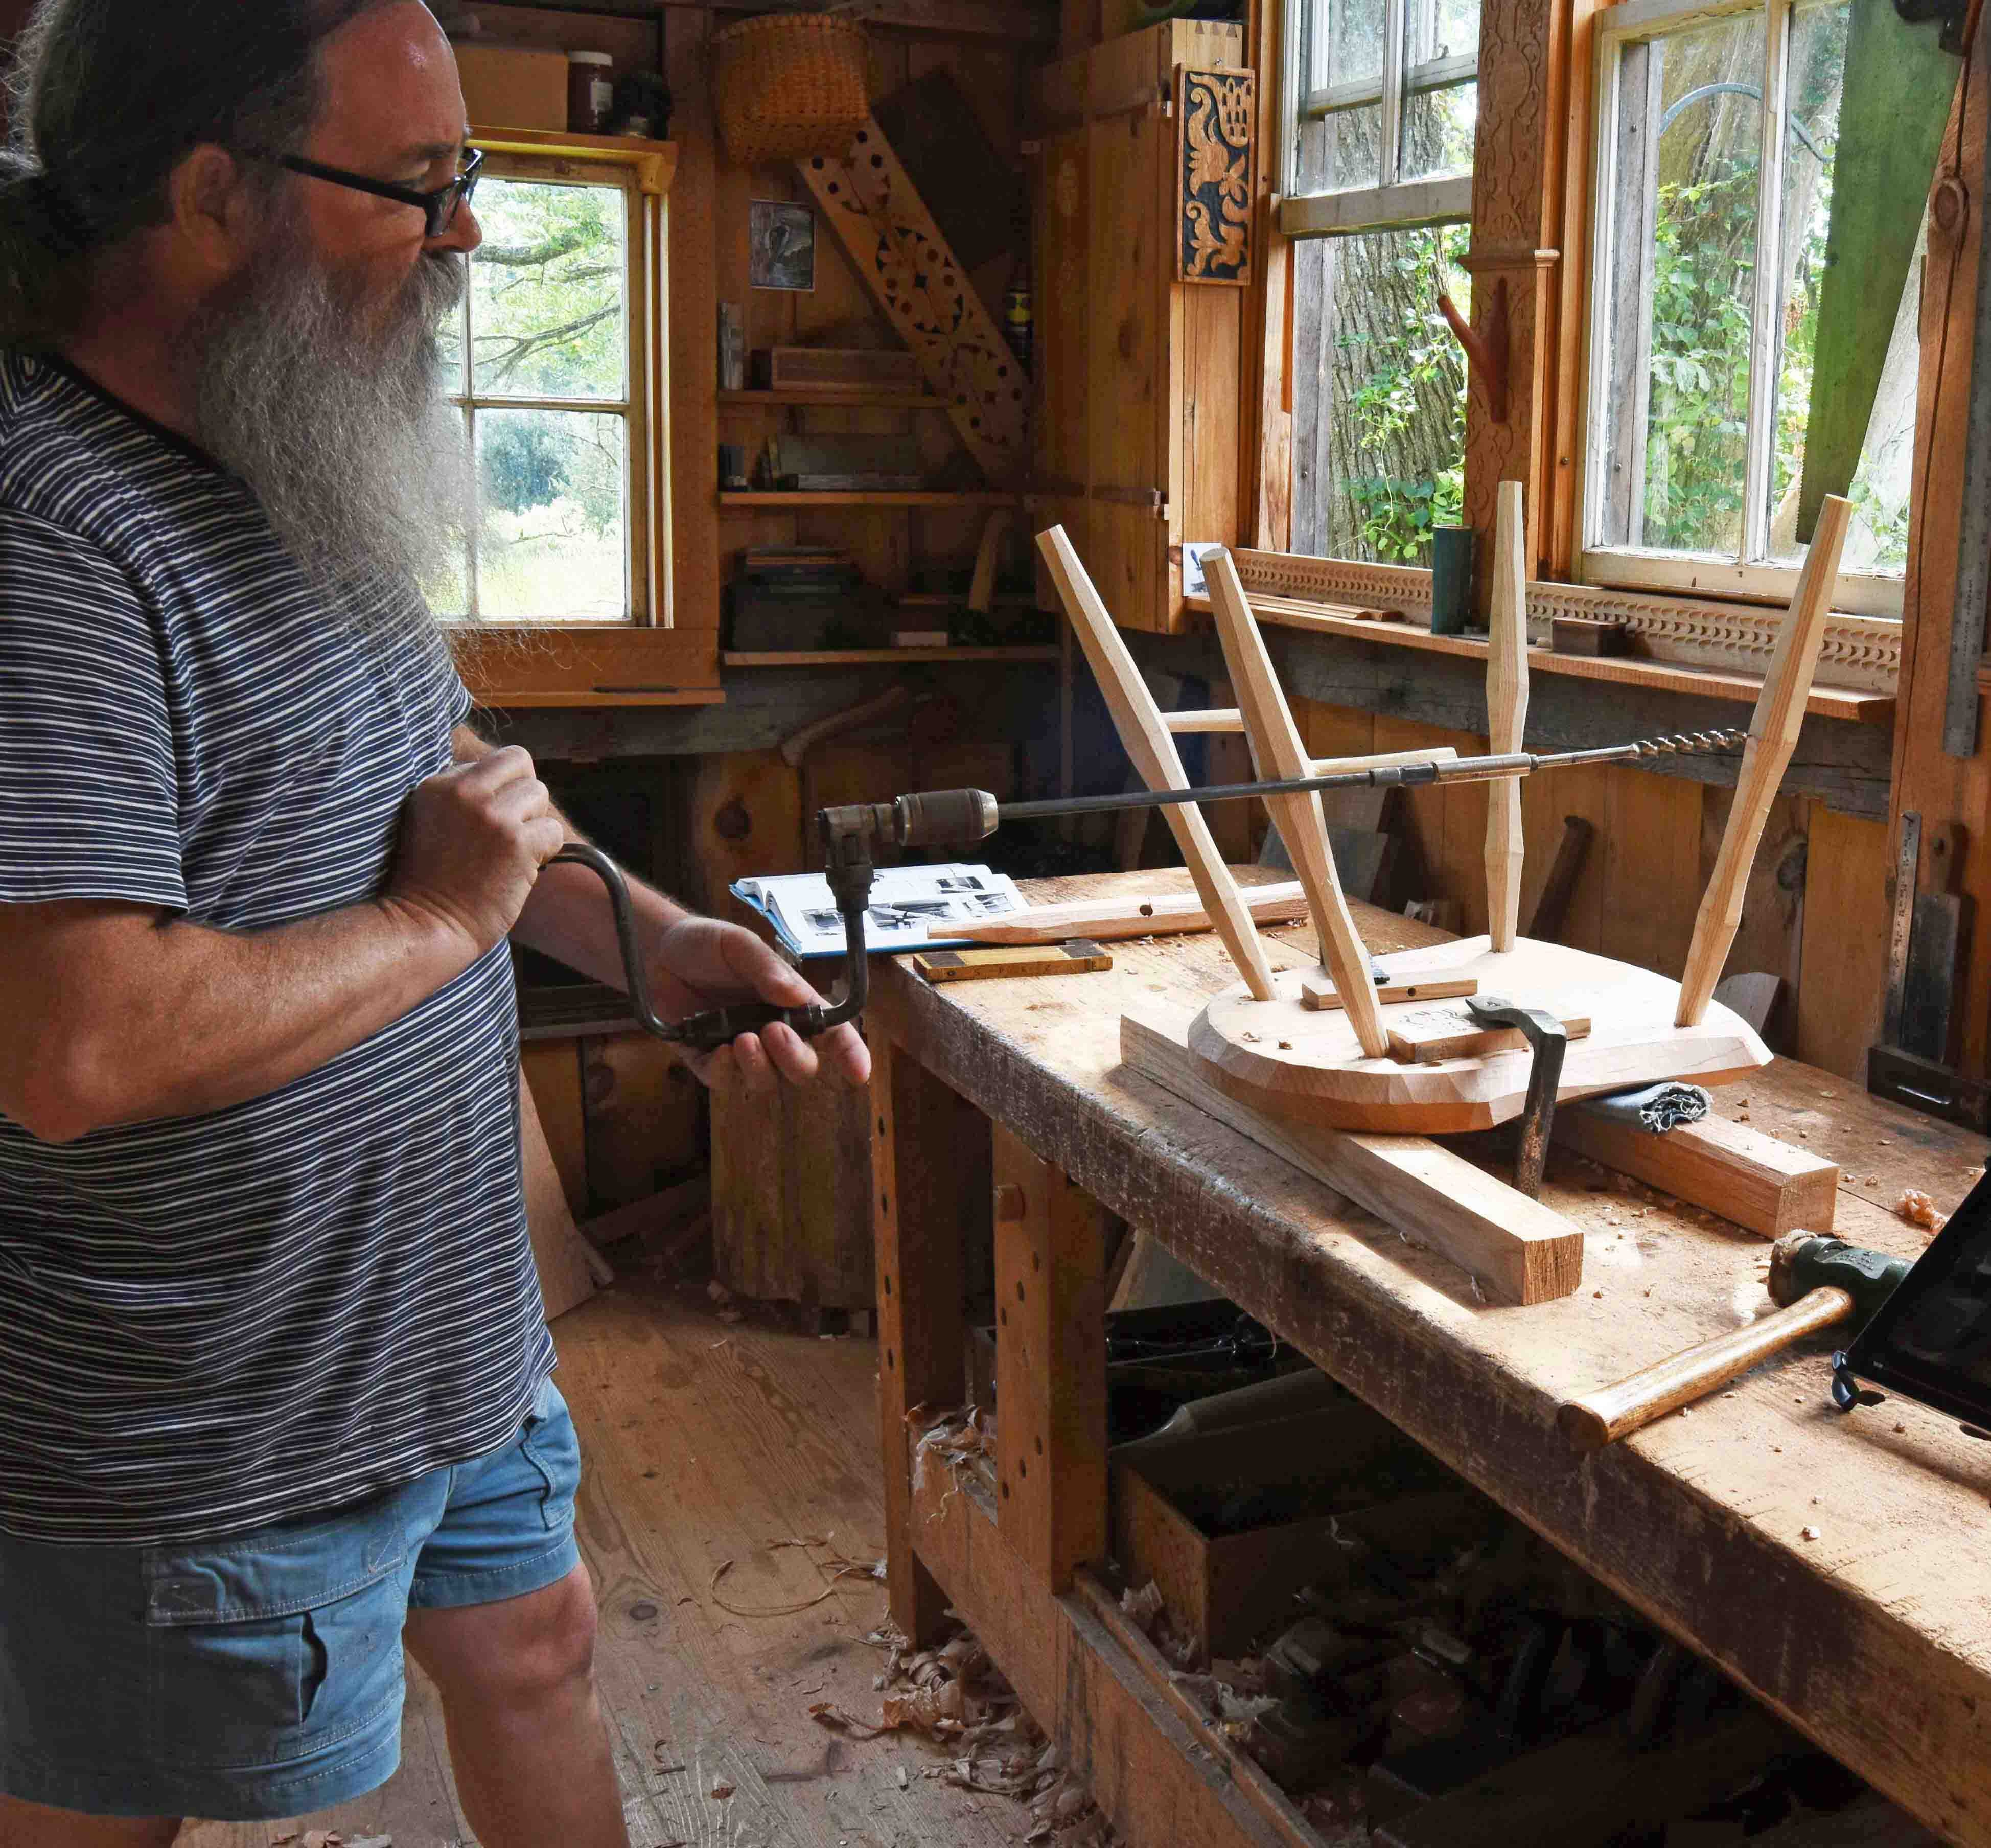
Meanwhile people were making Windsor chairs. I forget how we bored the legs in that class with Curtis. I know I used to bore them at home straddling a low bench, hunched over it with a brace & bit and adjustable bevel to line the bit against. For me it got laid to rest when I became a full-time joiner and stopped making Windsors for many years. But I would see what Drew or Curtis, and later Pete Galbert, were up to. In Drew’s 1997 book The Chairmaker’s Workshop he’s shown boring the legs with what he called the “direct” method – the legs inserted in the seat, line up a boring tool with a bit-extender and aim and fire. Works great. When I first read Drew’s book I wasn’t making that sort of chair, so the technique went in one ear and out the other.
from Drew’s book The Chairmaker’s Workshop
After my Windsor hiatus I set out to re-learn it and by then (2019) Curtis was making his democratic chair. For that one, he bored mortises by using Drew’s method but with a brace and bit. He told me recently that he thought it wouldn’t work with the brace, but Elia Bizzarri tried it & converted him. Here I am in 2019 boring one the way Curtis showed in his video series.
PF boring side stretcher, based on Curtis’ democratic chair
So there’s that method in 1997, then again around 2019. On a note dated Nov. 1, 1989 Daniel O’Hagan recorded, but did not illustrate, a method for boring what he called “rung holes” i.e. mortises for stretchers.
“…insert the 4 legs and mark with the awl then commence boring, say 5/8”. After well started remove the leg impeding the brace and steadily pull with left hand in back of bit until the point edges through [having clamped the seat down on top of the workbench with a handscrew, upon a piece of rug]
This done…then the same for the connecting stretcher…here with a ratchet brace be content with 1/2 turns…again pulling toward you with the left hand.”
Daniel has the gist of it there – I’m not so sure about how to bore with a brace one-handed. And the bit extender makes it more accurate. But the best part of this story came last week – I was reviewing some stuff Rich Starr sent me after Jennie’s death. Lo and behold – he’s got school kids boring this way IN 1972!!
photo by Rich Starr, c. 1972
What took us so long?
Rich told me he learned about woodworking from Daniel in the early 1960s. Visited there for a few years – “My feeling is that I was a pain in his life, but he graciously tolerated me. It was clear I was learning and maybe even had a direction. He did see my Taunton book and even said he learned something from it. It felt like I had paid him back…he planted the seed. It continues to grow.”
The bit extender and “direct” boring are illustrated in both editions of Rich’s book, now out of print, but widely available on the web. Drew’s book you can get from him https://drewlangsner.art/books/
All these years I’ve been watching huge flocks of blackbirds (common grackles, red-winged blackbirds, European starlings) swarming out of our marsh in early September dawns. And not til today did I finally decide to find out if they are migrating. I assumed, incorrectly, that they migrated at night. Nope. Diurnal migration for them. So the thousands of birds I see each morning are different ones from one day to the next…
Here’s a short video I put together of this morning’s flock(s). A bit shaky & noisy. The wind from the east brings the noise from the highway, just out of sight. Ditto the commuter train. I hope to catch the birds again tomorrow morning.
I know one thing I’ve never really written about is the preparation ahead of teaching a class. It will sound like I’m complaining, but I’m not. I’m about to go to Pete Galbert’s to teach a 6-day class on the JA chair. My 4th time there, always a blast. It’s chair-overload for 6 full days. But the past couple of days I can’t get out of my own way. It’s just the nature of prepping for one of these gigs. The nice thing is the loft looks better than it has in months – but I know in a week-plus, it will fill right up again. Chairs, chair parts, bending forms, and other paraphernalia.
a gross of rungs
rear posts bent in the previous class
I taught there in the spring and above are the rungs and posts made by those students. Starting on Monday the incoming students will make sets for the next class – whenever that will be. This leap-frogging of parts is how I learned it with Drew Langsner and Jennie Alexander after they had taught it a few times…
Bending forms, empty for now, about to get filled up again with fresh posts. Some of these I made, some I inherited from JA.
I made a couple of JA chairs in the past week or so – and yesterday and today decided to weave some new old seats in hickory bark. Good thing I did two. I set out to weave a diamond pattern. Had a perfect chair and perfect bark. And mis-read my own notes and got a sort of reverse diamond pattern – see the chair on the left below. The one on the right is correct- but 2 things make it hard to see the pattern right now. The seat is still wet for one. And the bark is a mixture of shaved and split bark – so the texture and color vary more than the chair on the left.
2 new hickory bark seats
Both will look better over time. Nothing improves hickory bark seats like use. The more you slide your butt around in them the more polished they get and the better they look. I don’t put a finish on them.
Last week I visited an old friend who is a regular at his town’s swap-shop at the transfer station, aka the dump. After seeing some 18th/early 19th century chairs, he said “you should see the chests I get there…” and so he showed me a few. This one I took some quick photos of –
northern Hungarian chest, 19th century
What an astounding thing! Someone was getting rid of it – I wrote to John Cornall figuring he could ID this chest. And so he did. I don’t know John, but I follow his stuff on Instagram and just about always like what I see there https://www.instagram.com/johncornallantiques/?hl=en John told me that the culture this chest comes from is the Matyo Hungarian people, in the north of the country. What fun. How it got to southeastern Massachusetts who knows?
Making chairs in Galbert’s shop is out of this world – an immersion experience if ever there was one. All chairs all week. This is about the 4th time I’ve been there for this class and each time we learn more & more.
We’ll start by riving out the stock, shaving all the parts and steam-bending the posts. At that point, we’ll switch over to stock prepped before hand and chop slat mortises and begin boring and assembly. I’ll have one of my chairs as well as one of the last ones Jennie made. There will be a seat weaving demo – but I don’t have materials for students’ seats. Anyone who has either hickory bark or Shaker tape can bring it & weave their seat on the last day of class.
“Me, I’m waiting so patiently, lying on the floor I’m just trying to do my jig-saw puzzle before it rains anymore” Jagger & Richards
I kept thinking about Mick & the boys while working on cutting the arches for the cupboard’s side panels. The work is all scribing, cutting and fitting. And adjusting. I first cut the arches into quarters with 90° outer corners. Then they need to be scribed and trimmed to accommodate the keystones and imposts. The one on our left below is trimmed. The one on the right needs trimming for the imposts below the arch.
arches in process
I numbered them on the back so they’ll go on the cupboard in the same order. After setting them I moved onto the moldings running down the sides and across the bottom. And mostly forgot to photograph the work!
Because of the cupboard’s shape the panel this stuff gets mounted on is tilted – if the cupboard is lying on its back. That makes test-fitting a bit of a hassle. First time I made the cupboard I hit on the idea of making a mocked-up frame the same size. So did that again. It’s fine for the shapes that fit between the framing parts – probably as accurate as it needs to be.
But these bits below just hang in space under the arches – and I decided that cutting and testing those was probably a waste of time. So what I plan on doing is gluing the arches and the outer moldings in place, then fitting these 3-sided blocky bits as I go.
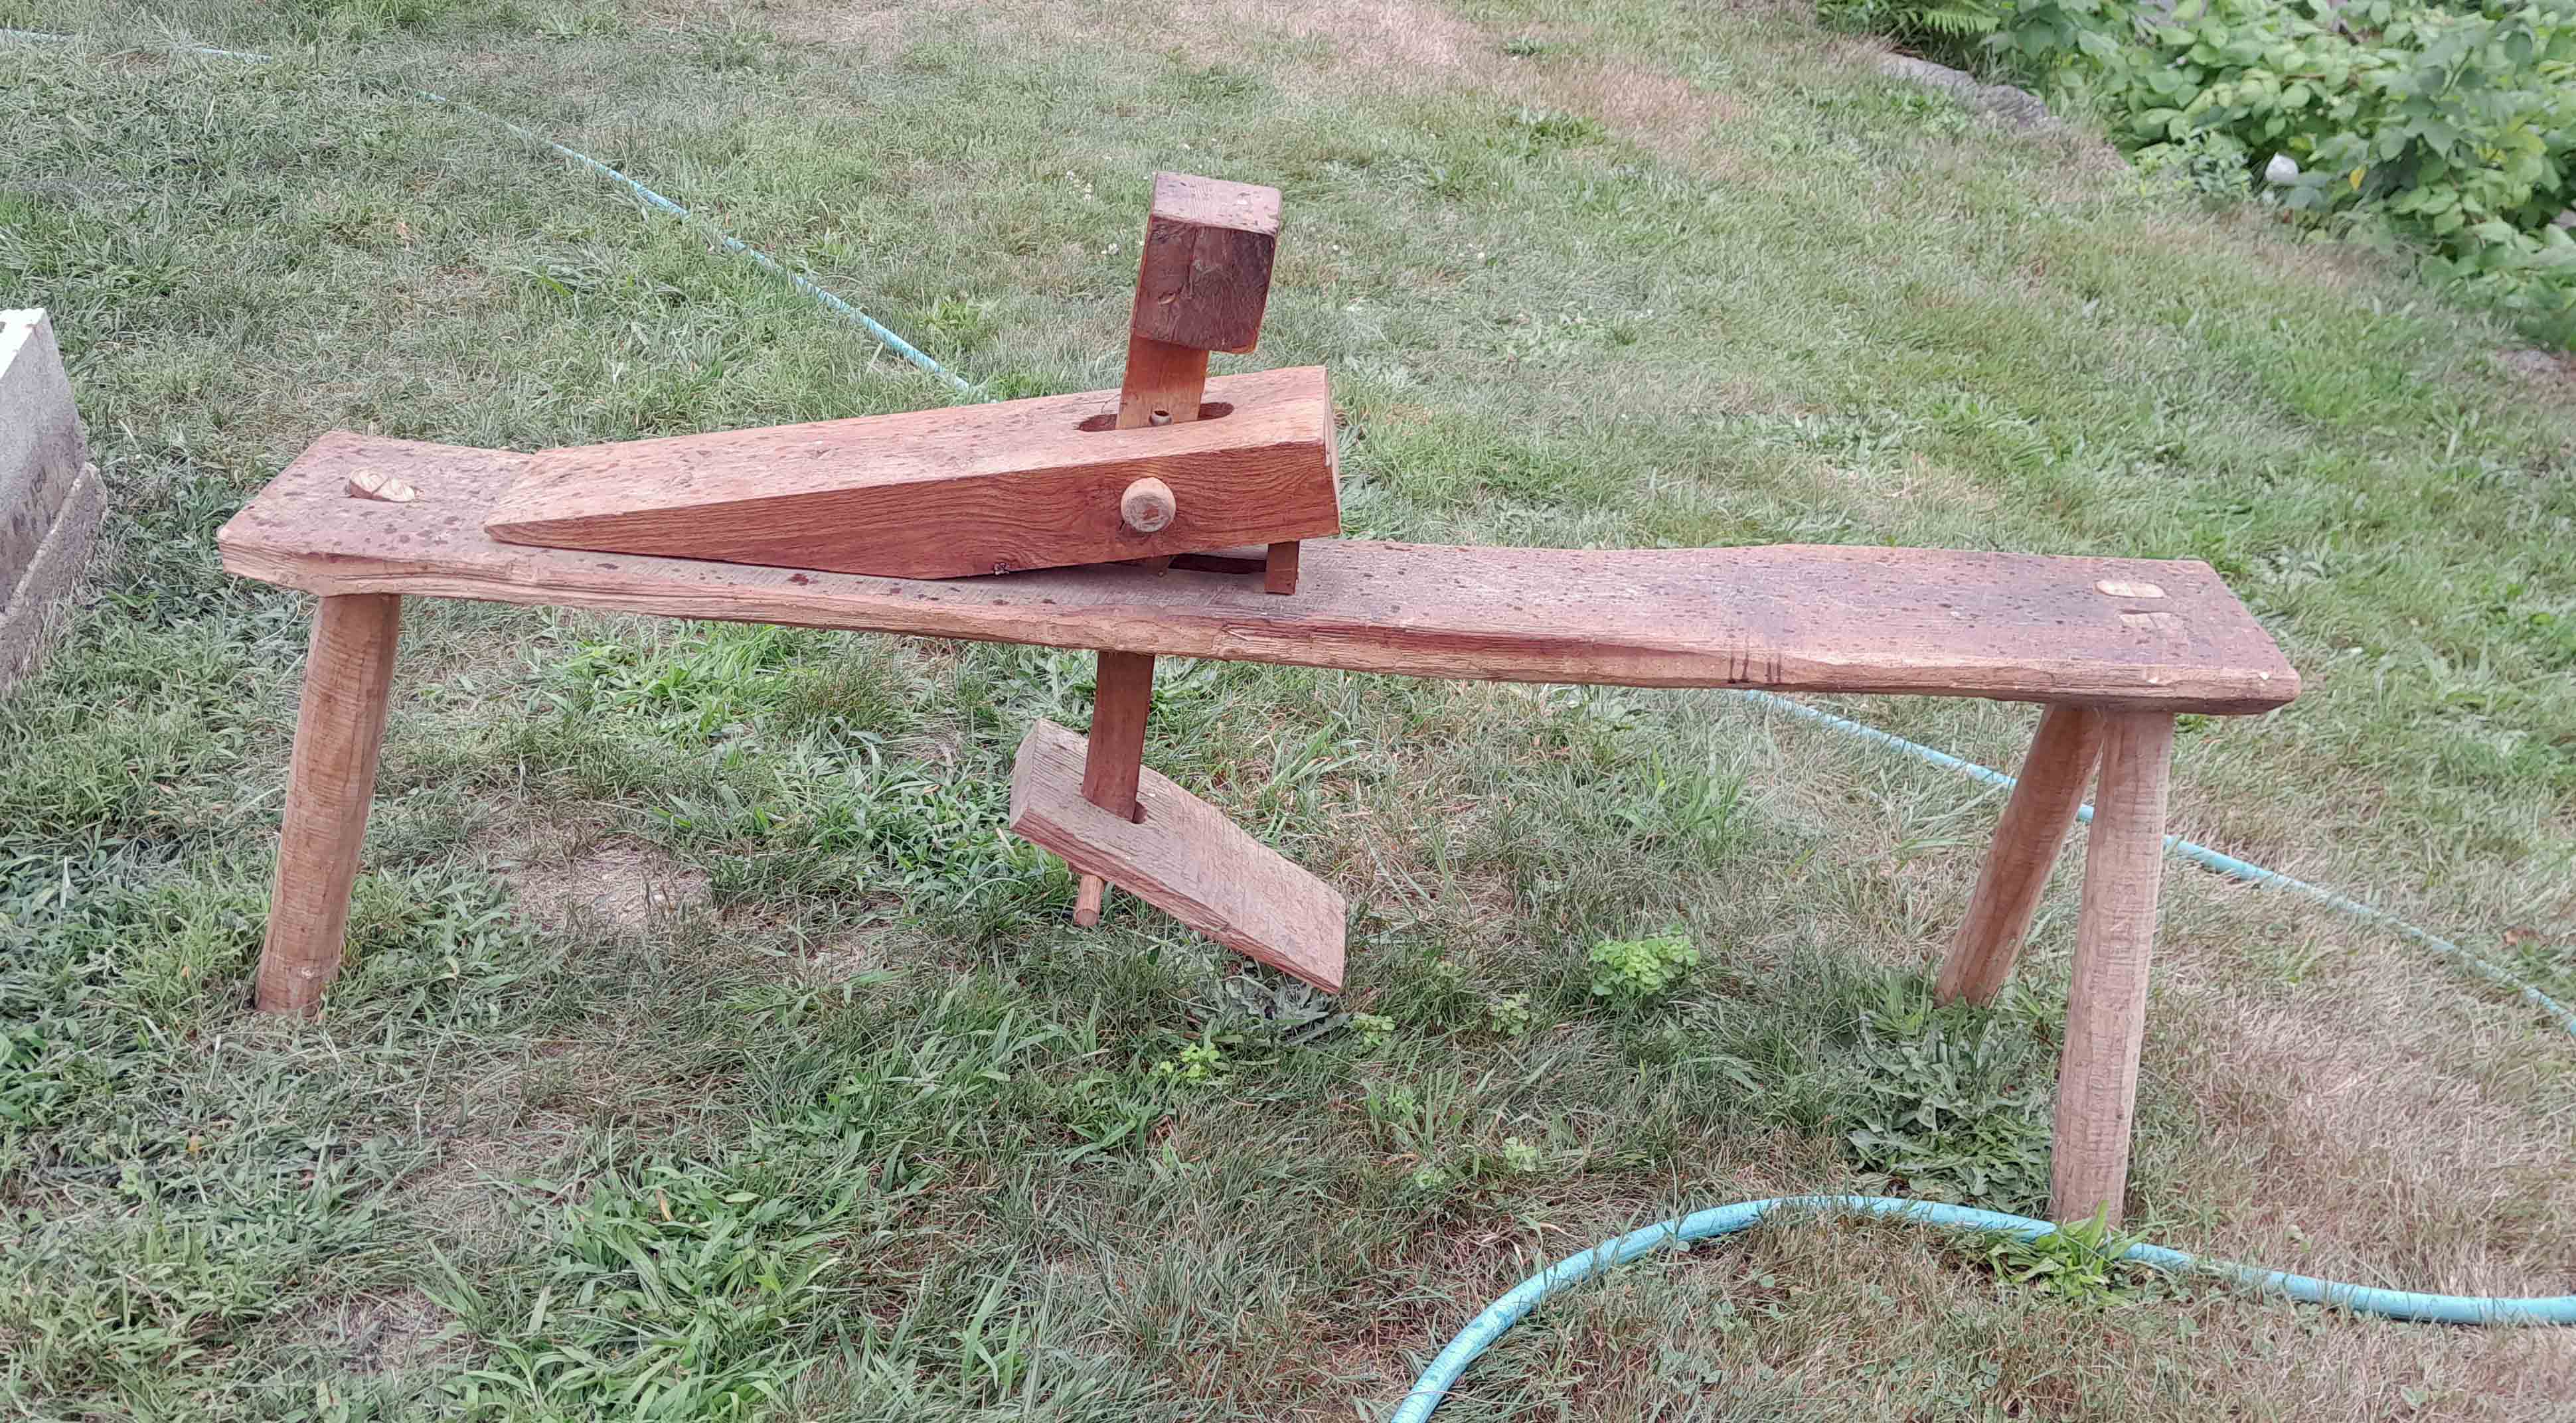
For some stupid reason, my friend Ted Curtin wants to move his shaving horse along. So I told him we’d post it here & see if someone wants to come to Plymouth Massachusetts and make it go away.
I know little enough about it. Ted says (& his photo shows) bugs have eaten at the sapwood in the bench. Says it’s red oak. I bet it’s over 30 years old – here’s his sparse text:
Red oak, 5’3″ long, 21.5″ seat height. Three position-head. Even has flamed maple legs!
And the damage –
Leave me a comment or send me an email if you’re game & I’ll put you in touch with Ted.