It feels like a long time since I’ve written about furniture-making. Shop-building & spoon carving have taken up a lot of space here. This week, I’m building a stool that reaches back to the beginnings of this blog in 2008. Here’s one I made many years ago for the museum where I used to work. These things don’t exist in the wild – not 17th century ones anyway. Chairs built along these lines are common in England and elsewhere. Not New England. These stools are found frequently in Dutch paintings. Note that the three stretchers are at different heights. The seat rails are all at the same height. More on this below.
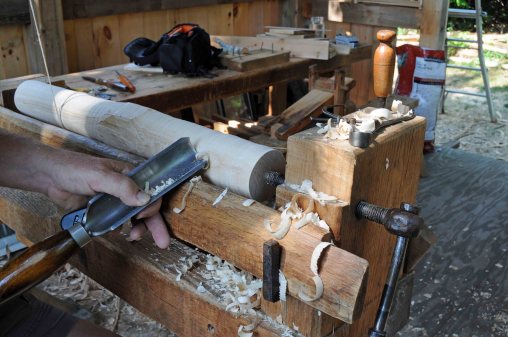
I am a joiner who does some turning, not a turner by any means. Especially these days. My lathe had been packed away in storage for 18 months. That’s a long hiatus between turnings! This is almost where the lathe will be in the shop, I plan on moving it further back into the corner when the real setup happens. The pole is up in the peak, about 14′ above my head.
These turnings are pretty basic, just a large gouge & a couple of skew chisels. Wood is straight-grained ash. Riven & hewn before mounting on the lathe.
one main feature of these stools, and the related chairs, is the joinery at the seat level. All the seat rails are at the same height, so the joints intersect. A large rectangular tenon gets pierced by a smaller turned tenon. Like this:
Here I am scribing a centerline on the end grain of the seat rail. This is the basis for the layout of the tenon.
Sawing the shoulders.
Splitting the cheeks.
Paring to the finished dimension.
The seat rails get a groove plowed in them to receive the beveled panel that is the seat. Here’s how I held it to the bench for cutting with the plow plane. The rectangular tenon is pressed into the teeth of the bench hook, and a notched stock pressed against the round tenon. Holdfast keeps that stick in place. I eyeball that the rectangular tenon is parallel to the benchtop, then the groove goes in the resulting top center of the rail’s surface.
boring and chopping joinery next time.
here is the same information, in one of my first posts https://pfollansbee.wordpress.com/2008/07/05/three-footed-chair/
https://pfollansbee.wordpress.com/2008/09/03/board-seated-turned-chair/


Nice photographs! I almost feel like I’m there, and things move slowly enough (!) that I can notice the details…
I’m reading this post while seated on just such a stool, which I made after reading your earlier posts. I’m quite happy with it, though I find a firm cushion is in order. The new shop looks great, even unfinished – perhaps wide open is ideal for this time of year.
Peter,
So much beauty here. The shop, your work, the tools. Keep it going.
Would i be correct in assuming that each seat rail has one flat tenon and one round?
And I thought this was called a thrown stool … there must be at least one painting with it airborne?
[…] Peter Follansbee, Joiner’s Notebook (blog post) 24 July 2016 https://pfollansbee.wordpress.com/2016/07/24/3-footed-turned-stool/ […]
[…] Three Footed Turned Stool 24 July 2016; Information about general construction A Lot of Photos of the 3-Legged Stool Assembly 06 July 2016; Instrumental in understanding how the seat… um… seats.) by Peter Follansbee, Joiner’s Notes (blog) […]